Site Presets are site design and layout settings that have already been adjusted and optimized to make your various Zenfolio pages have a well coordinated presentation. They are comprehensive, affecting your site settings, theme, layouts, and page options.
The preset is applied to your entire site- with the preset's combination of customization settings applying to all of the pages of the site. Also all groups, galleries, collections and other pages will be set to use default settings.
Please see the video below for a short tutorial on applying Site Presets:
When first opening a Zenfolio account, you may apply a preset with sample content such as galleries with images. This also includes pages with about and contact information as well as blog posts. You will have a completely pre-configured site ready for visitors to view immediately.
For already active accounts that apply a preset to their site, the presets do not generate sample content.
After applying a preset, you can further customize your site by choosing different layouts, themes and options for your various pages.
Here is a list of all available site presets. Click on the preset to view a demo site that utilizes that preset.
Applying a Site Preset
Applying a Site Preset will change all page themes and layouts. All pages, galleries, and groups will be set to use defaults.
In the Dashboard, hover your mouse pointer over Website then click on Customize Website.
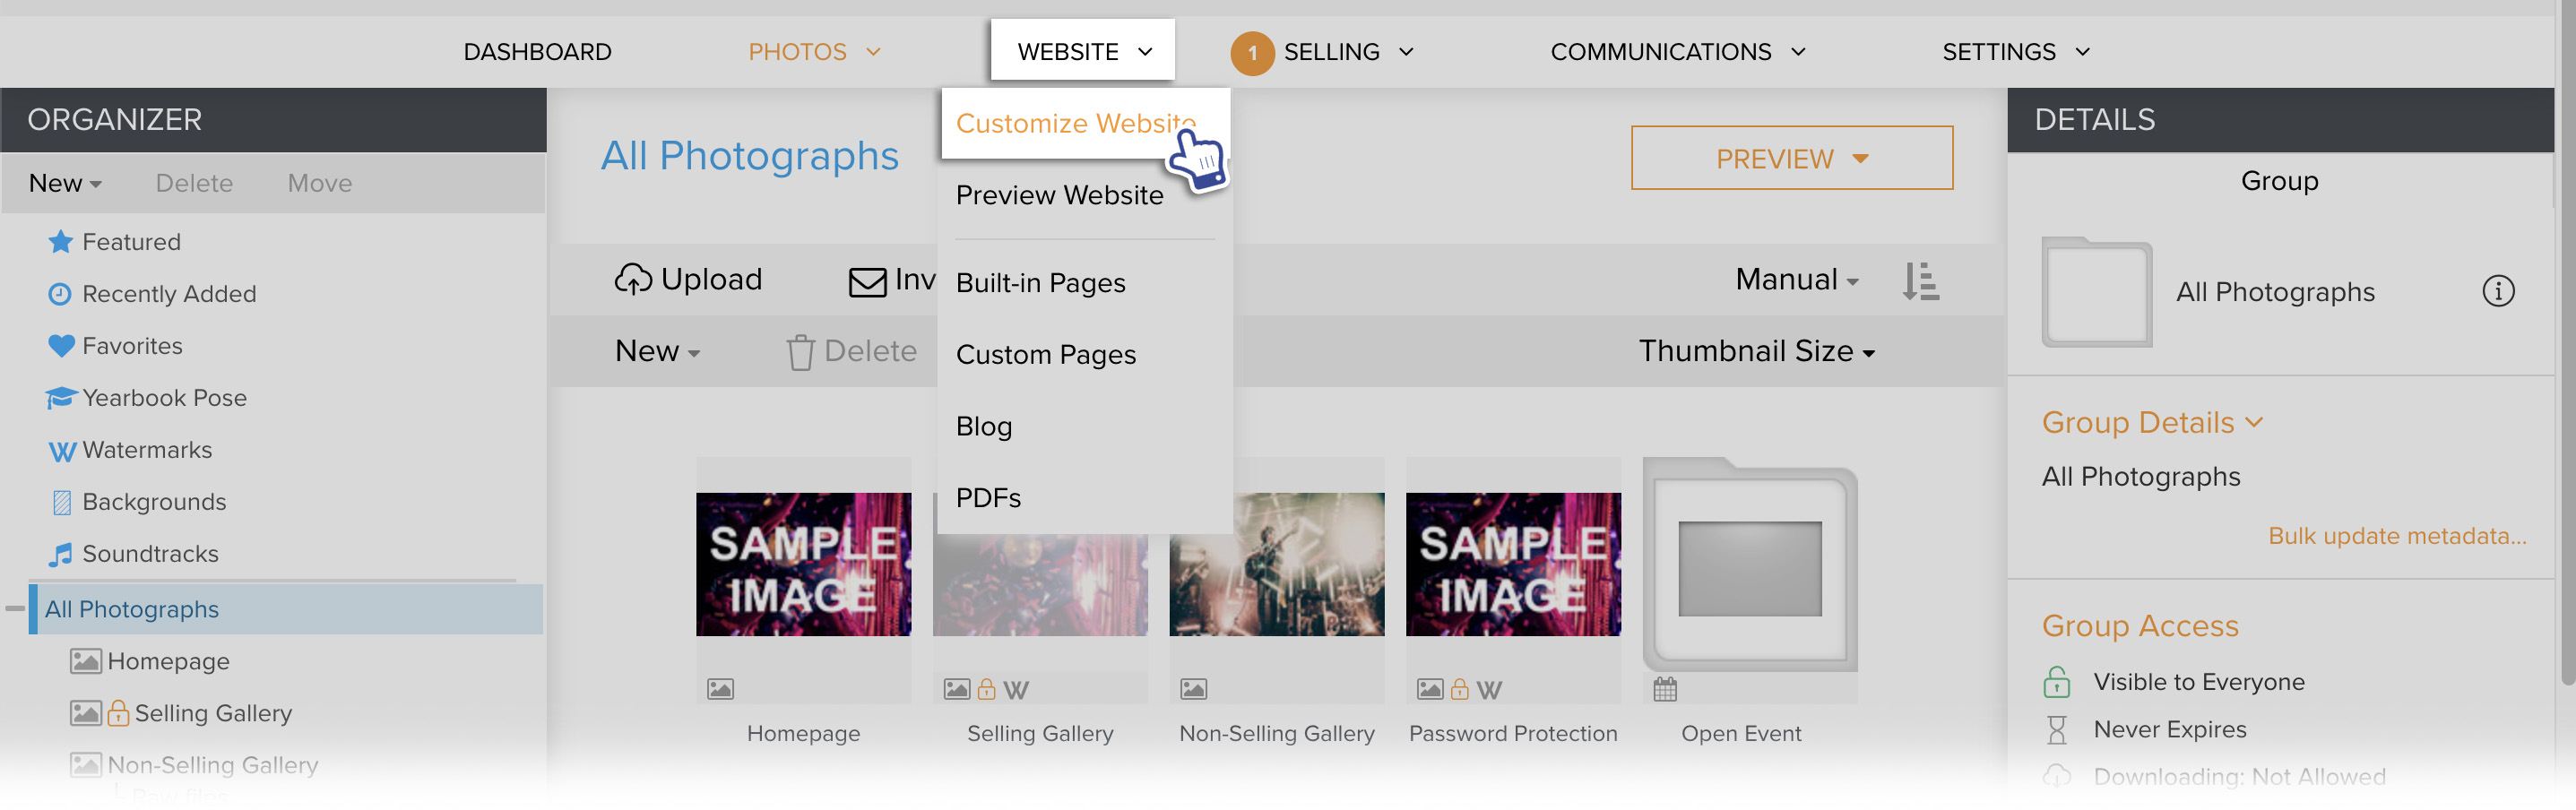
The page will refresh with a new customization menu at the top, confirming that you are in the Customize Website View.
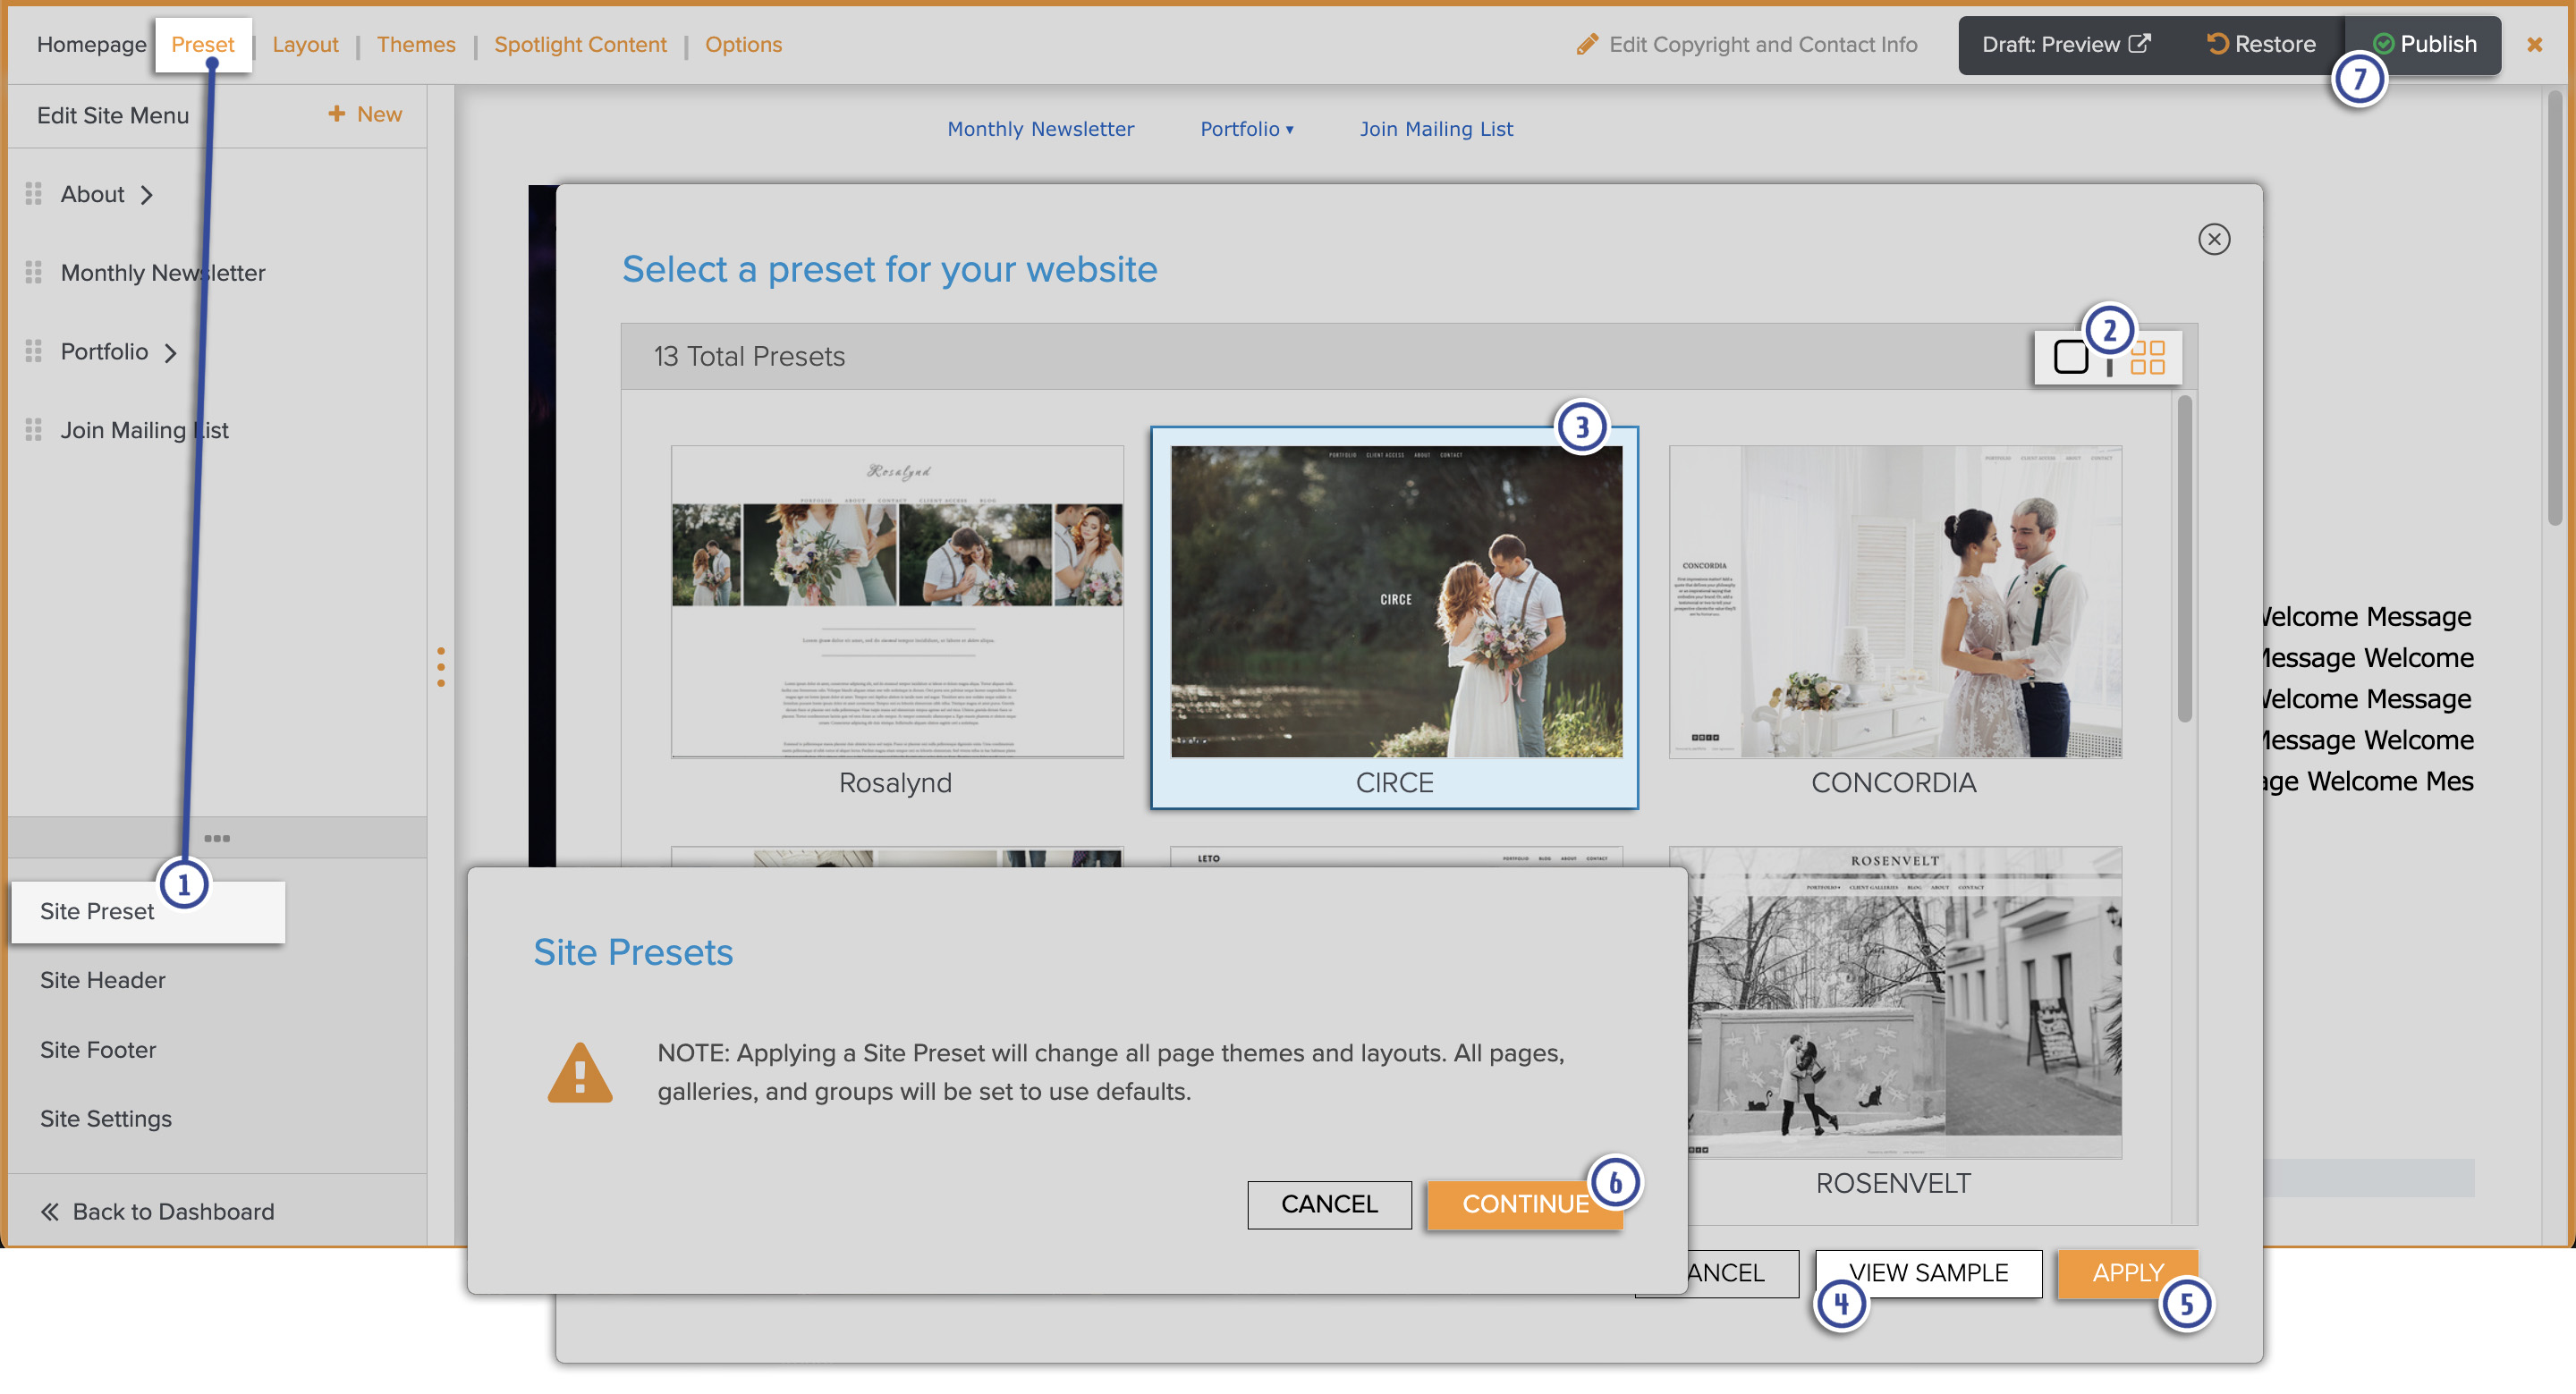
- Click Site Preset to display the Site Preset selections.
- In the new window that appears, view your Site Preset options as Large Preview or Thumbnails by clicking on the square icons. We will use Thumbnails for this example.
- Click View Sample to see a working website with the Site Preset applied.
- Select a Site Preset by clicking on it. The Site Preset will be highlighted indicating that it has been selected.
- Once you have selected the Site Preset that you want, click Apply.
- A warning pop-up window will appear to confirm you wish to apply changes. Click Continue. Repeat steps 1-6 until you are satisfied with the preset that has been applied to the site.
- Click Publish to save your changes and exit Customize Website View.
And again, after applying a Site Preset, you are free to fine tune the customization settings applied by the preset by applying your own choice of Theme, Layout and Options to the various pages of the site.