Note: This feature is exclusive to Pro and Advanced account subscribers.
You may offer your own designs for collages, flat greeting cards, folded greeting cards, and magnets available as vendor products. By using Product Template Designs you can create a pre-made design that your customers may purchase from your shopping cart and customize with text and photos.
Create a Product Template Design
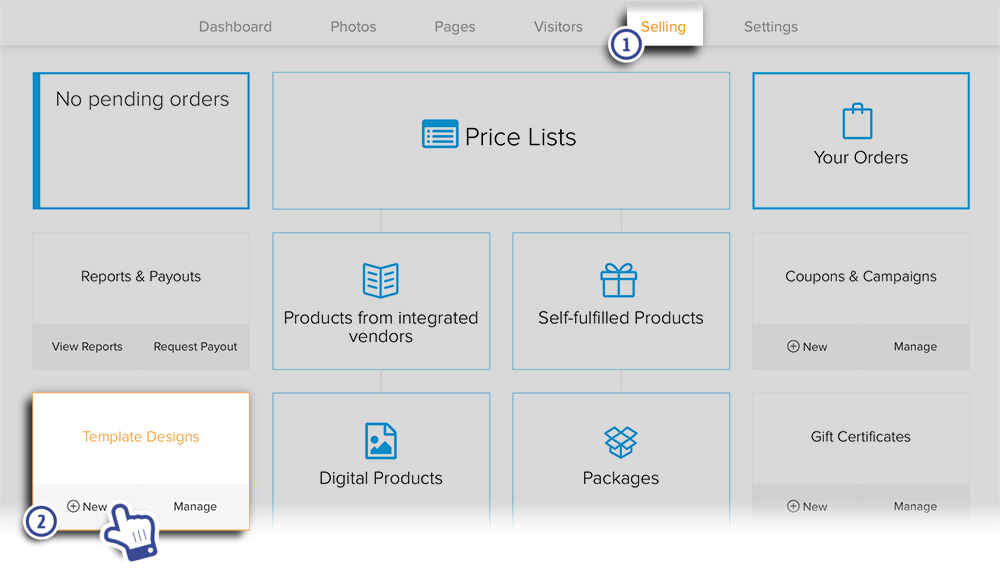
- In your account, go to the SELLING tab.
- In the Template Design box, click New. A new screen will load with Product options.
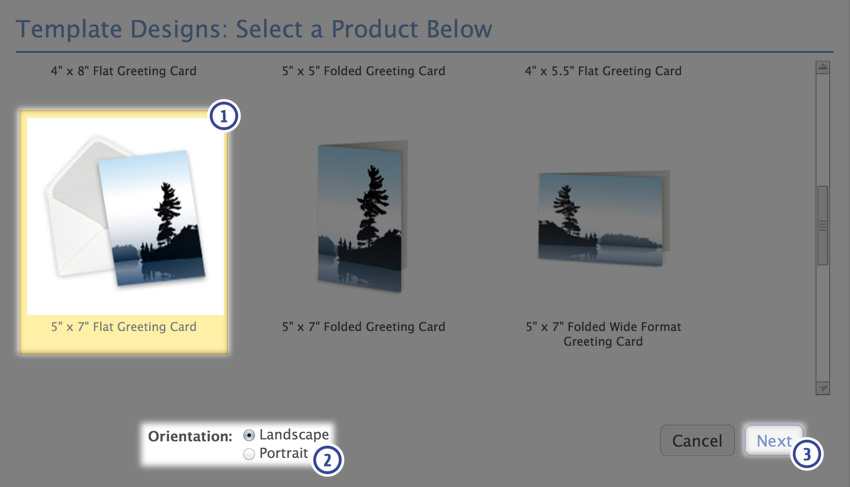
- Select the product.
- Choose the Orientation.
- Click Next. A new screen will load with Template Design options.
Add Background Design
- Select Upload Background Design.
- Click Browse and select the file you wish to apply for your background.
- Click Upload. The image will appear as the Background Design in your template and be listed in the Placeholders.
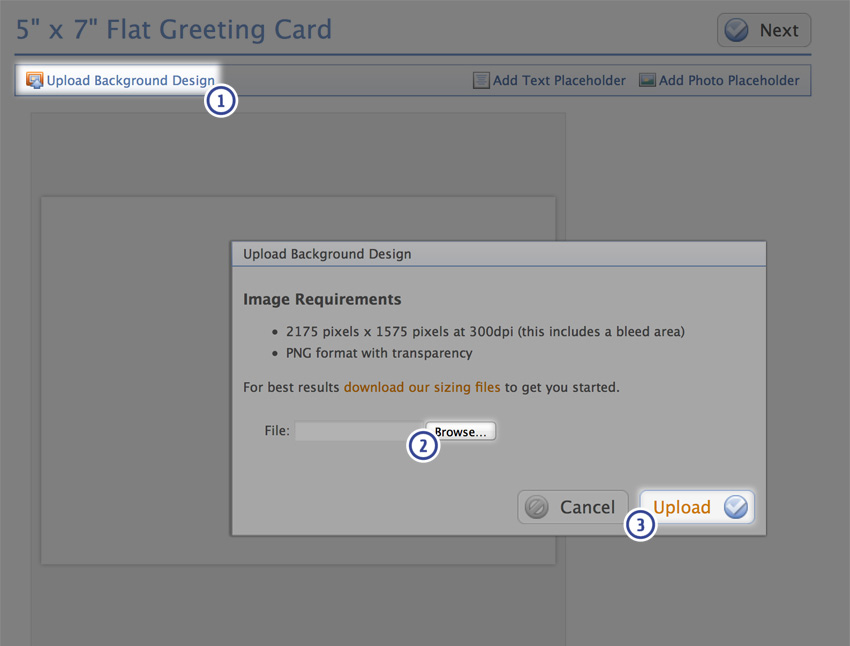
Notes: When creating your design to apply as a background for cards and magnets, you must meet the requested image requirements. You will find the specific requirements for the product size by clicking on Upload Background Design. We suggest you download our sizing files.
Add Photo Placeholder
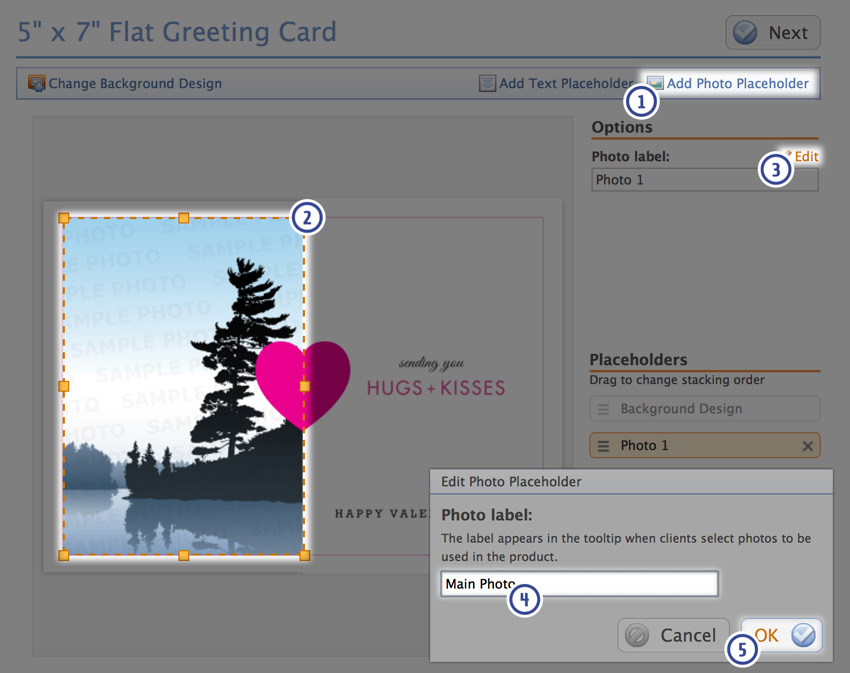
- Select Add Photo Placeholder. A resizable image thumbnail will appear within a crop box over your template. A listing will also appear under Placeholders.
- Resize the image thumbnail and move it to the location you wish for photos chosen by your customer to be placed.
- Under Options, click Edit next to Photo Label.
- In the edit window enter text for Photo Label to be seen by your customer
- Click OK. Your Placeholder will be renamed to match this change.
- Repeat steps 1-3 until you are finished.
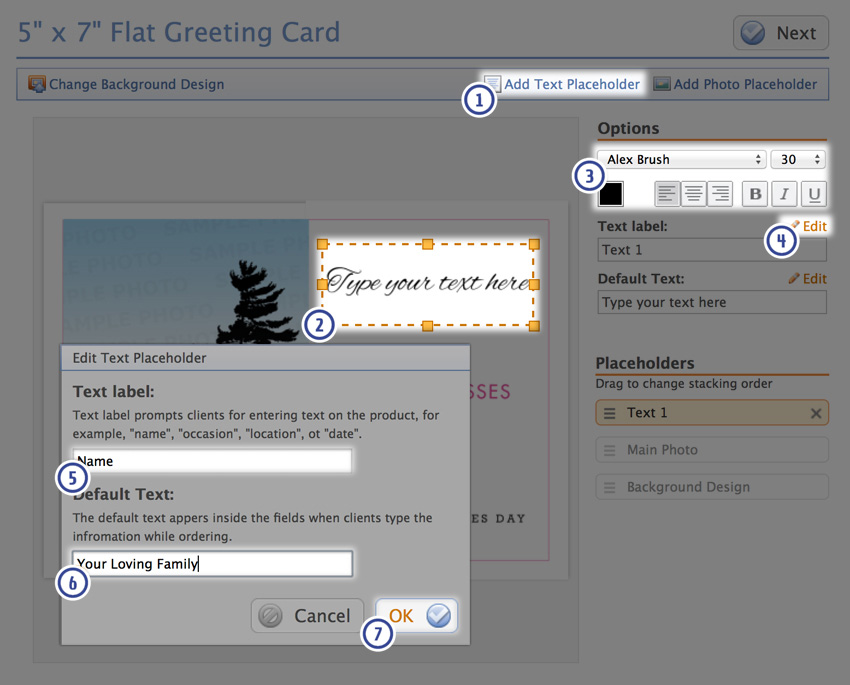
Add Text Placeholder
- Select Add Text Placeholder. A resizable text area within a crop box will appear over your template. A listing will also appear under Placeholders.
- Resize the text box and move it to the location you wish for text to be entered by your customer.
- Under Options, select the format for the text such as font type and font size.
- In the Options area next to Text Label, click Edit.
- Enter Text Label seen by your customer.
- Enter the Default Text that can be changed by the customer.
- Click OK. Your Placeholder will be renamed to match this change. Your text area will also change to match this change.
- Repeat steps 1-5 until you are finished.
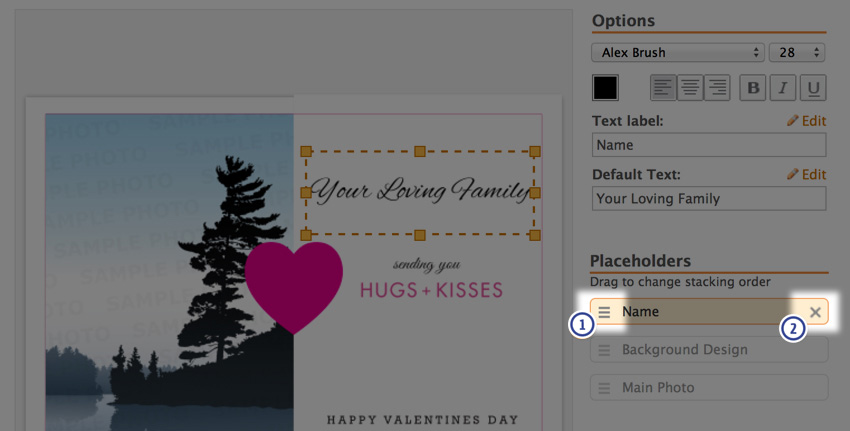
Organize Placeholders
- Change the stacking order of the placeholders by dragging them with the left grab bar. The first placeholder will appear in front of all other placeholders in the template. The last placeholder will appear behind all other placeholders in the template. The Template Design will change to reflect the new order.
- You may select the X to delete any placeholders.
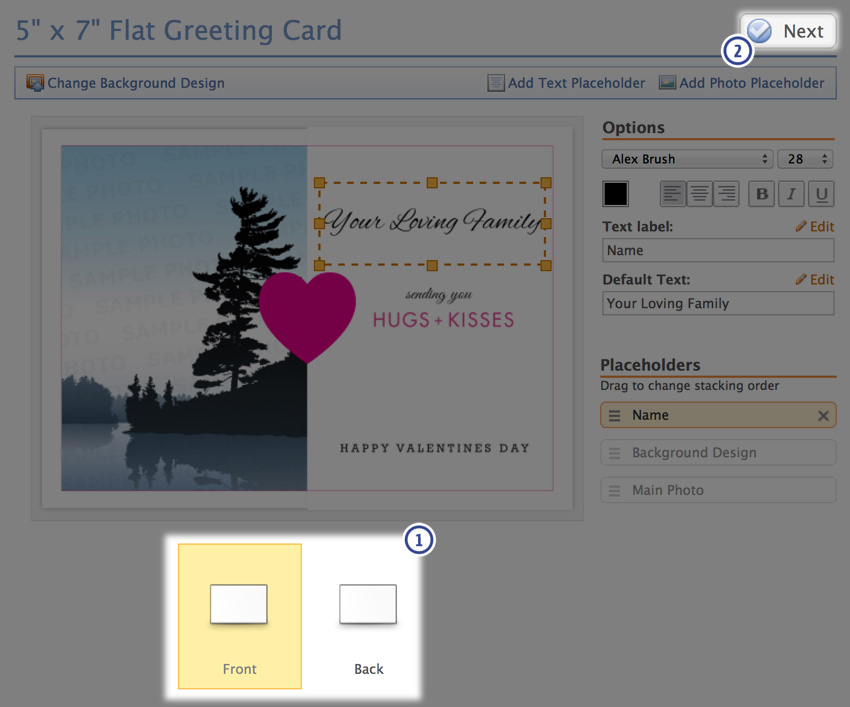
Complete Template Design
- There may be multiple sides to any product. Be sure when creating a Product Design Template to add content to all sides if you do not want any side to be blank.
- Once you are finished designing all sides click Next. The Product Template Design is saved and a new screen will load.
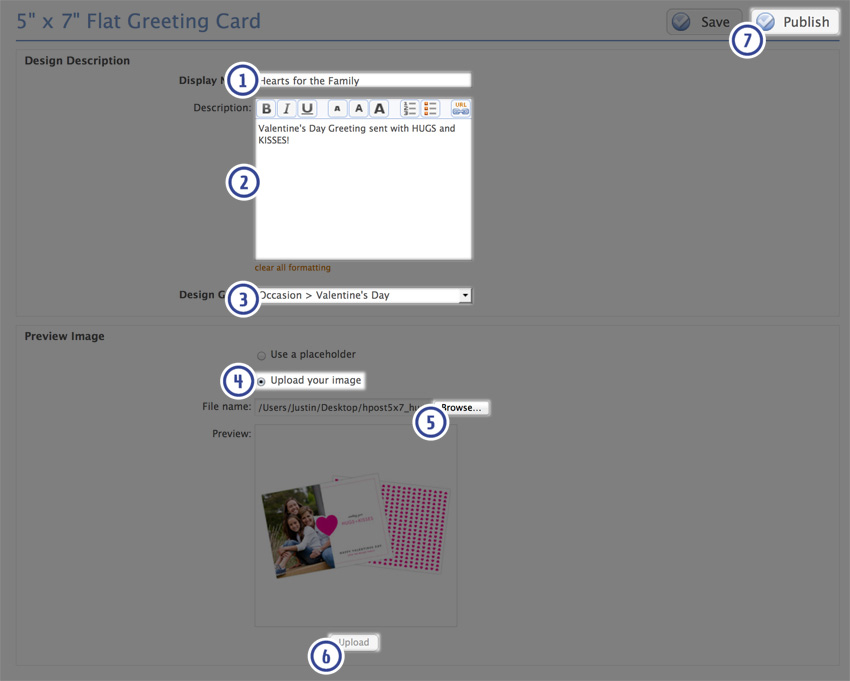
- Enter a Display Name for the Template Design.
- Enter a Description for the Template Design.
- From the Design Group drop-down, select where this template design will appear in your shopping cart.
- You may choose to add a preview image. Select the radial button for Upload your image.
- Browse your computer to select and open the file you wish to apply for your background.
- Click Upload. The image will appear in the preview.
- You may choose to Save as a draft, or Publish to make the Template Design immediately available for adding to a price list.
Offering the Product Template Design for sale
Products which offer Design Templates must be added to a Price List before you can select your Design Templates.
Click HERE to see the specific steps for adding products to a Price List.
After adding the product to the Price List, use these steps to make the custom product template available to your clients.
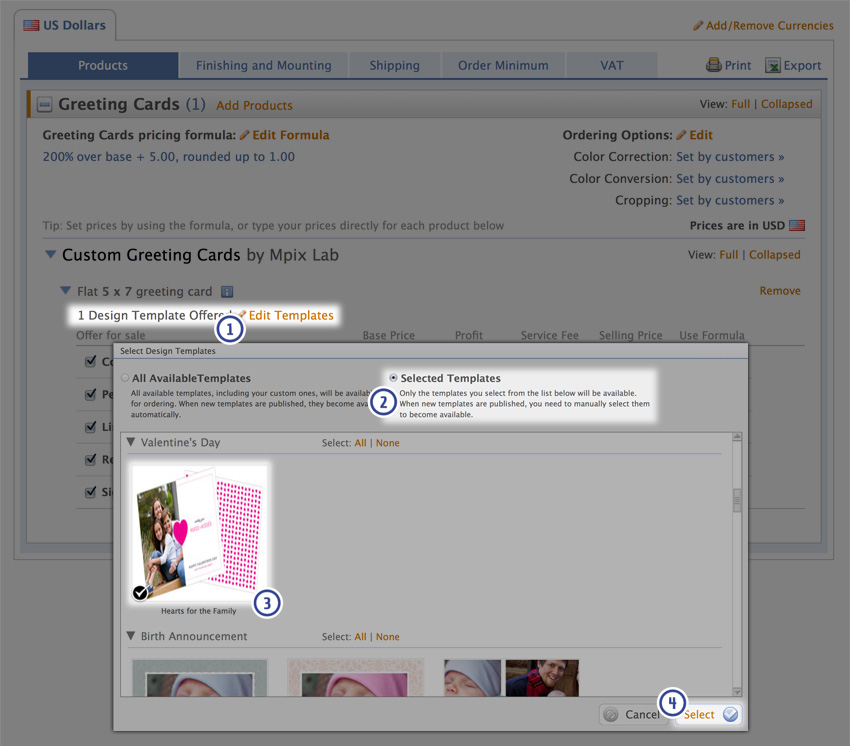
- Under the product in your price list, click on Edit Templates next to Design Templates Offered.
- Click the radial button for Selected Templates.
- Select your Template Design and any other templates you wish added. If your Template Design does not appear you may want to verify it is set to Publish and has not been saved as a Draft.
- Click Select.
Once your price list is updated with the select items, you may also want to specify which paper types are available for sale, options, and set your pricing.
Make sure to Save the Price List when you are finished editing the Price List.
Lastly, assign the price list or make sure that the price list is assigned to the gallery or galleries that contain the photos that you would like to be available for printing on the Custom Template Design product.
Once your client has selected the product from the shopping cart, they will have the option to change and select photos used by the product, text, paper types, etc.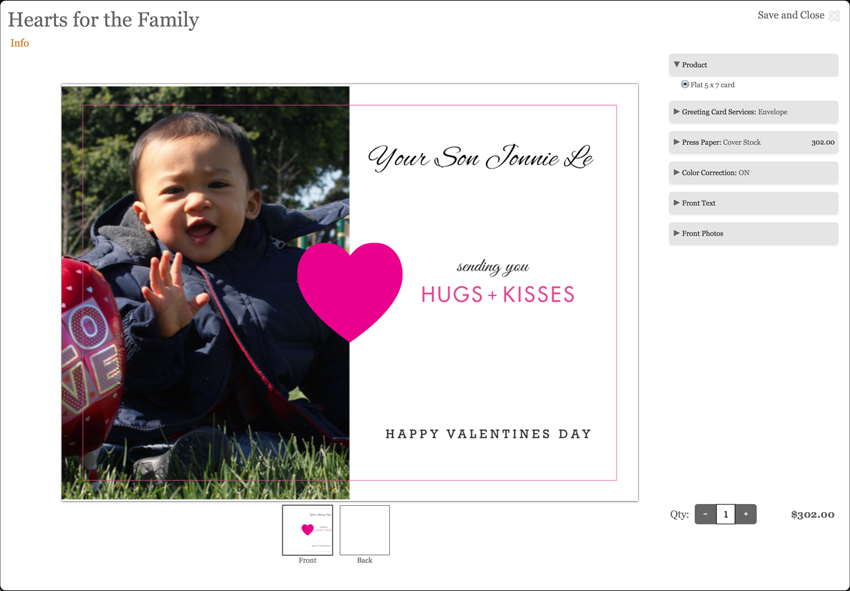
Custom Product Template Design FAQ
Q: What is a product template?
A: A template is a design that contains placeholders for photos and text that can be replaced by a customer. For example, a customer could choose a Wedding “Save the Date” card and customize it by adding photos of the couple, plus entering the date and location of the wedding.
Q: How do I create a product template design?
A: Use the Zenfolio Template Designer to upload designs you have prepared using your graphics software of choice (e.g. Adobe Photoshop). The designer allows you to add photo and text placeholders onto your design and configure the layout of each side of the product you are designing for.
Q: Do I need to make a separate design for each side of the product I am designing for?
A: If you are designing a template for a multi-sided product (e.g. folded greeting cards) you have the option of adding design elements on all sides of the product. However, it is not required. Any side that does not contain a design or photo/text placeholder object will simply be blank.
Q: How can I make sure my design is the right size for the product I am designing for?
A: The best way to ensure the designs you upload are the correct size is to download our Sizing Guide files for the specific product you are designing for. These files are sized correctly, including a clearly marked bleed area, making it easy to create your design in your graphics program of choice. When exporting your design, be sure to save at full resolution and delete or hide the guide layers.
Q: What resolution should I make my design?
A: We suggest keeping your design images at 300dpi at the specific size for the product you are designing for. For example, a 5” x 7” greeting card design would need to be 5.25” x 7.25” (including the .25” bleed) and saved at 300dpi. The best way to ensure the designs you upload are the correct size is to download our Sizing Guide files for the specific product you are designing for.
Q: What is "bleed area"?
A: Bleed is a printing term that refers to printing that goes beyond the edge of the sheet after trimming. The bleed is the part on the side of a document that gives the printer a small amount of space to account for movement or shift of the paper, and design inconsistencies.
For the template designs there is an area 1/8th inch (.125 inch) per side. This gives the lab's printers a margin of shift - so the critical parts of your uploaded designs should fall within this area to avoid any potential cut-off when printing.