When you have a promotion, you can use your website header to display the sale information.
This guide covers how to display a promotional image in the Custom Content area of the Header.
Here is the outline of all of the steps needed for this process:
- Create the Coupon
- Create the Promotional Graphic
- Upload the Graphic to a Gallery
- Display the Graphic in the Custom Content Area of the Header
Create the Coupon
To offer a discount on your products, create a coupon in your account. This will allow you to offer discounts such as-20% off, 25% off, 30% off, etc-off of the prices of the products that you're selling.
When creating a coupon, we recommend setting an expiration date so that it cannot be used past a specific date. This will help create a sense of urgency for your clients.
You can see the steps for how to create a coupon by clicking HERE.
Create the Promotional Graphic
First, create a graphic that contains the promotional information. Don’t forget the expiration date.
Since the graphic will be displayed in the header, it should be sized to fit properly in the header.
The recommended size is 1,550 pixels wide by 240 pixels tall.
You can use your favorite graphic program such as Adobe Photoshop or Adobe Lightroom to create the image. You can also find some free image editing programs HERE.
Upload the Graphic to a Gallery
Before the graphic can be displayed in the header, it will need to first be uploaded to a gallery in your account. We recommend creating a new gallery and uploading the graphic to that gallery. Click HERE to learn how to create a new gallery and upload the image to the gallery.
To make sure the image can be displayed to the public, make sure that the gallery's Access Control settings are set to Public and not to Private or Locked with a Password. Click HERE to learn how to set the gallery to Public in its Access Control settings.
You can hide the gallery so that clients do not see it. Click HERE to learn how to hide a gallery from view.
Display the Graphic in the Custom Content Area of the Header
Next, you'll need to edit your Header to display the Custom Content area and then display the graphic in that area.
You can make these changes in Customize Website View.
In your account, hover your mouse pointer over Website then click on Customize Website.
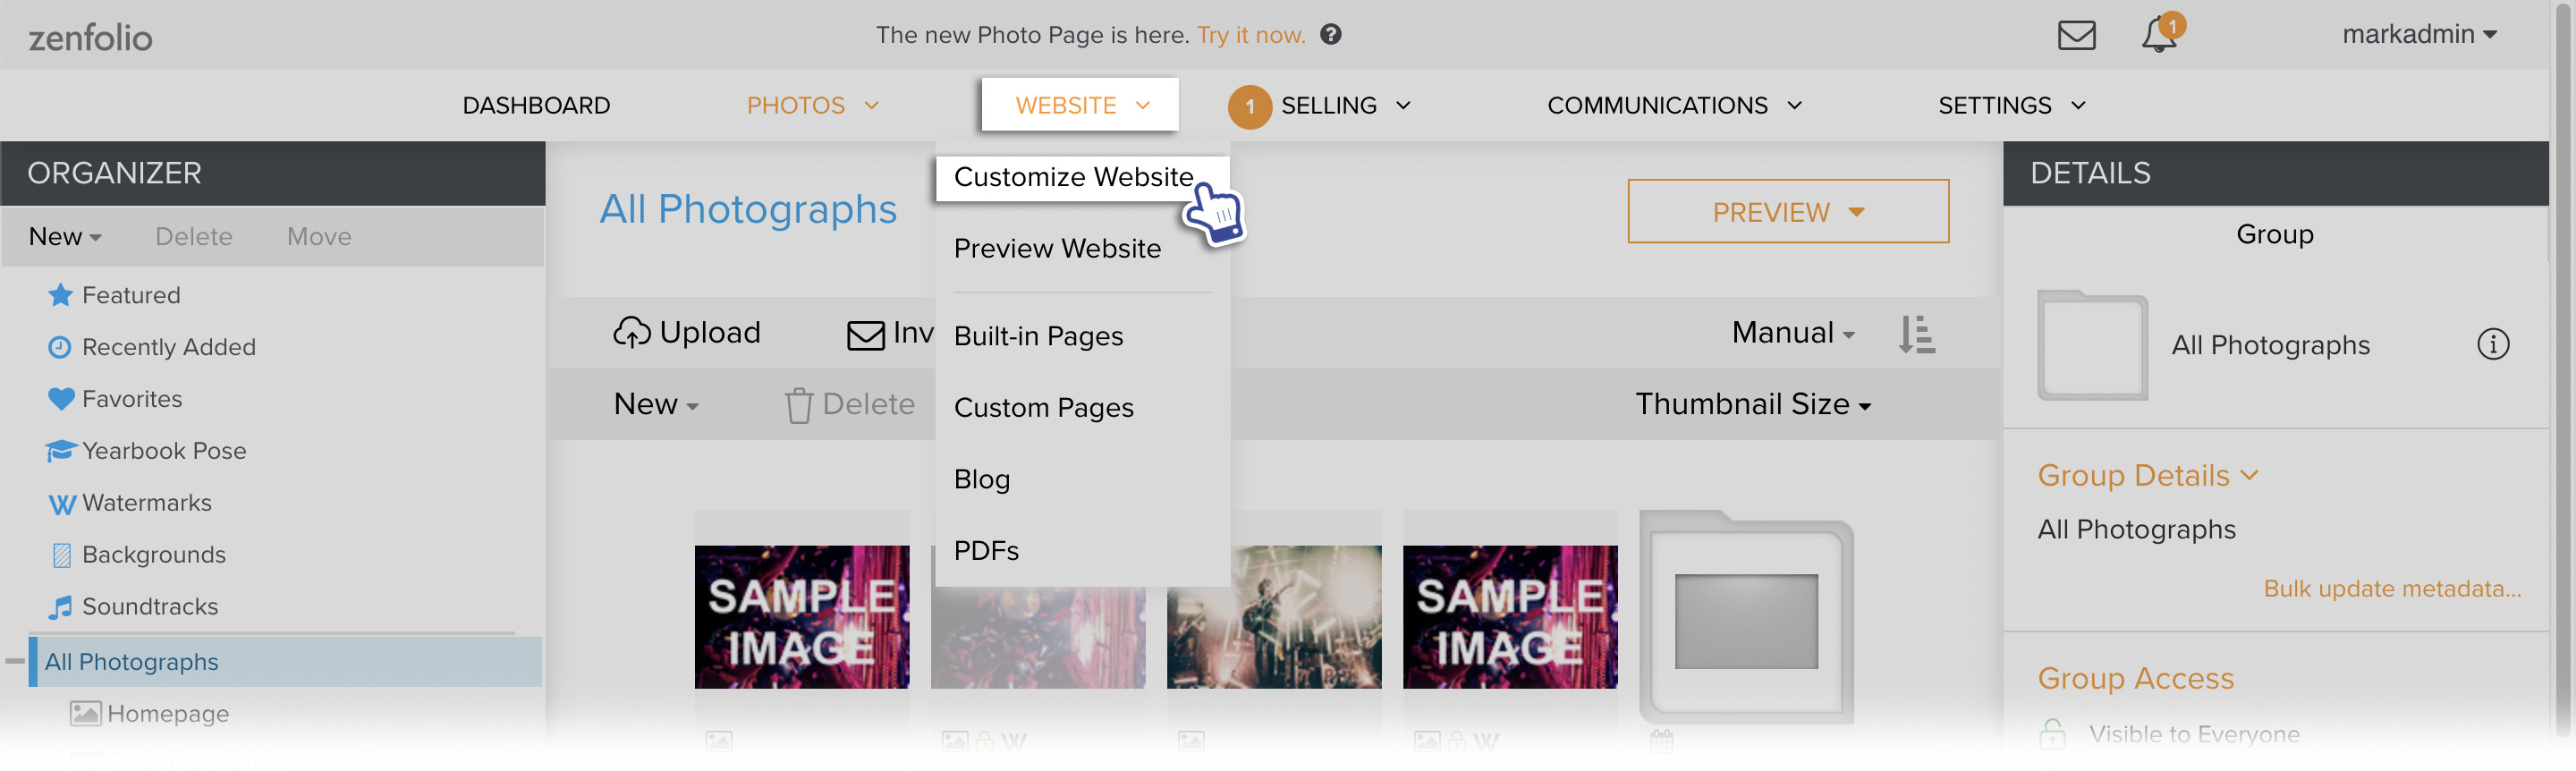
The page will refresh with a new customization menu at the top, confirming that you are in the Customize Website View.
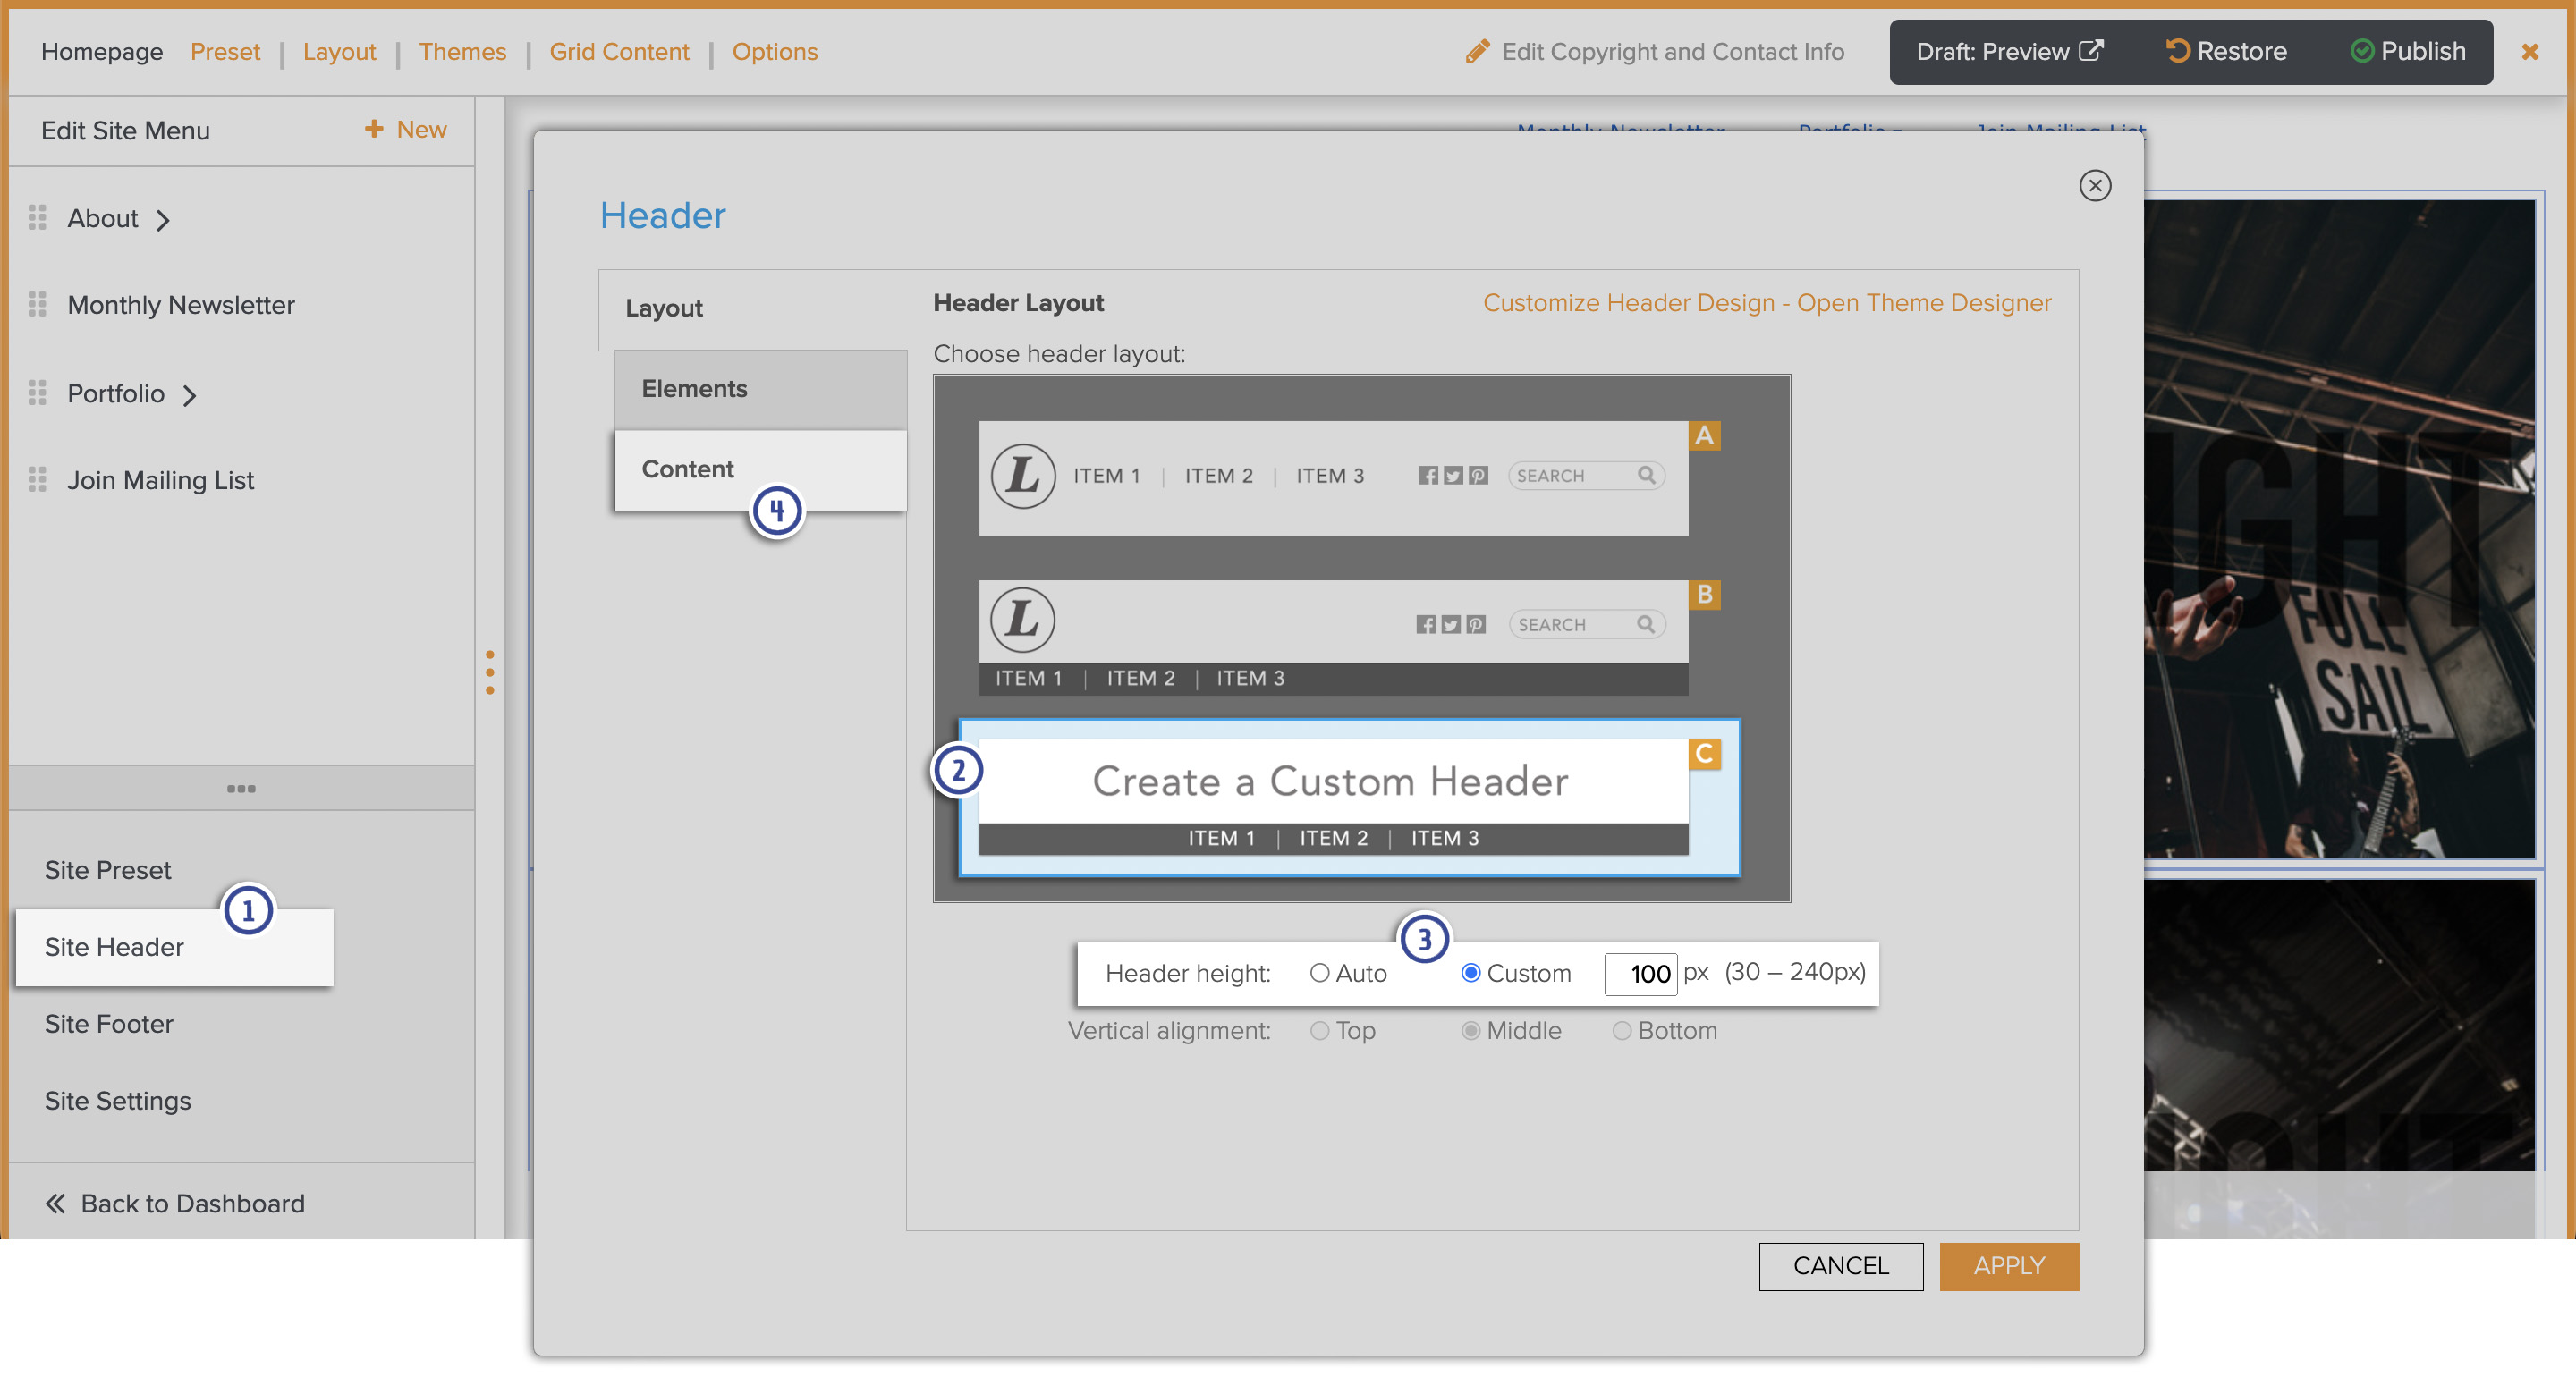
- In Customize Website View, go to Site Header.
- Click on Header Layout C, Create a Custom Header.
- For the Header Height, choose Custom and set the height to 170 pixels.
- Go to the Content tab.
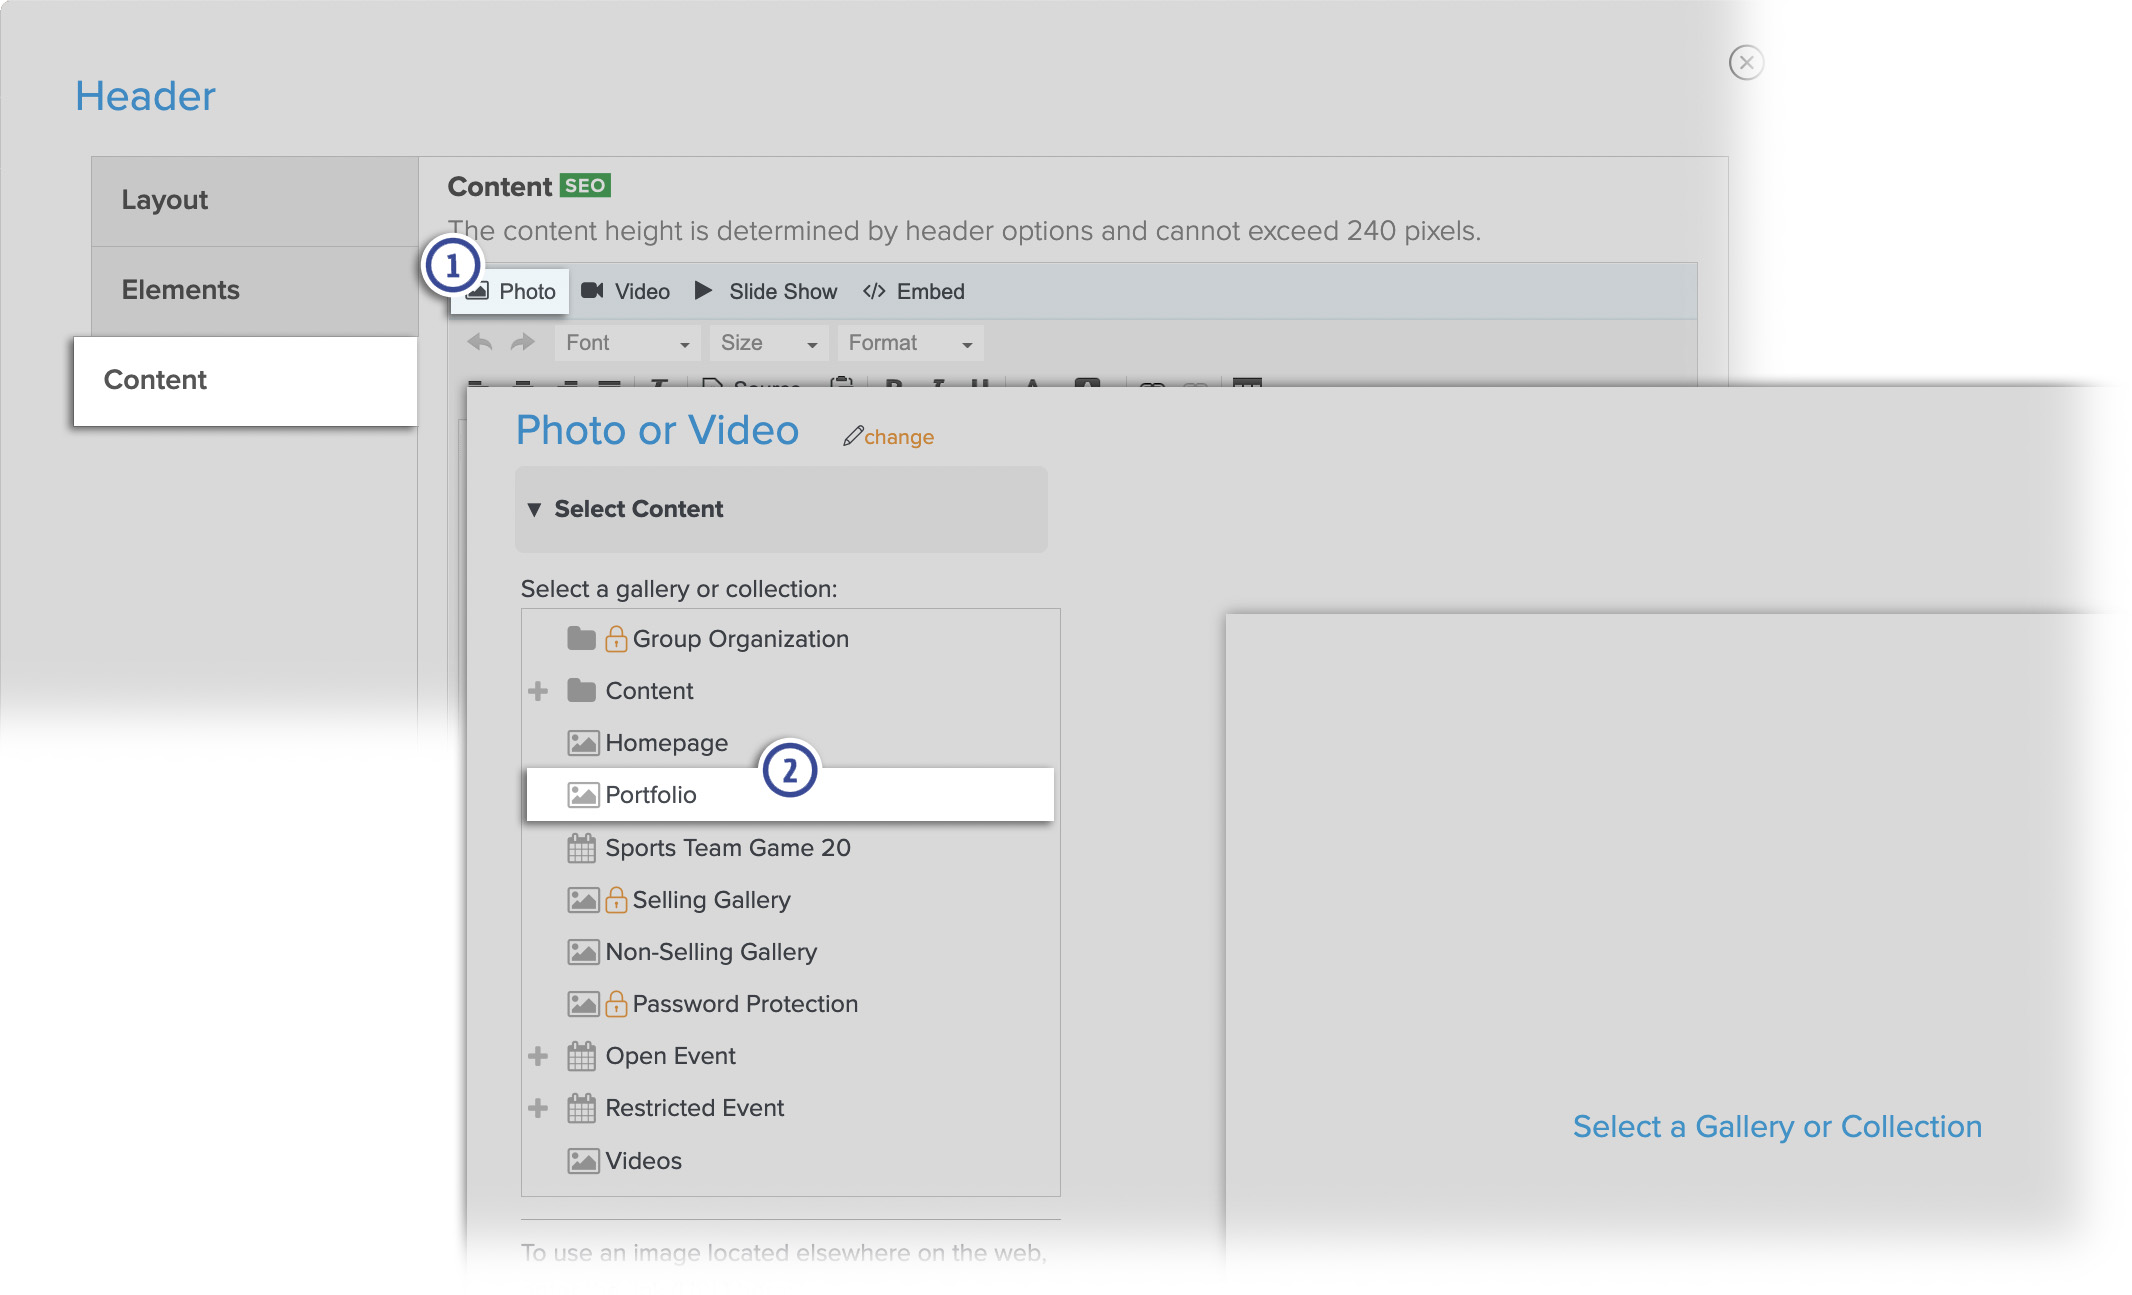
- Click on Photo.
- Find the gallery that contains the graphic and click on it.
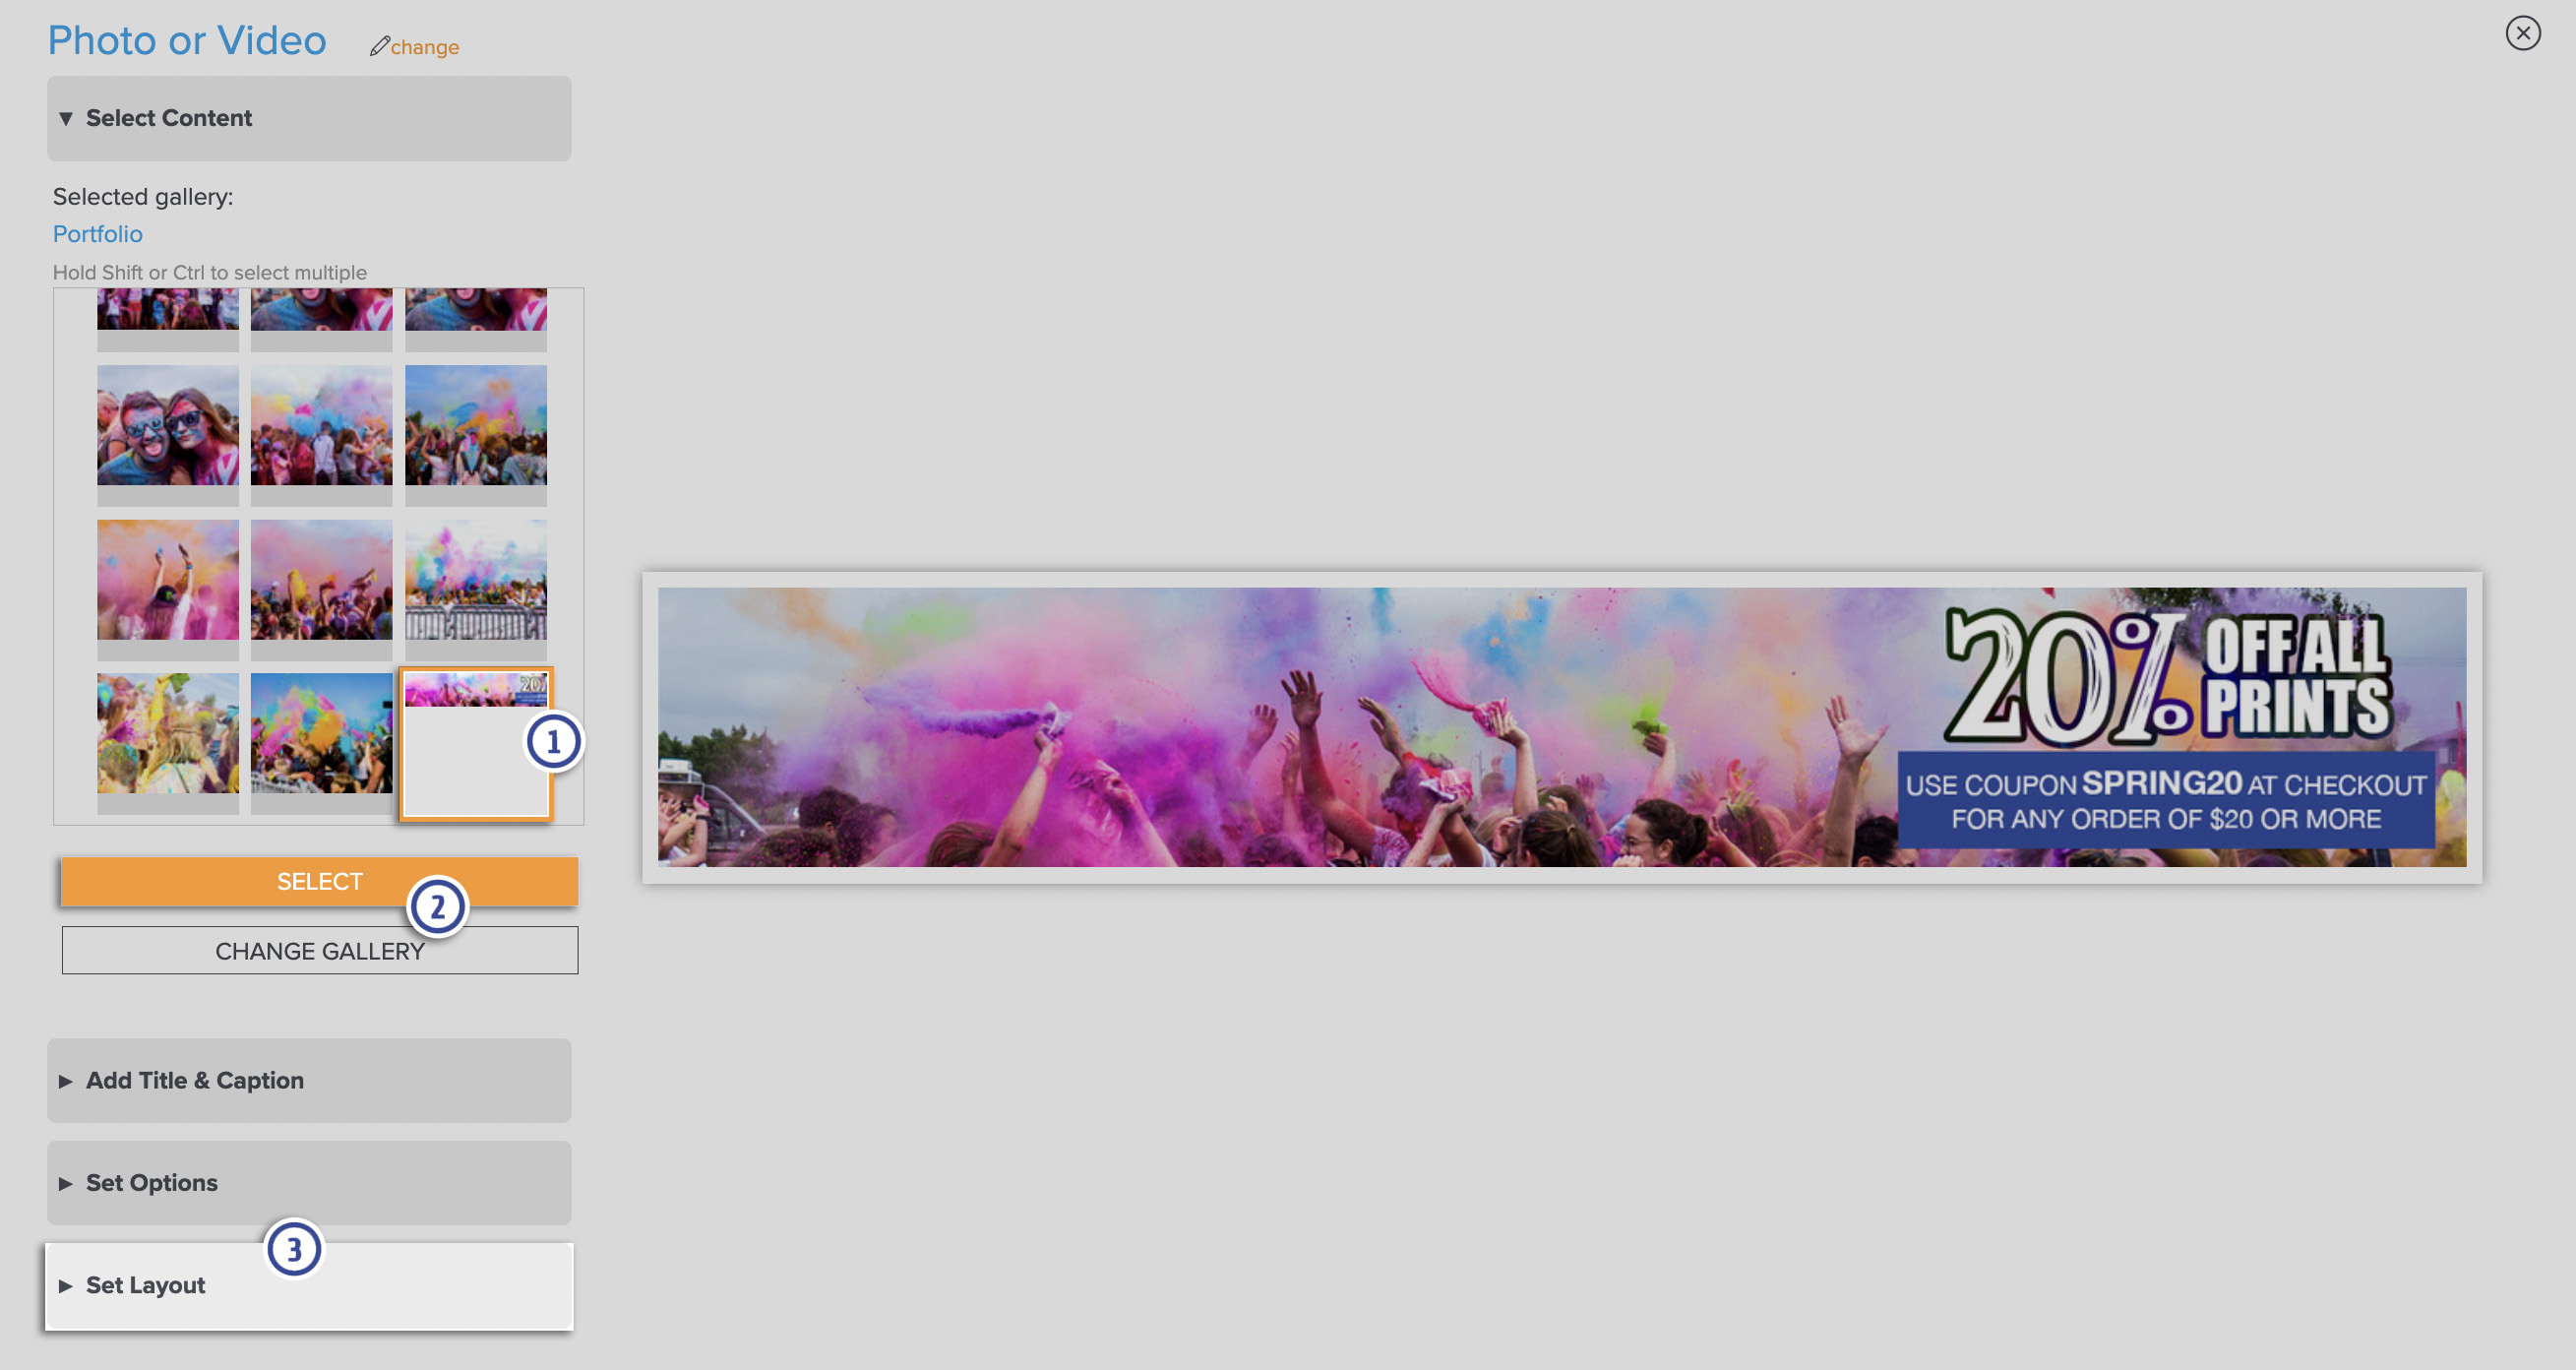
- Click on the image.
- Click the Select button.
- Go to the Set Layout tab.
Apply these settings:
- Browser Scaling: Scale
- Border: None
- Layout: Fixed alignment
- Alignment: Choose the center option
- For Spacing around the image, set Horizontal and Vertical to 0 (zero) pixels.

Click Insert.
If the Header is set to Show in Options, then the Header (with the sale graphic) will now be displayed in the site. If it's not displayed, you can display the Header by going to the Options panel in Customize Website View.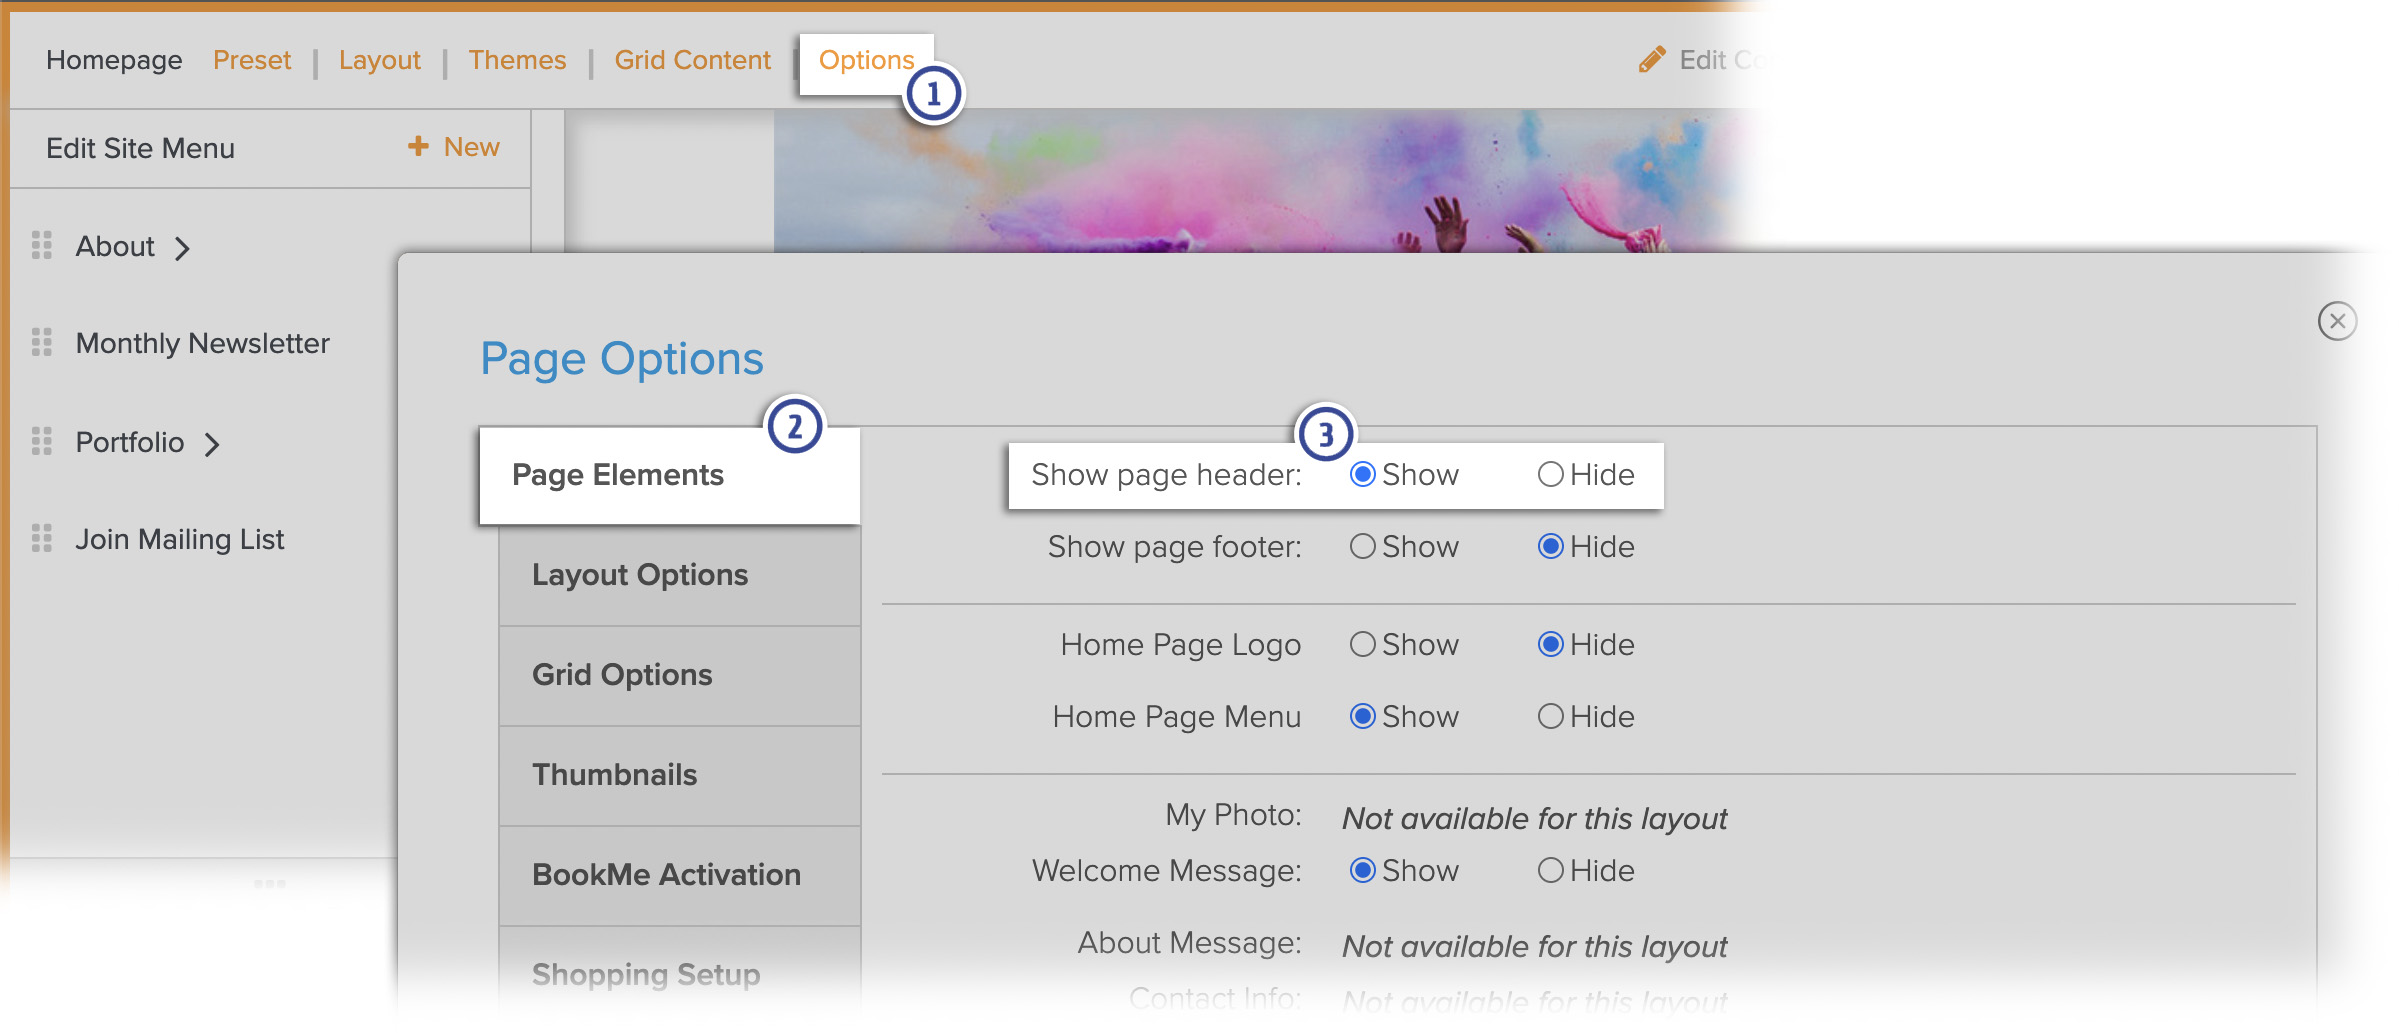
Click HERE to learn how to get to the Options panel in Customize Website View.
When you're finished, make sure to click Publish to apply all of the changes to your site.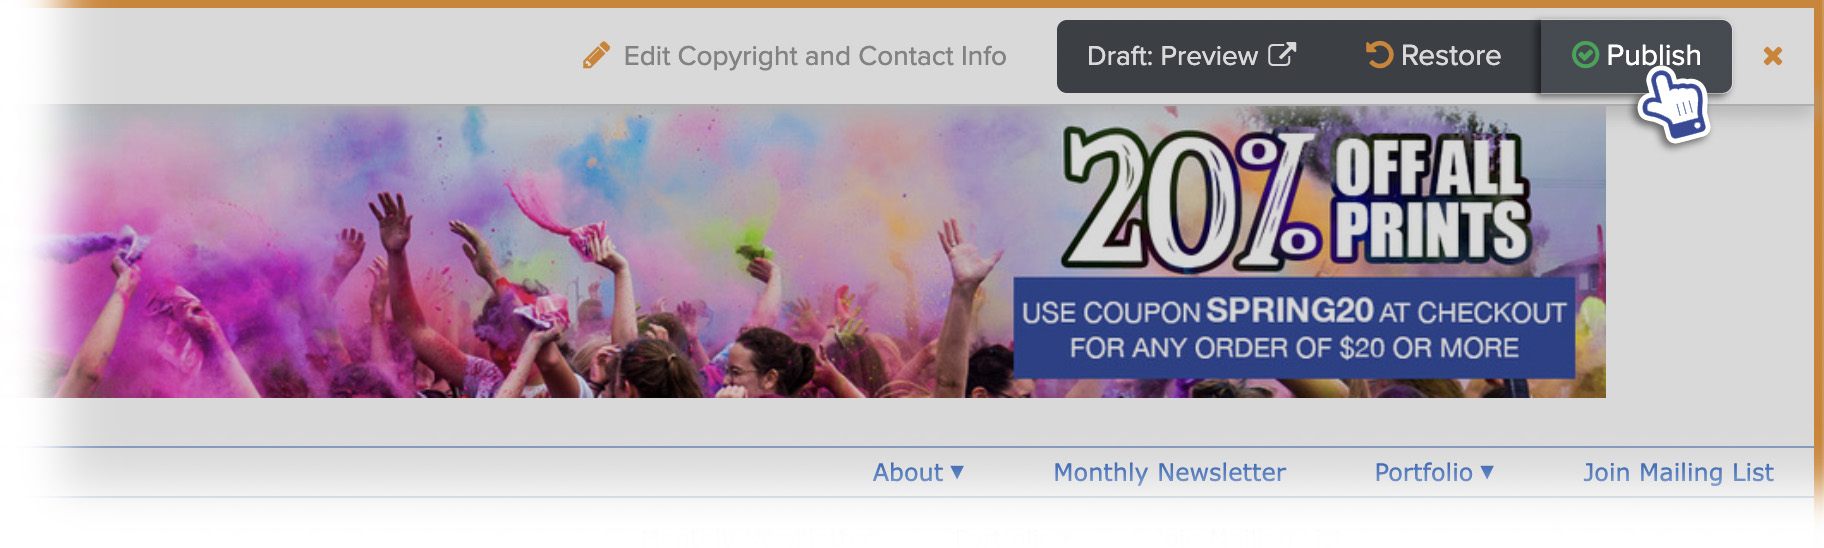
After the Sale
Once the sale has passed, you may be able to easily remove the graphic by using the Restore function in Customize Website View.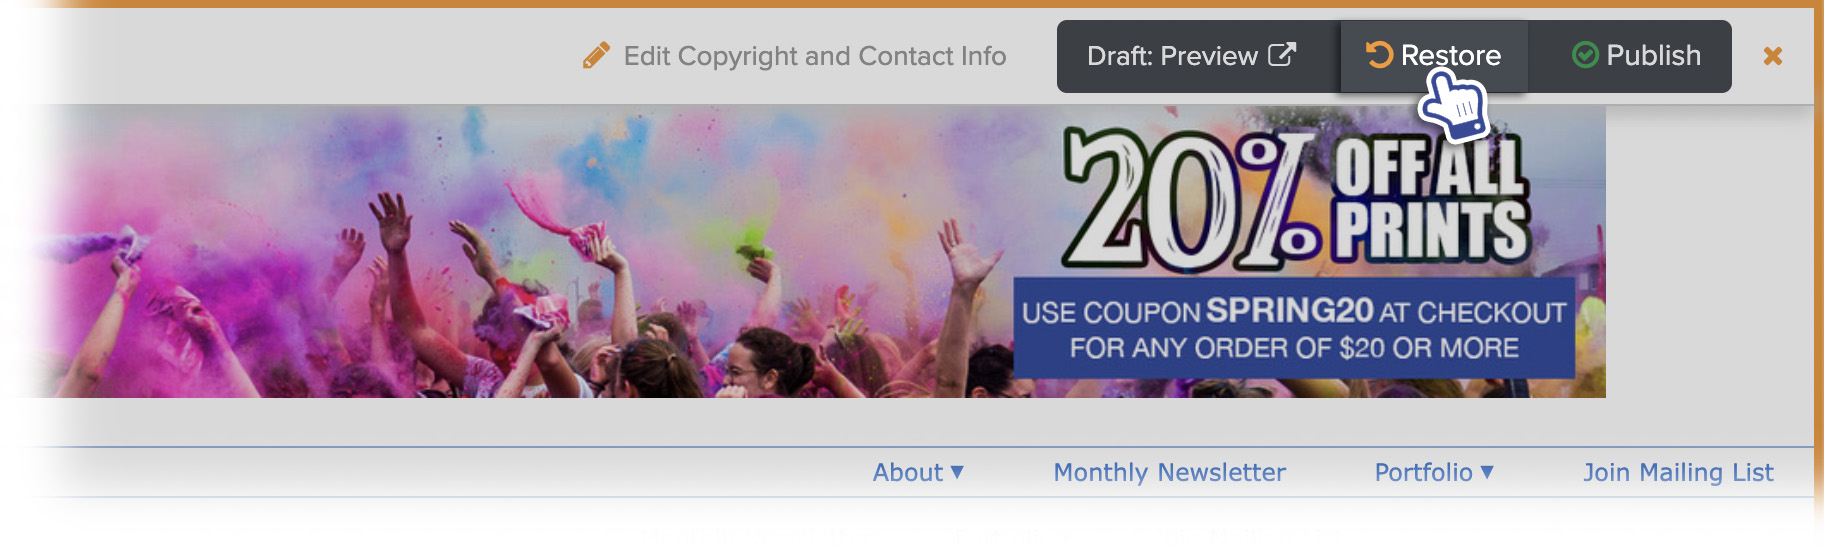
Make sure to Publish the changes after using Restore.
Note: Restore will remove any other changes that were made and published in the customize view. You are also only able to restore the site back to the the most recent published version of the site, if you have published other changes since adding the banner, the Restore function will not work for you.
If the Restore option is not available, you can remove the graphic by undoing the changes listed in this article.
Here is a list of the steps needed to undo the changes.
- Go back to Customize Website View.
- Go to Site Header.
- Choose Header Layout A or Header Layout B.
- Set the desired Header height or choose Auto.
- Click Apply.
- Publish your changes before exiting Customize Website View to make the changes live on your site.