What does your Account look like?
Original Photos Page: Showing Image Filenames by using them as Image Titles
The filenames of your photos are not displayed along with the photos. If you would like the filename to be displayed, you can do so by following these two steps:
- Edit the Titles of the Images with Their Filenames
- Display the Images' Titles in the Gallery Thumbnails Pages
Please also check out this video which shows the same steps above:
Edit the Titles of the Images with Their Filenames
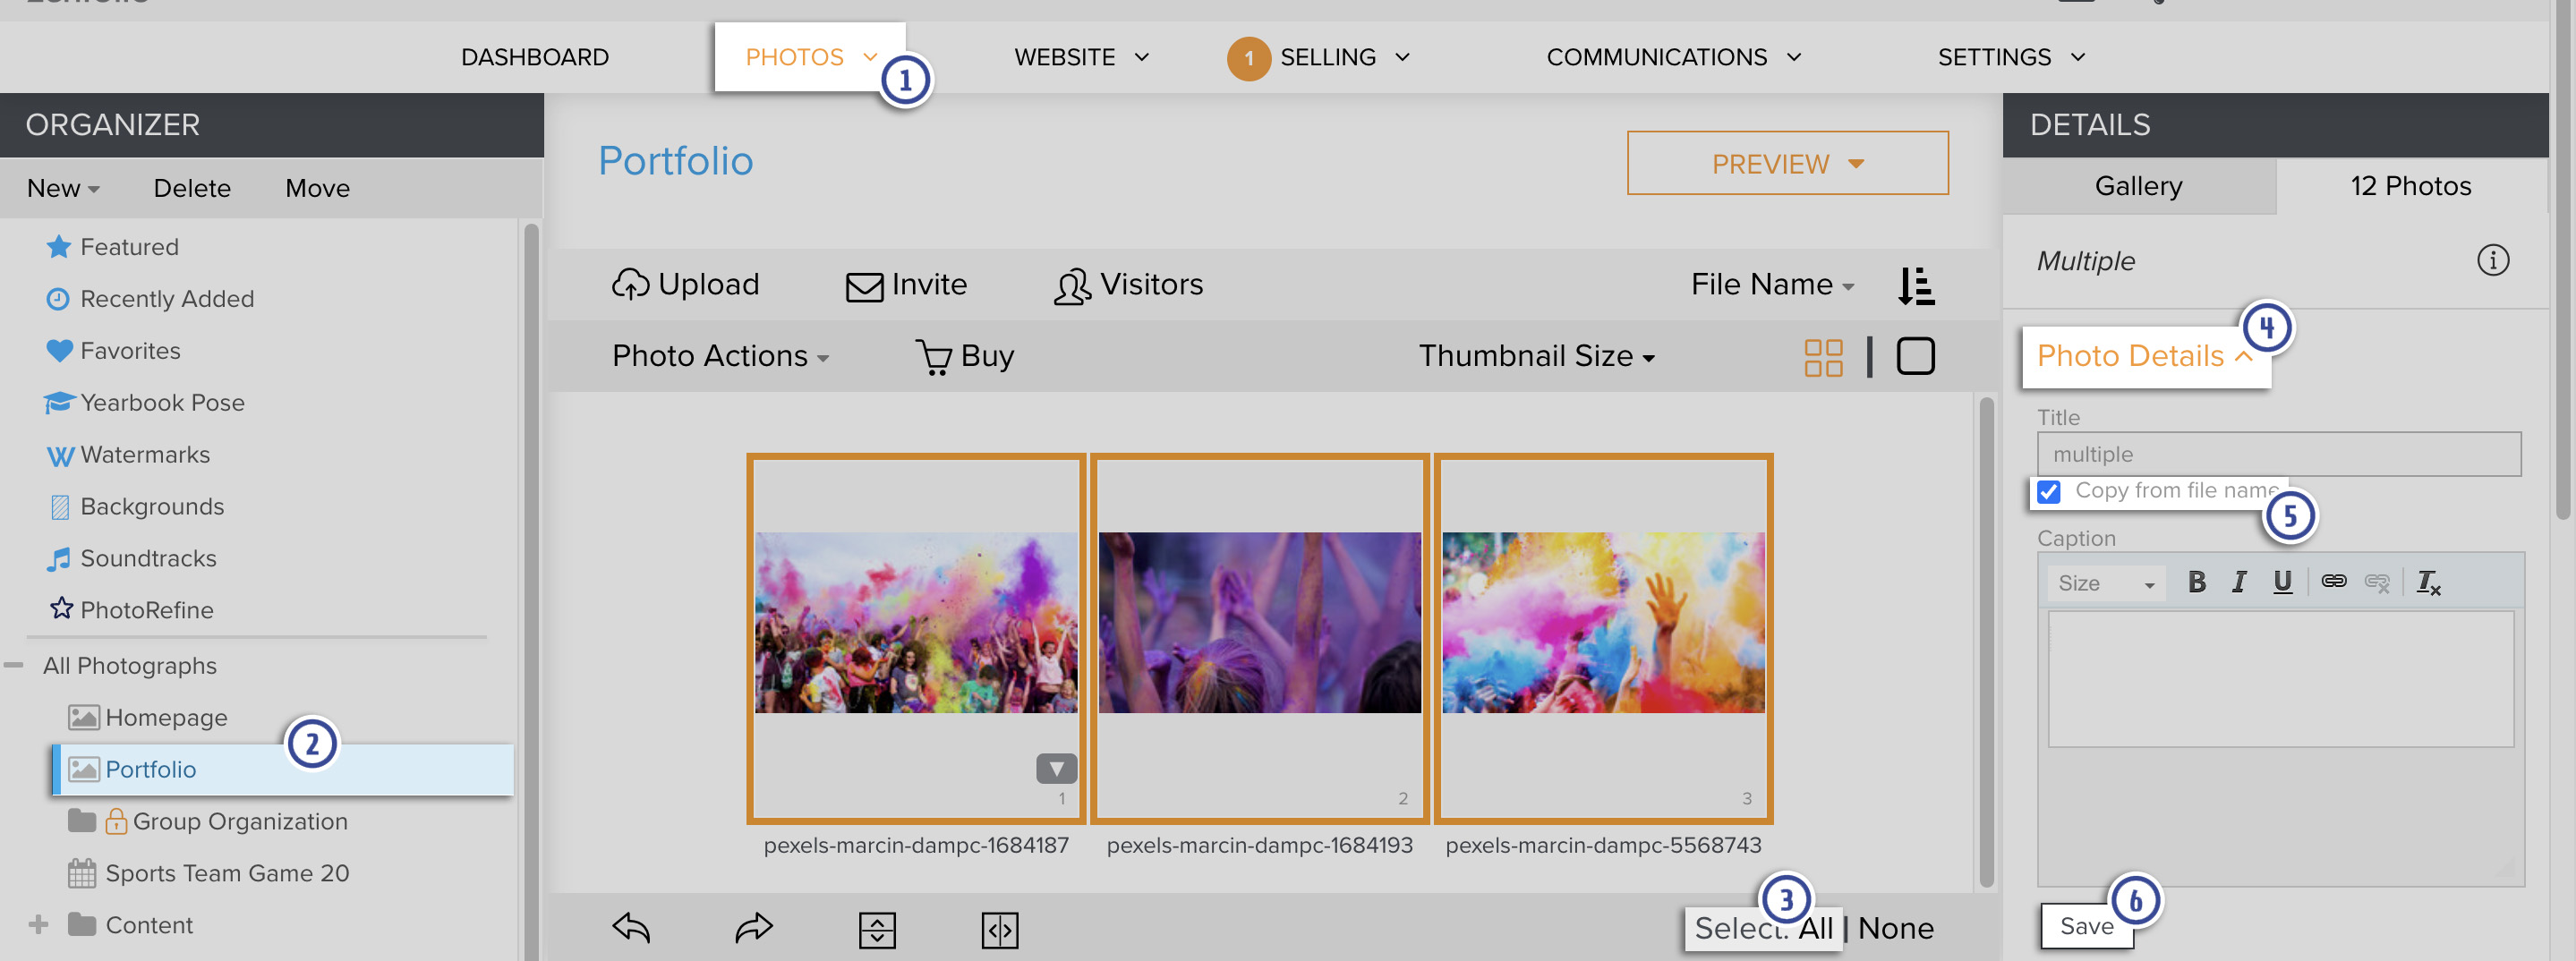
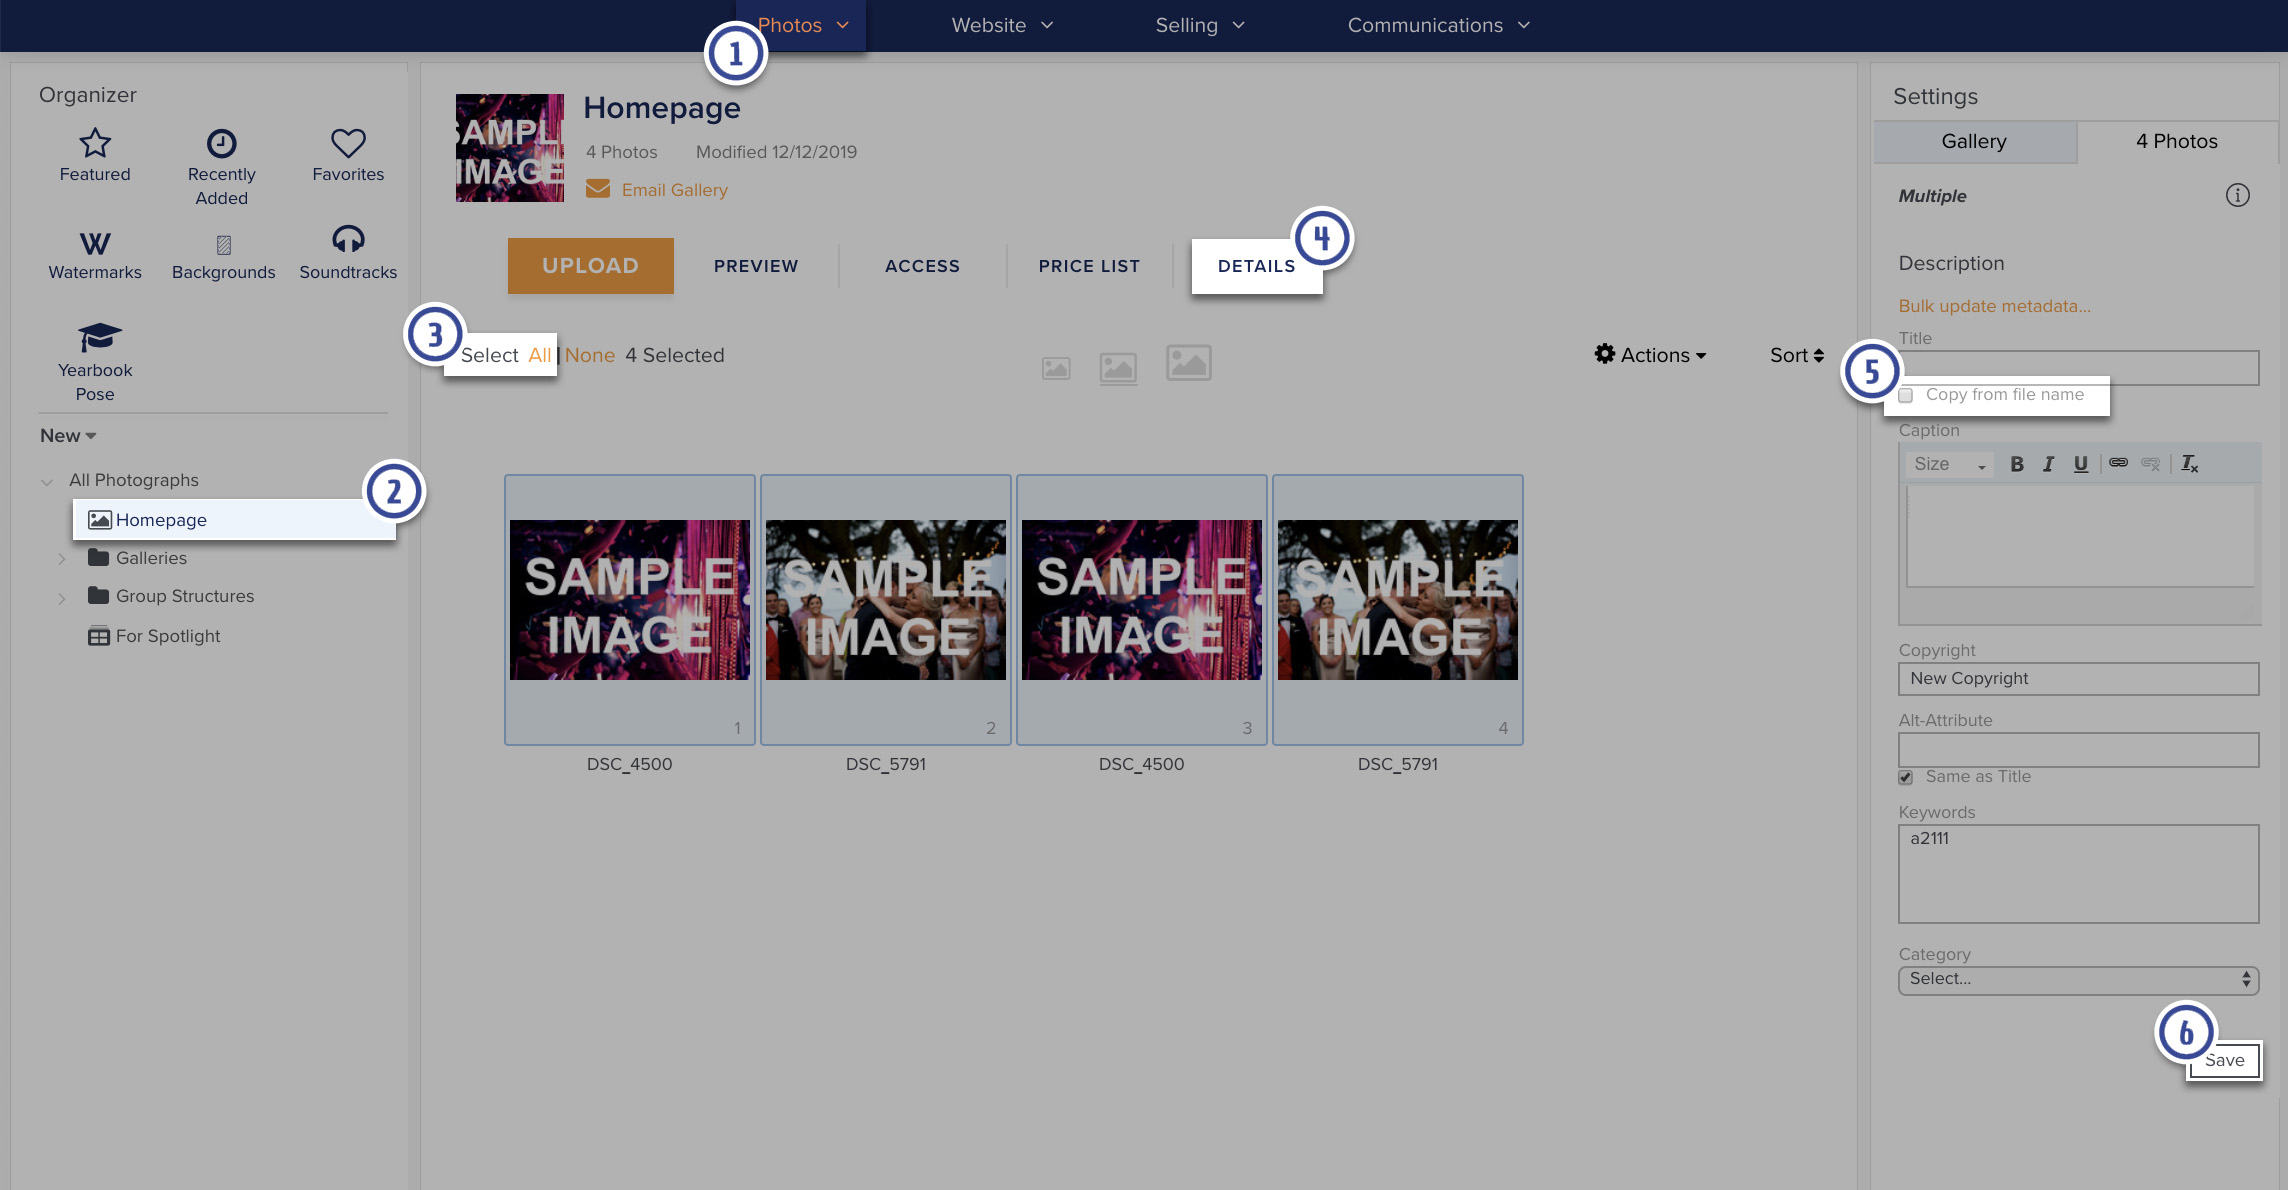
- In your account, go to Photos.
- In the Organizer, click to select the gallery containing the photograph you would like to edit. Thumbnails from the gallery will load in the Main Area and the title of the gallery will display at the top.
- In the bottom of the Main Area, click All to select all of the photos in the gallery. The thumbnail will become highlighted and photo-related information will be loaded in the Details Column.
It may take a few moments for the items in the Details Column to load depending on the number of photos in the gallery. - Click Photo Details in the Details Column.
- Below the Title field, check the box for Copy from file name.
- Click Save. The new title will be updated in the Main Area and the Description section of the Details Column.
If you wish to use original names as a default setting for all uploaded photos you can set that up in your account preferences.
Using original file names as a default setting
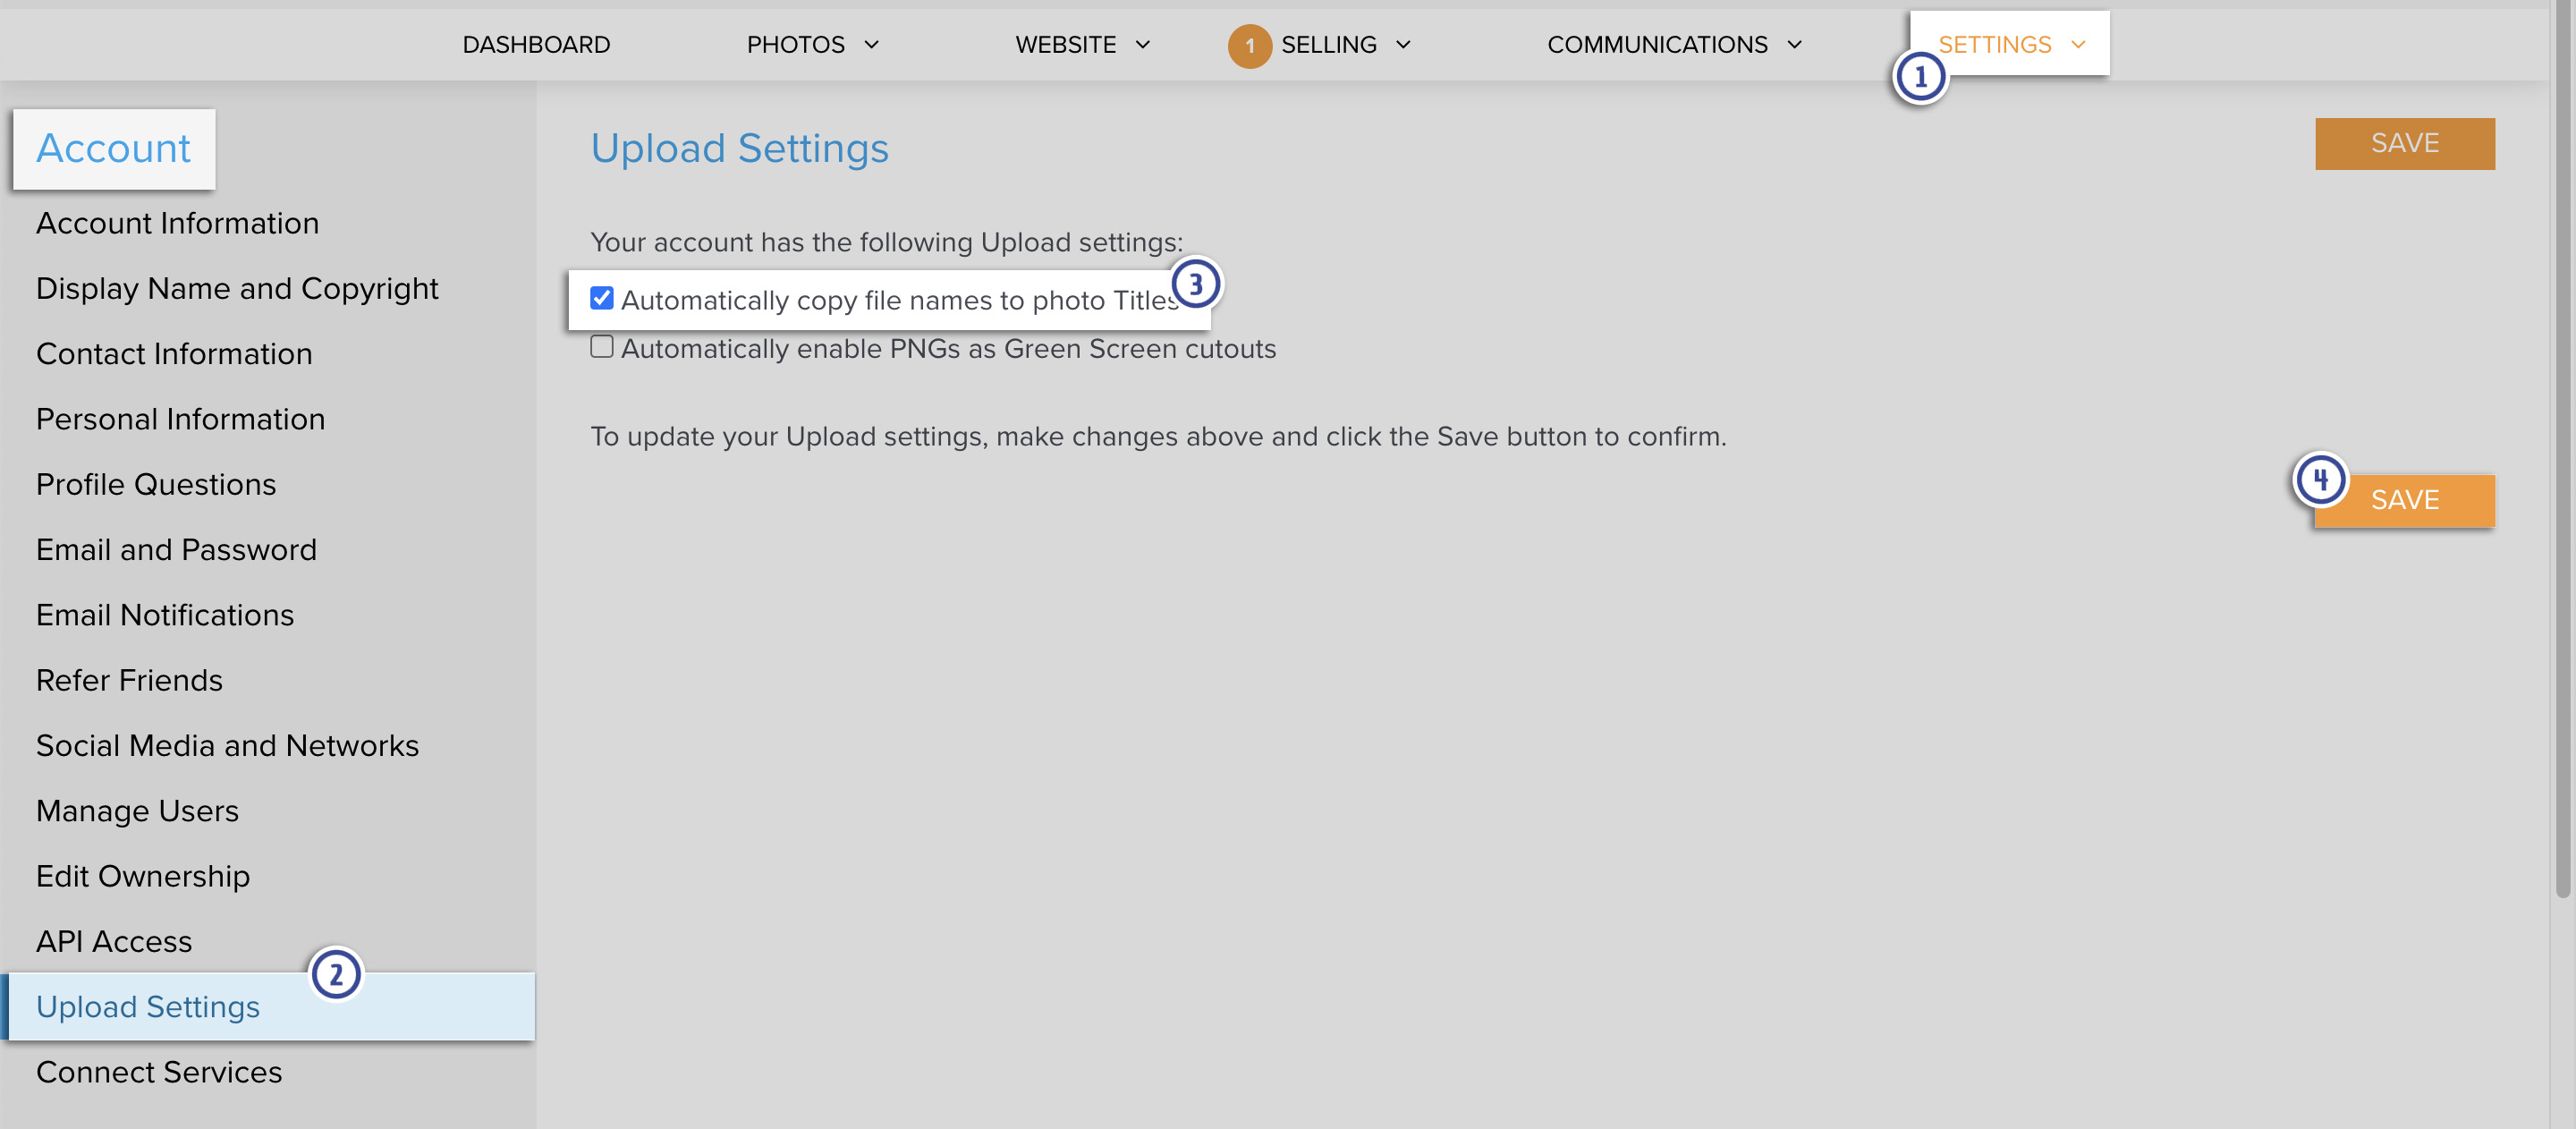
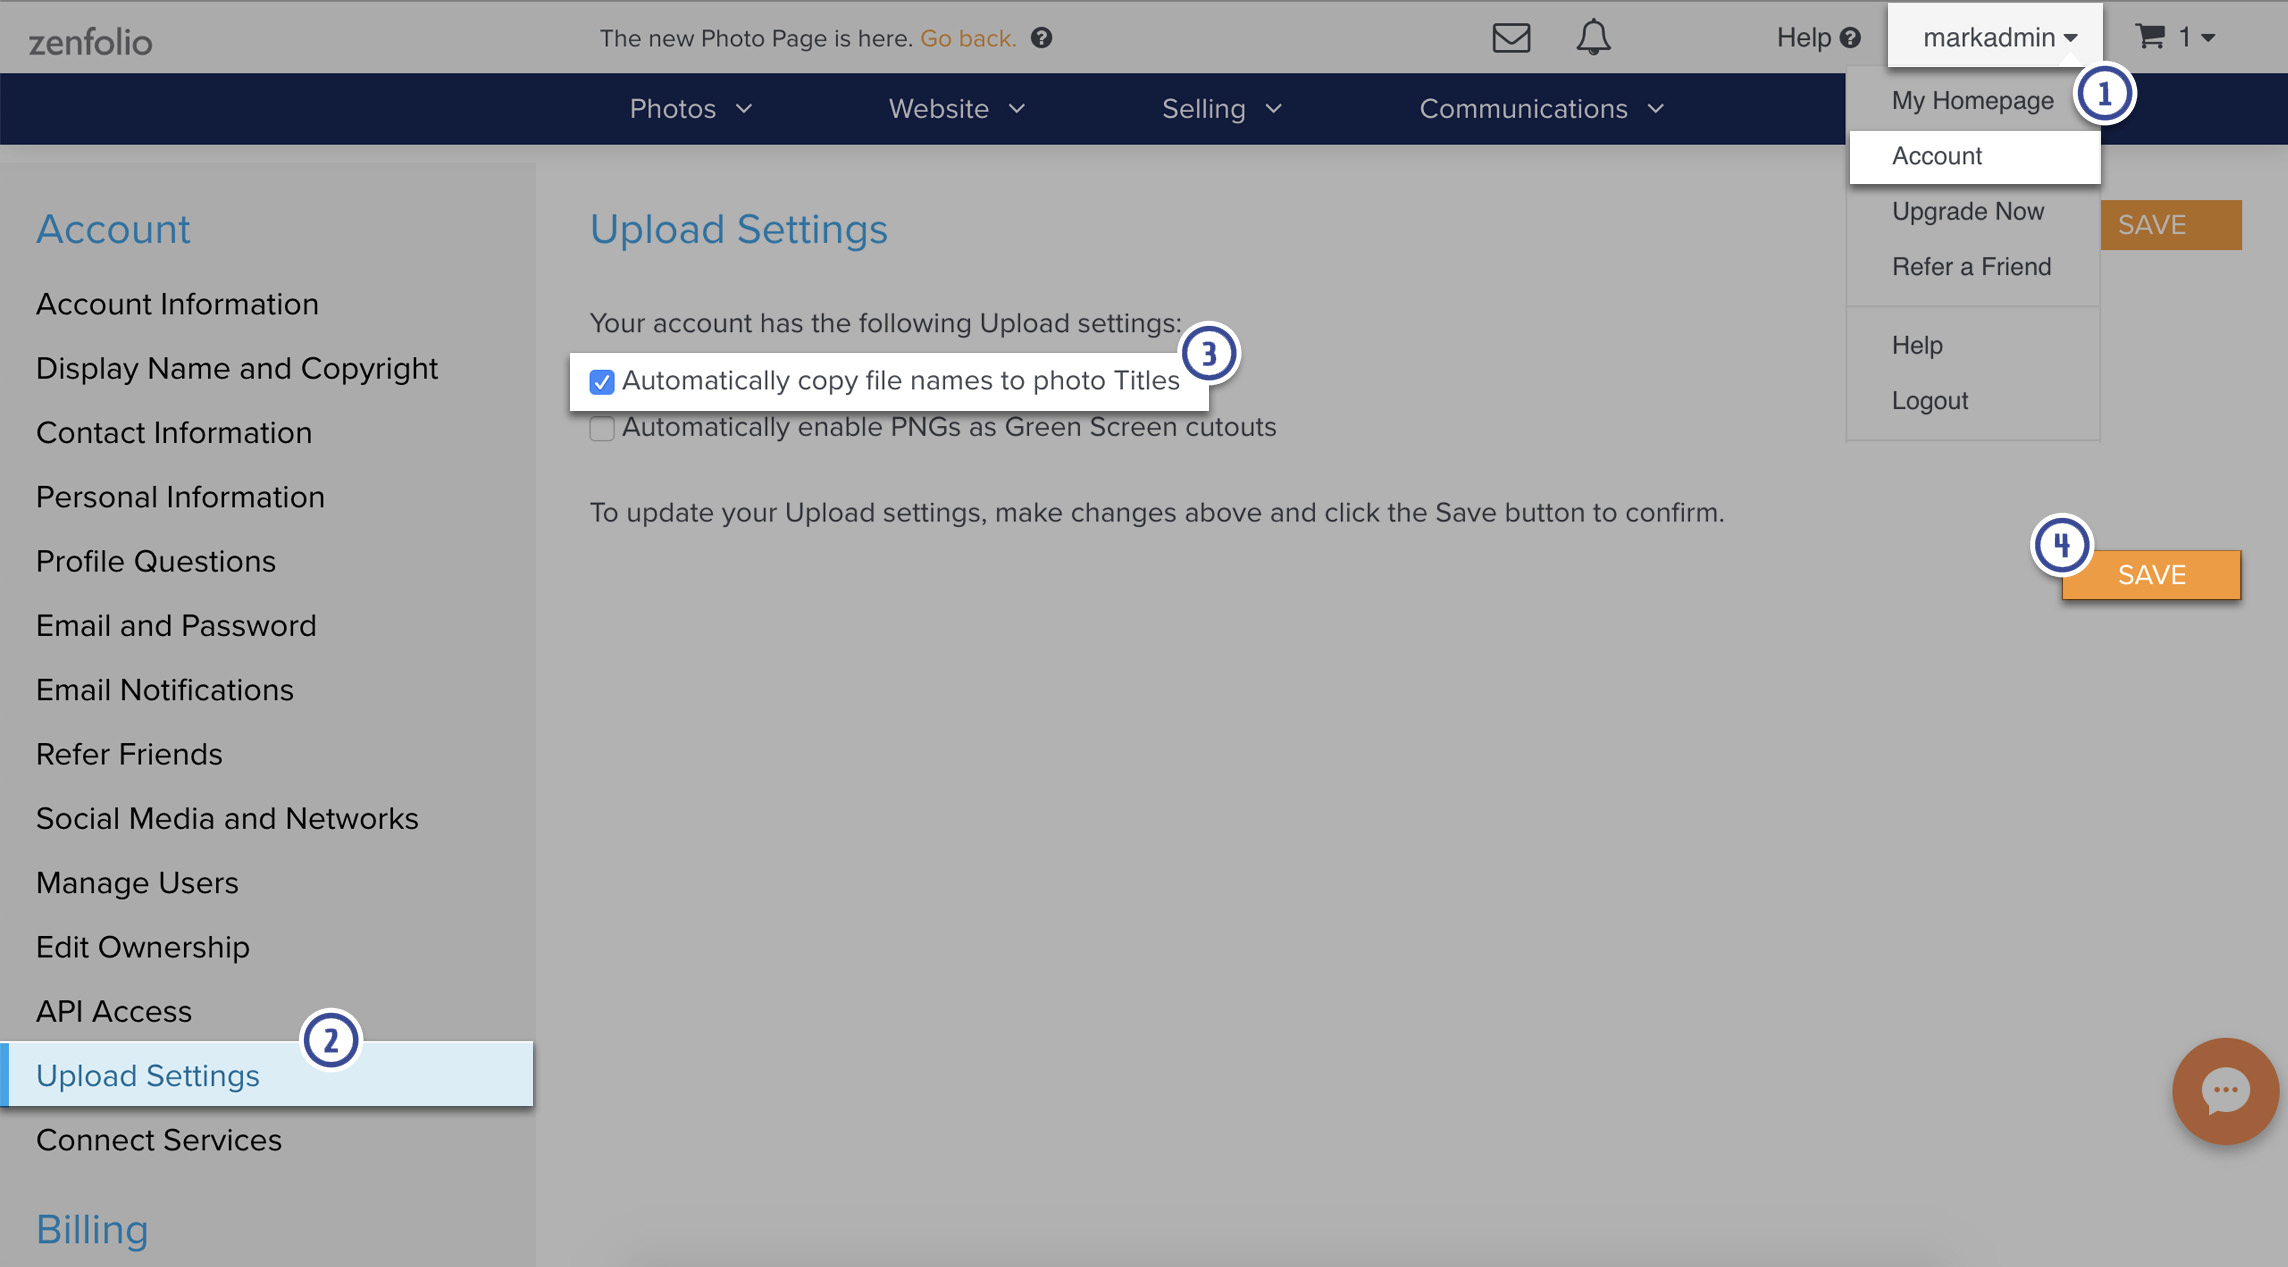
- In your account, click on Settings.
- Choose Upload Settings from the menu on the left side of the page.
- Check the box for Automatically copy file names to photo Titles.
- Click Save to apply. All future photos you upload will have original file names applied as the title unless you decide to manually edit them.
Displaying the Titles
The titles are automatically displayed in Photo Pages and in the Quick Shop page.
In gallery thumbnails pages, the photographer has the option to show or hide the titles on that page.
The option to Show or Hide the Titles can be found in Options when viewing the gallery thumbnails page in Customize Website View.
- In your account, go to Photos.
- Navigate to the desired Gallery or Collection under the Organizer.
- Hover the mouse pointer over Preview then click on Customize.
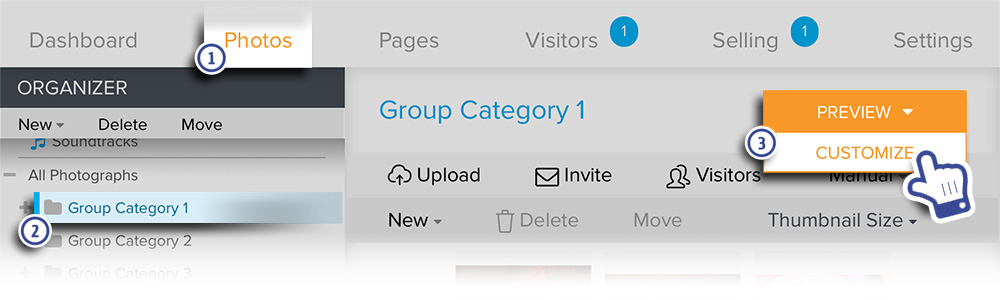
The page will refresh with Customize Website View displayed at the top, confirming that you are in the customization mode.
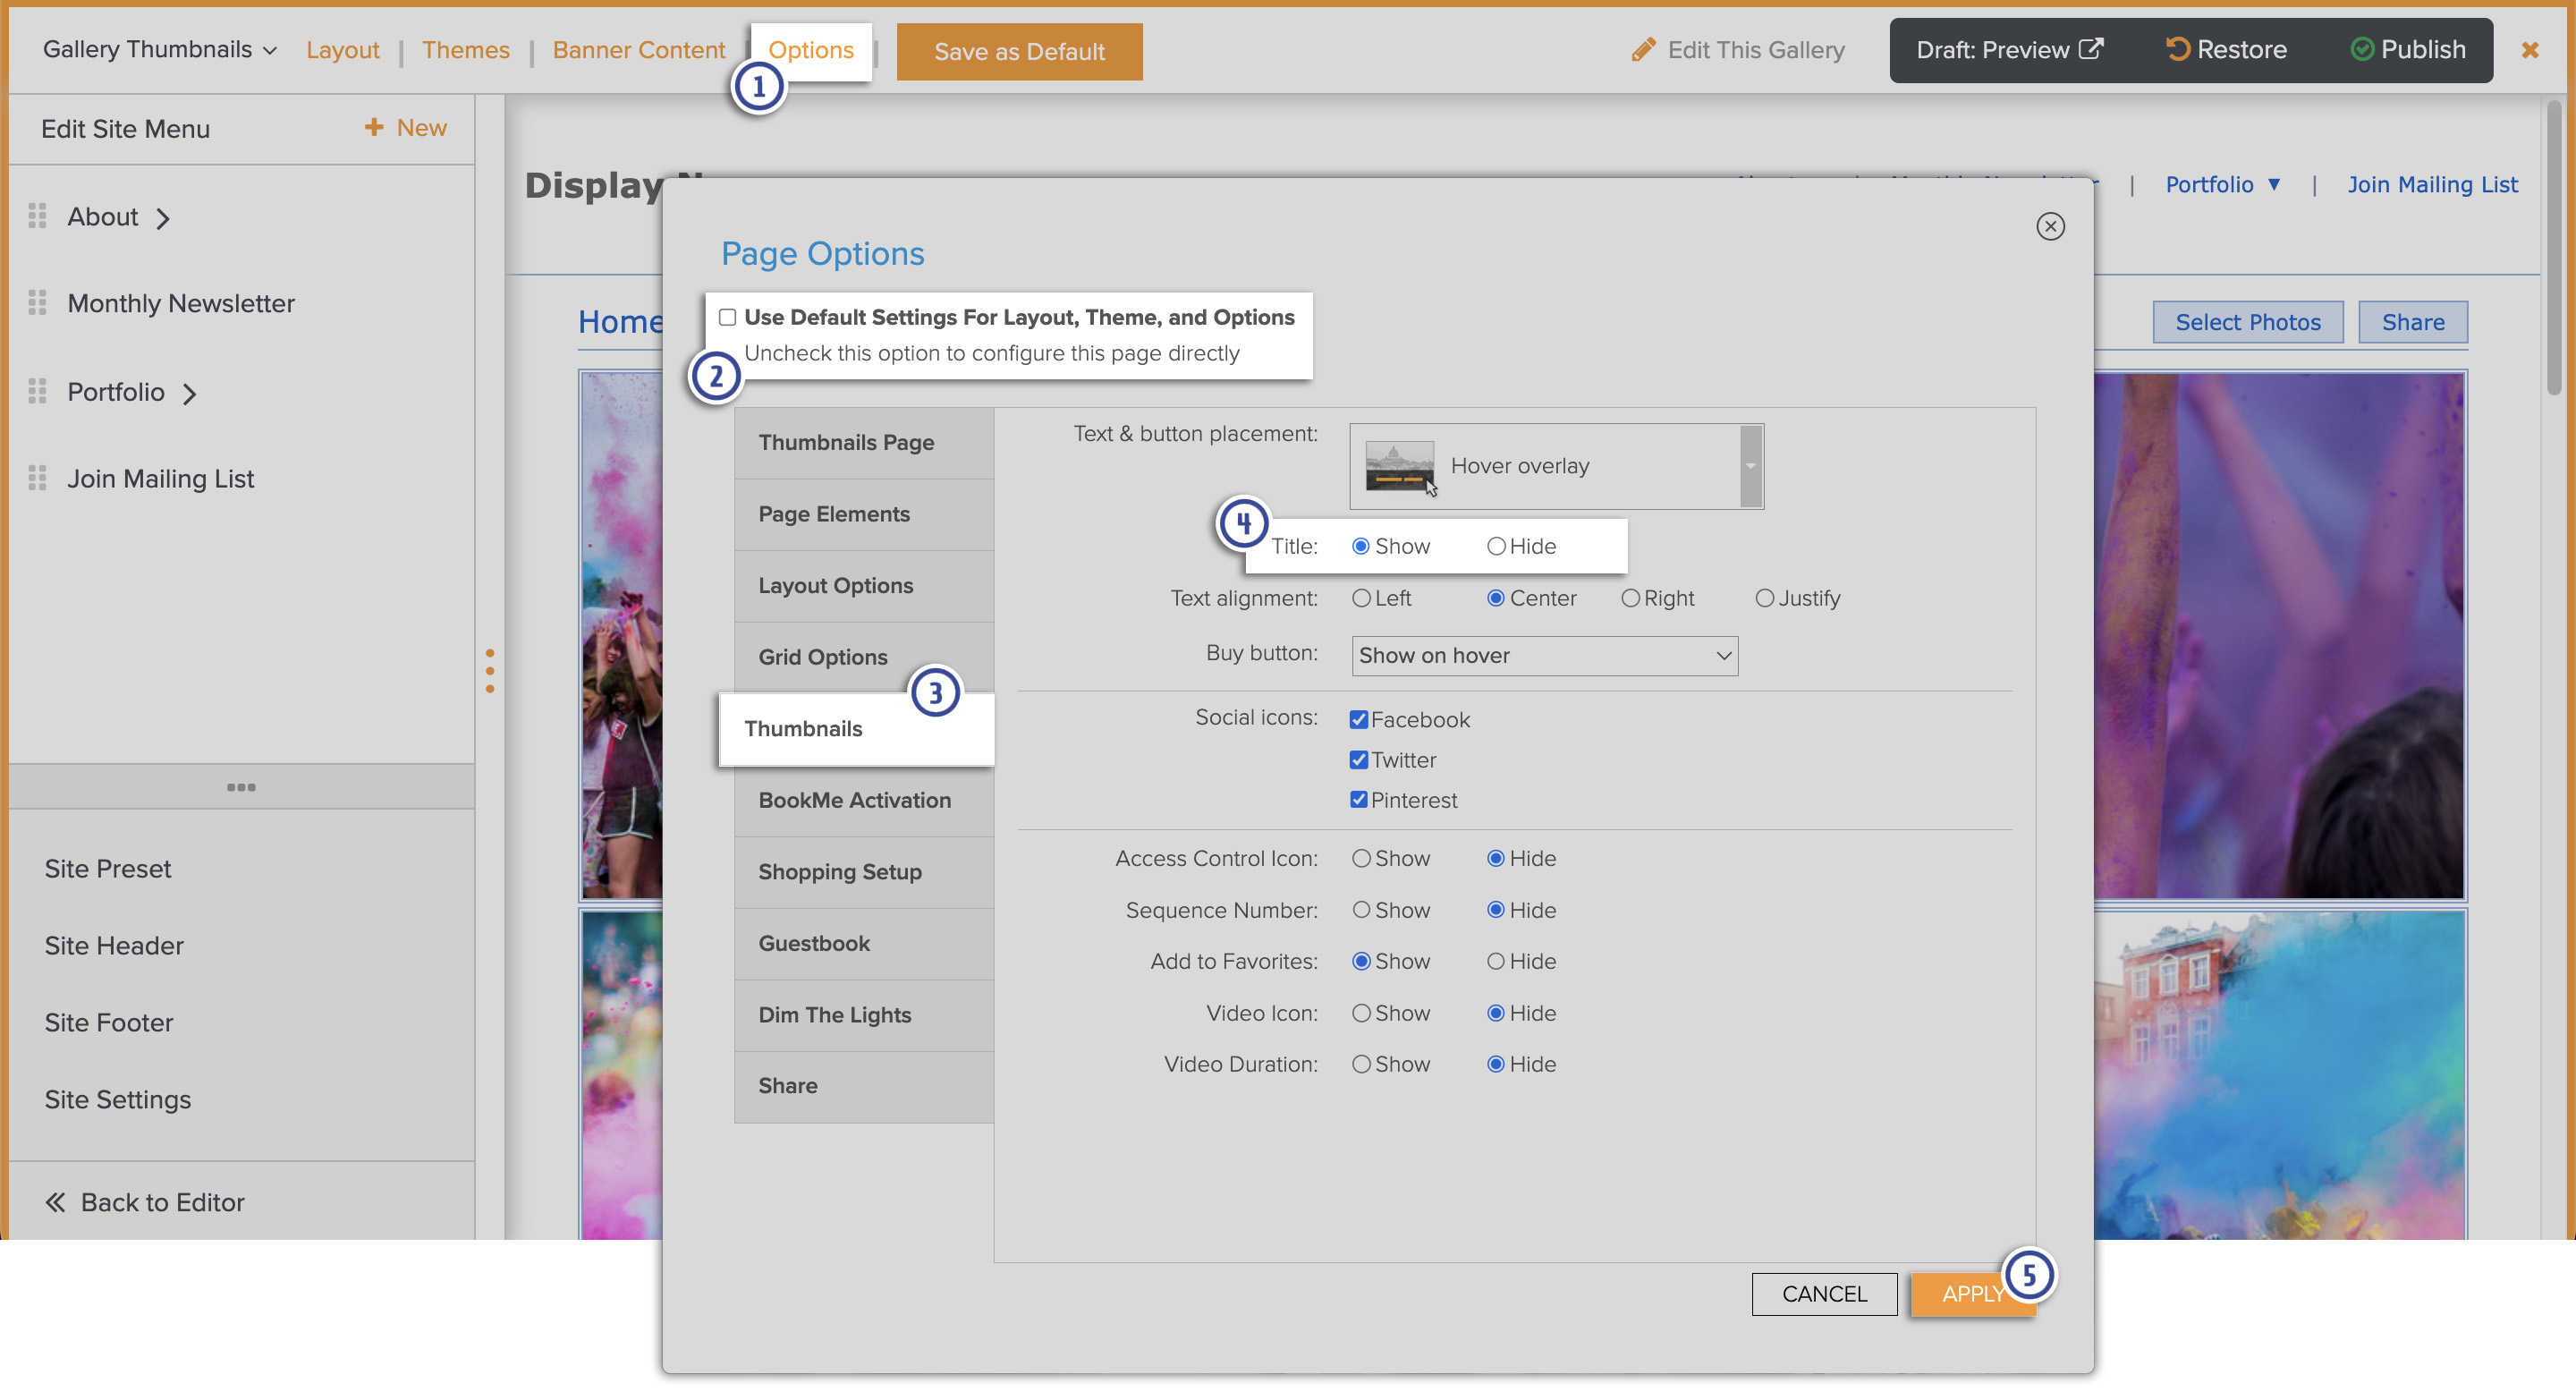
- In Customize Website View, go to Options. The Options panel will appear.
- Uncheck Use Default Settings For Layout, Theme, and Options if necessary.
- Go to the Thumbnails tab.
- Set Title to Show.
- Click on Apply.
Click Save as Default if you would like this same set of settings to apply to all other galleries that use default settings. This will also apply this gallery's settings to all new galleries.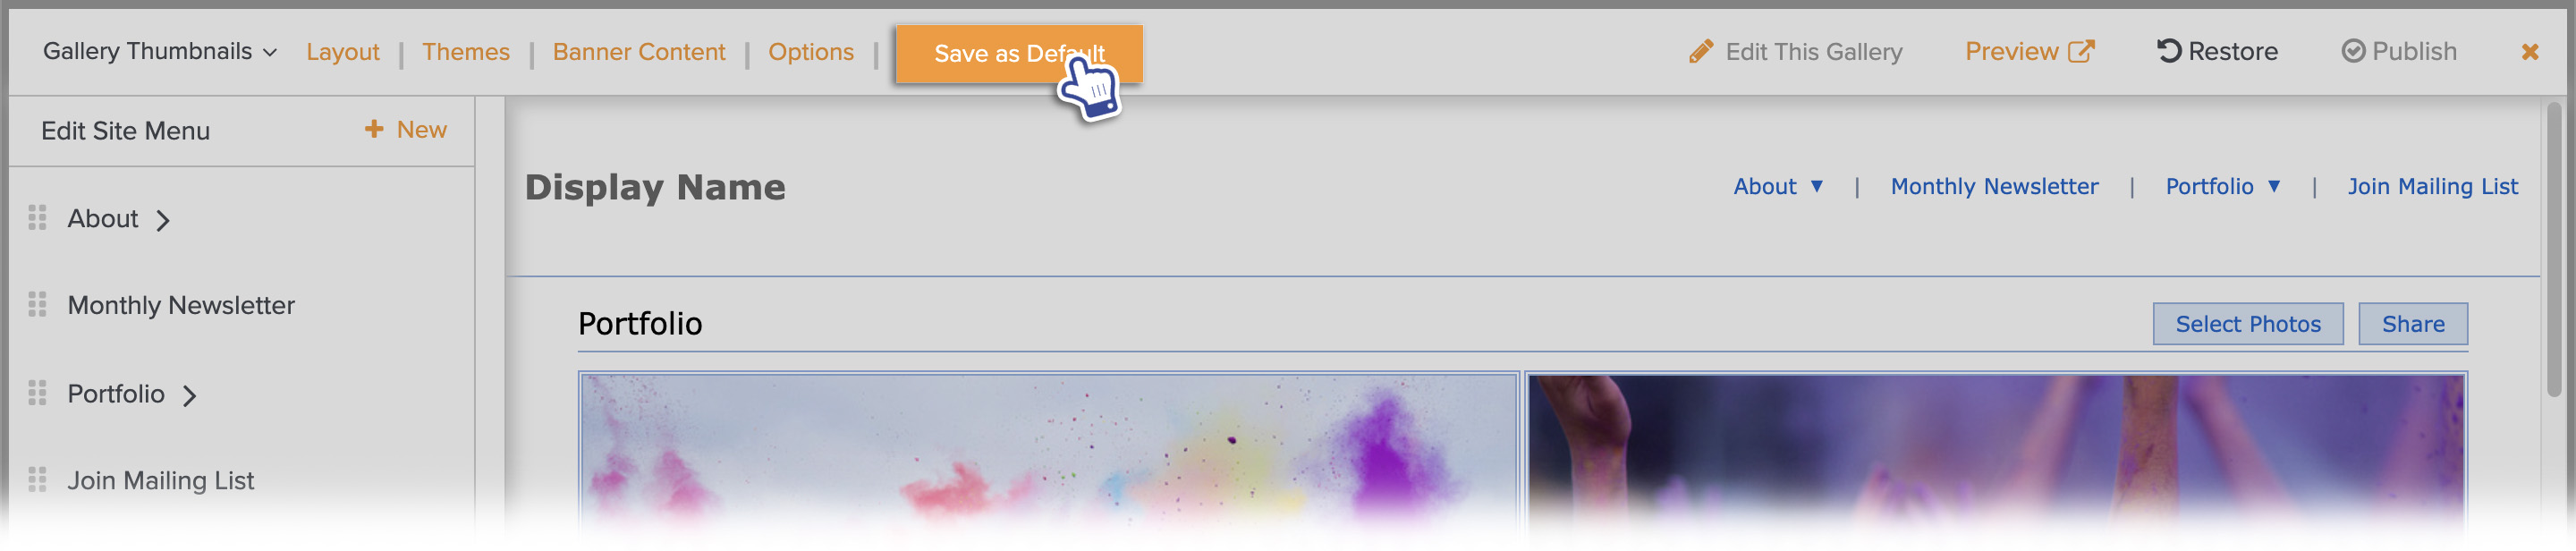
Click Publish before exiting Customize Website View to make those changes live on your site.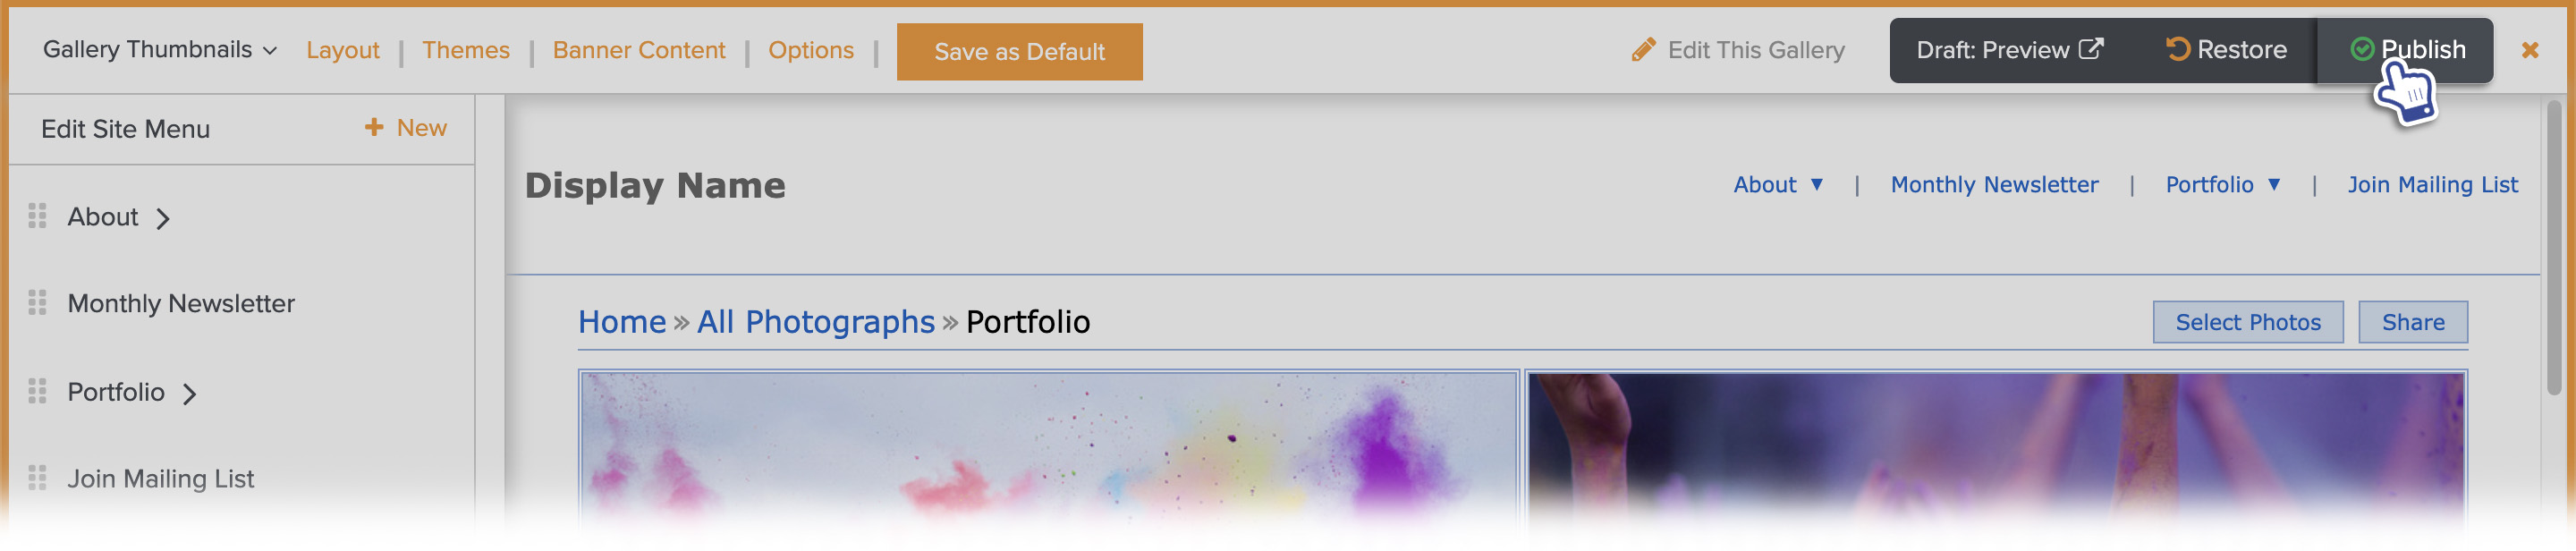
New Photos Page: Showing Image Filenames by using them as Image Titles
The filenames of your photos are not displayed along with the photos. If you would like the filename to be displayed, you can do so by following these two steps:
- Edit the Titles of the Images with Their Filenames
- Display the Images' Titles in the Gallery Thumbnails Pages
Edit the Titles of the Images with Their Filenames
- In your Account, go to Photos.
- In the Organizer on the left side, click to select the gallery containing the photograph you would like to edit. Thumbnails from the gallery will load in the Main Area and the title of the gallery will display at the top.
- In the top of the Main Area, click All to select all of the photos in the gallery. The thumbnails will become highlighted.
- Click Details in the in the center area above the thumbnails
- Below the Title field, check the box for Copy from file name.
- Click Save. The new title will be updated in the Main Area as well as in the Details of each photo highlighted
If you wish to use file names as a default setting for all uploaded photos you can set that up in your account preferences.
Using original file names as a default setting
- In your account, click hover over your username and click on Account
- Choose Upload Settings from the menu on the left side of the page.
- Check the box for Automatically copy file names to photo Titles.
- Click Save to apply. All future photos you upload going forward will have original file names applied as the title unless you decide to manually edit them. This does not work retroactively for photos that have already been uploaded to your account.
Displaying the Titles
The titles are automatically displayed in Photo Pages and in the Quick Shop page.
In gallery thumbnails pages, the photographer has the option to show or hide the titles on that page.
The option to Show or Hide the Titles can be found in Options when viewing the gallery thumbnails page in Customize Website View.
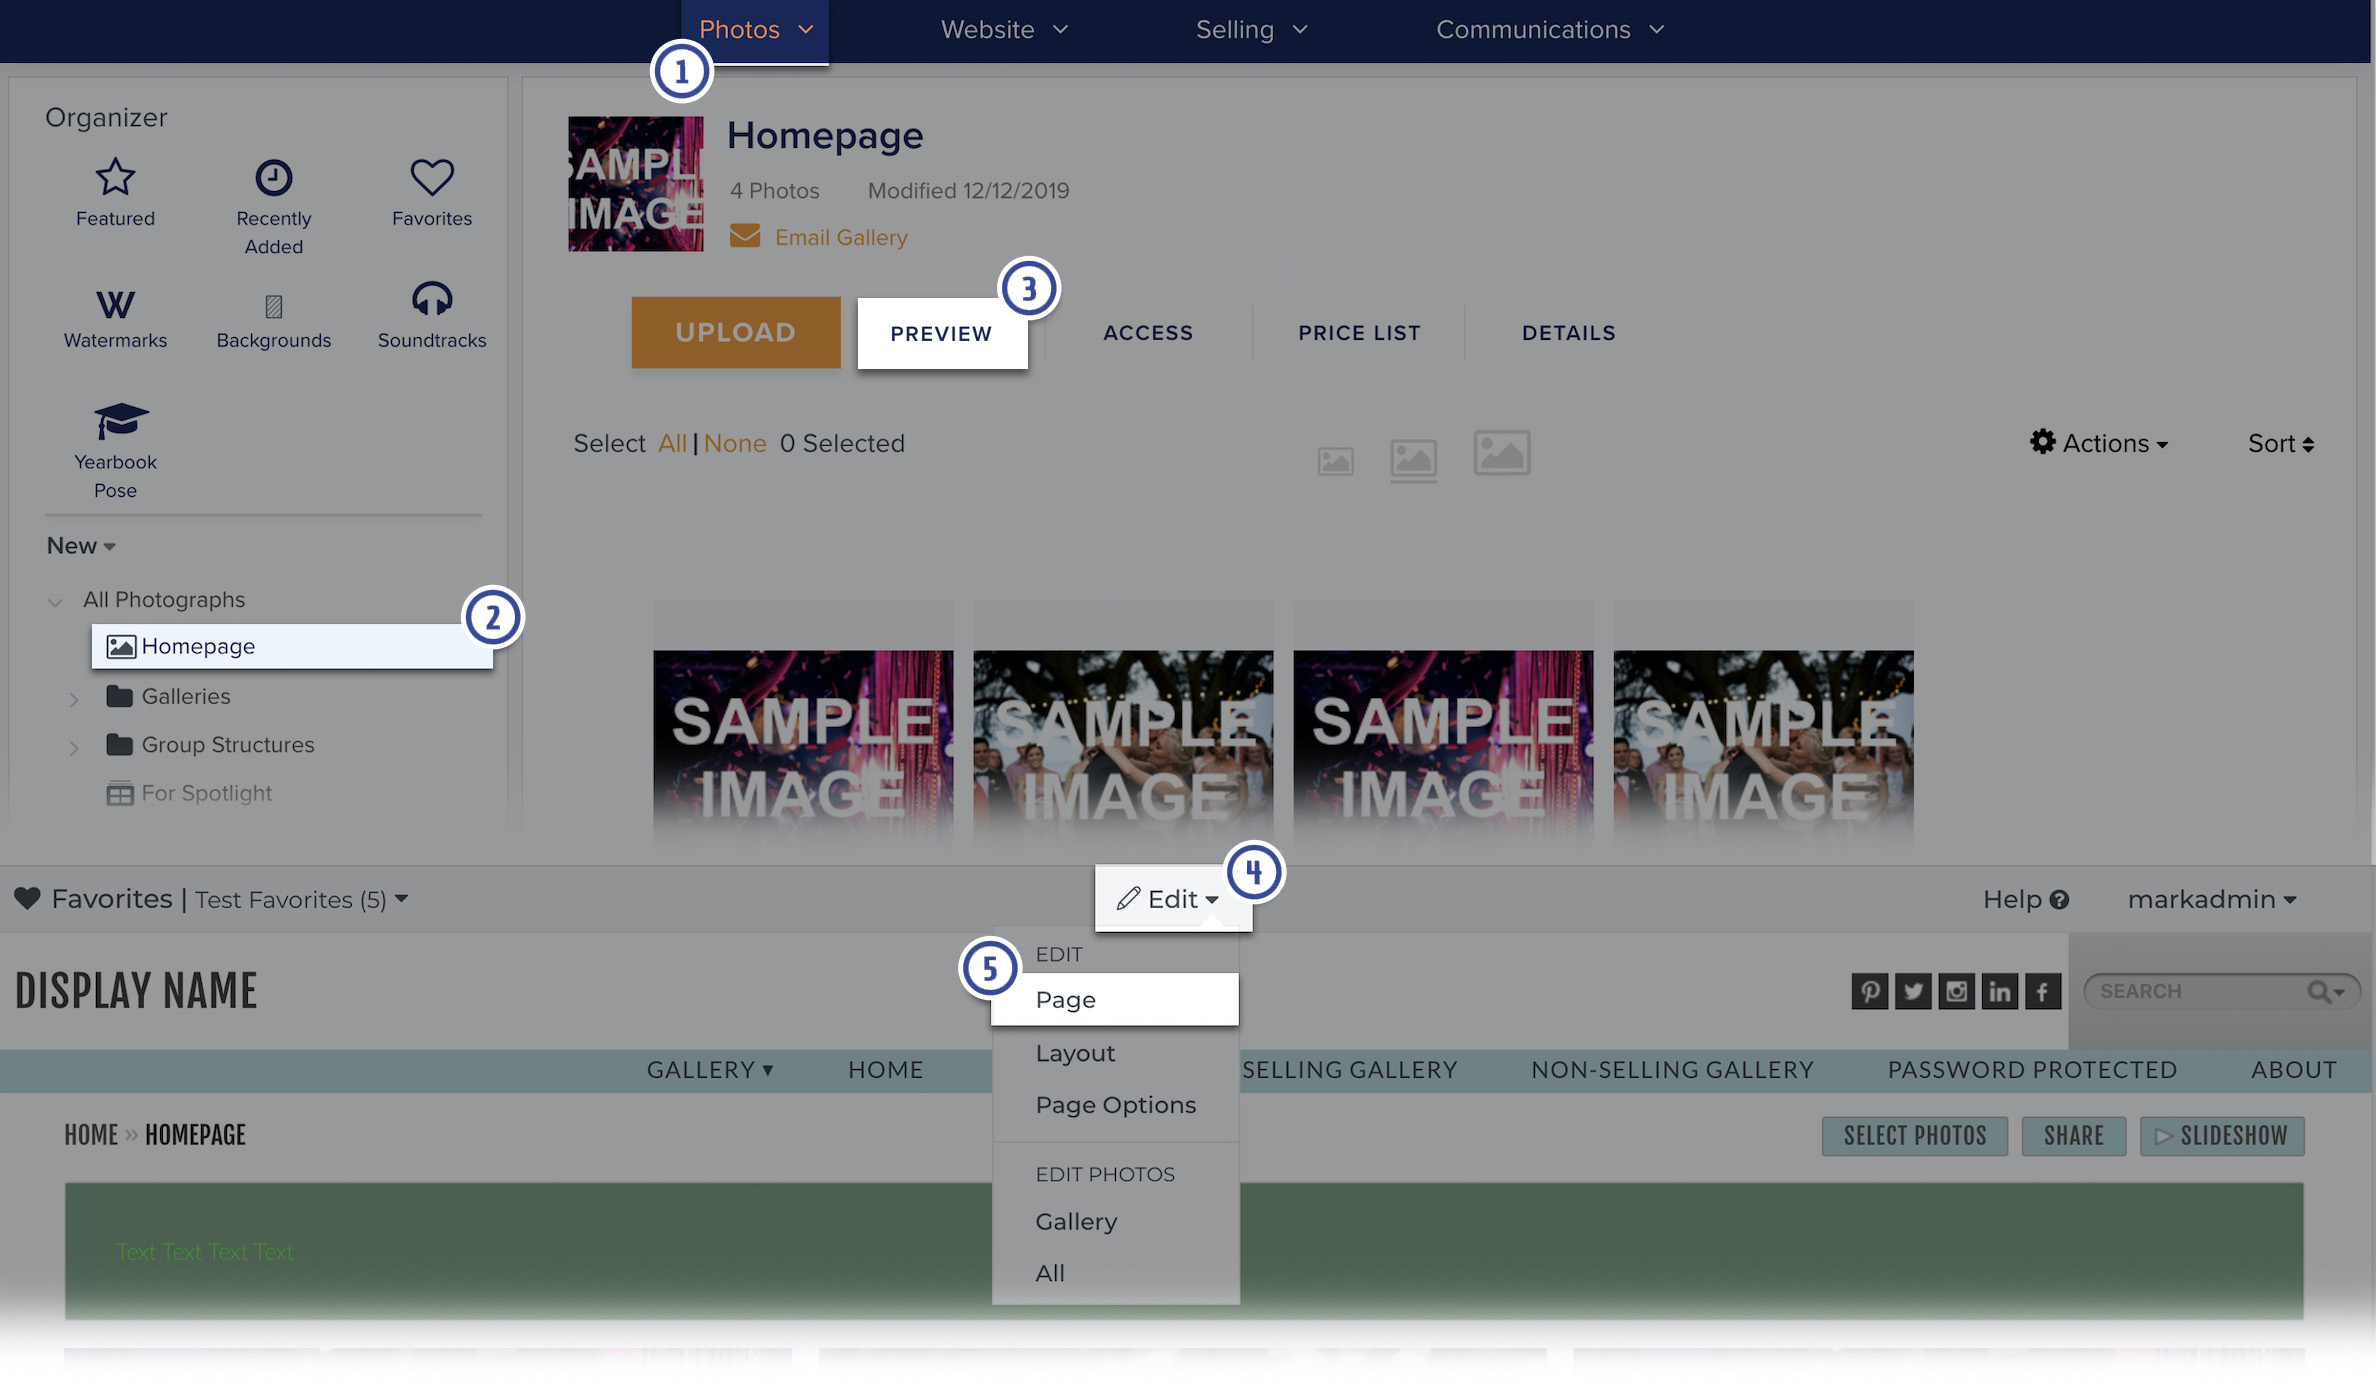
- In your account, go to Photos.
- Navigate to the desired Gallery or Collection under the Organizer.
- Click on Preview
- In the Preview of the Gallery, click on Edit in the top center of the page
- Choose Page from the dropdown that appears
The page will refresh with the Customize view of the Gallery you selected, make sure that Gallery Thumbnails appears in the top left corner, confirming that you are in the customization mode of the correct page.
- In Customize Website View, go to Options. The Options panel will appear.
- Uncheck Use Default Settings For Layout, Theme, and Options if necessary.
- Go to the Thumbnails tab.
- Set Title to Show.
- Click on Apply.
Click Save as Default if you would like this same set of settings to apply to all other galleries that use default settings. This will also apply this gallery's settings to all new galleries.
Click Publish before exiting Customize Website View to make those changes live on your site.