Included with your Zenfolio account is the ability to send out email invitations to your clients.
You can send emails inviting them to view a specific gallery, group or collection. And you can edit the contents of the email sent to your clients.
Please note that this is not the same as a general use email inbox such as gmail, Yahoo mail or Hotmail. This does not provide an email inbox for receiving emails.
Also this does not provide a custom email address based on your custom domain. For such an email address and service, you will need to contact a domain registrar or host.
What does your Account look like?
Original Photos Page: Inviting Clients to your Site via Email
To send an invitation email to view a specific gallery, collection, or group
Important Note: Before creating the email, please confirm that the group or gallery is open for visitors to view and is not access-protected. If it is password-protected, do not forget to include the password in the invitation.
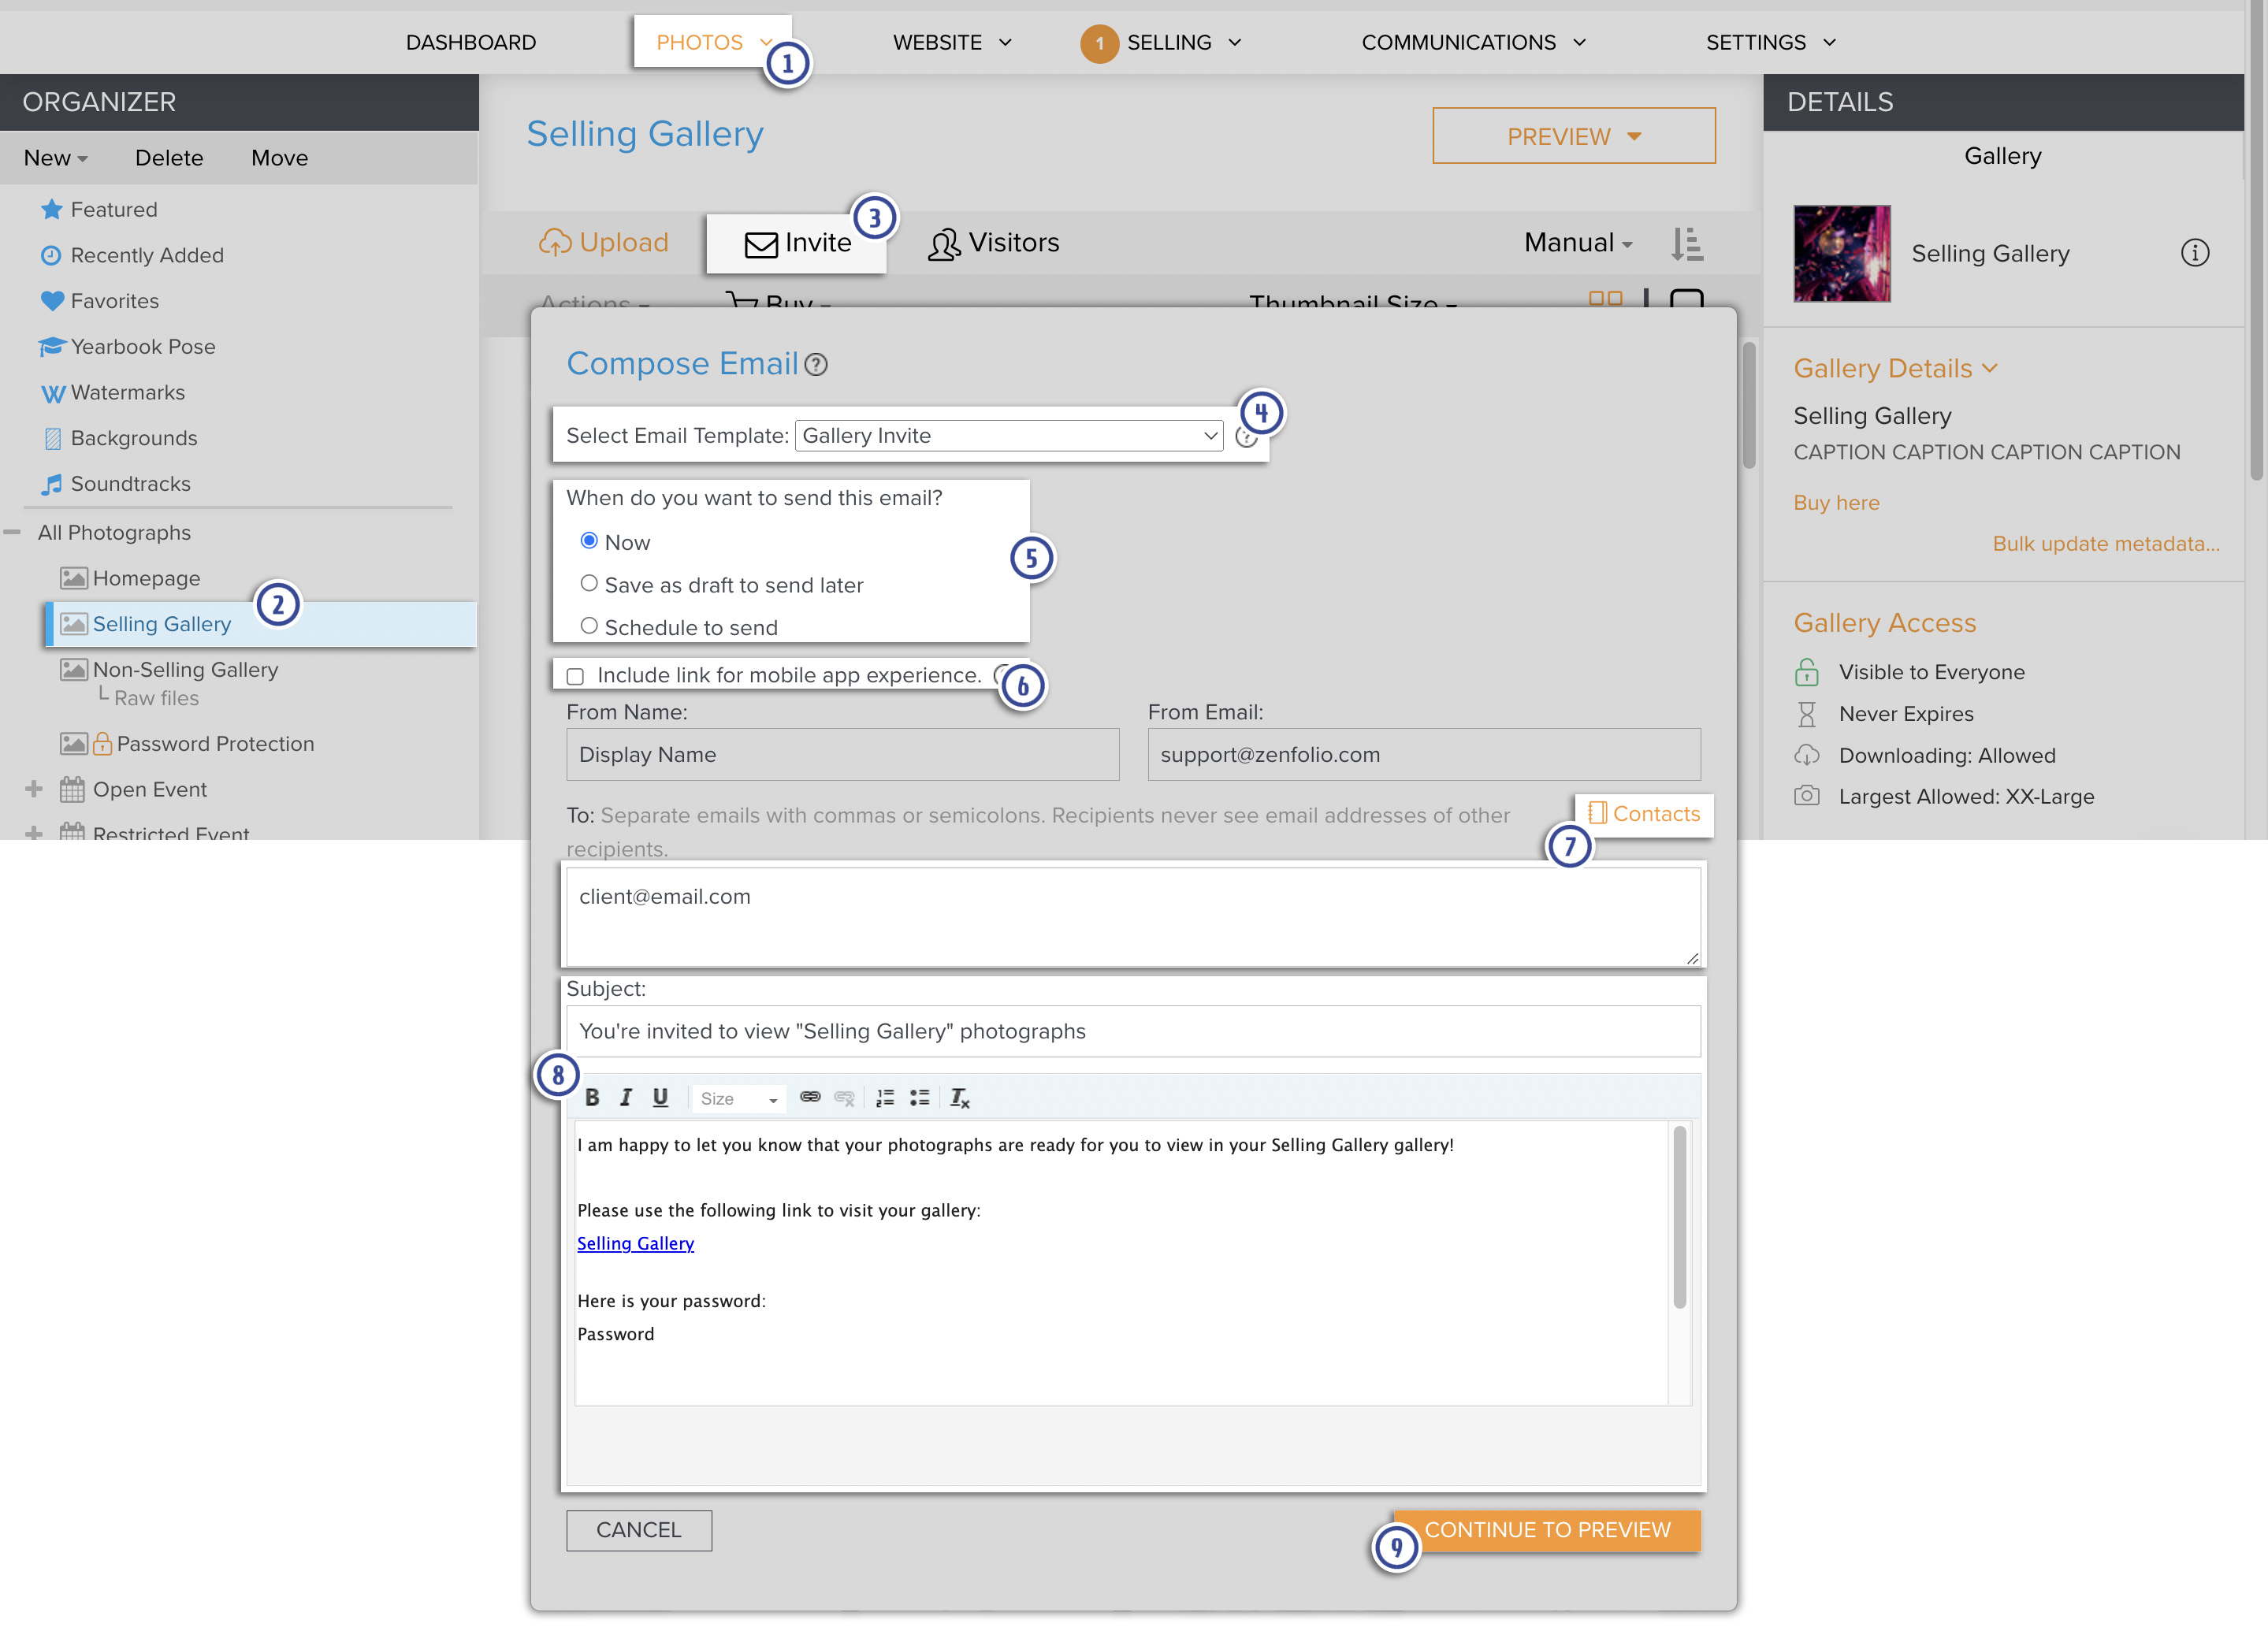
- In the Dashboard, go to Photos.
- Click to select the gallery, group or collection in the Organizer or double-click it in the Main Area to open. Thumbnails from the gallery will load in the Main Area and the gallery title will display at the top.
- Click Invite in the Top Menu. A Compose Email window will load.
- Use the Select Email Template to choose from your custom email templates.
Please note that this feature is only displayed for Pro and Advanced plan subscribers.. - You can choose to send out the email as soon as it's completed or you can set it so it is sent at a later time.
- Check this box to include the link for displaying the photos in the Photo Moments app. Not available for Private groups and galleries.
- In the To window, add emails separated by commas or semicolons. You can also click Contacts to select from your Contacts List.
- Edit the Subject and the Body of your email as needed. Click here for more details on the Text Box Formatting Tools.
- You can preview what the invitation will look like to your recipients before sending by clicking on Continue to Preview. Doing this will load the Email Preview Screen.
On the Email Preview Screen, you can:
- Choose to apply or not apply the same theme applied to the Group, Gallery or Collection.
- Include a link to the gallery and preview images from images in the gallery.
- Send yourself a copy of the email.
- Send the Email when you're ready.
The appearance of an invitation to view a group will only feature the assigned cover thumbnail image.
Please also see this tutorial video as it goes over how to invite clients via email:
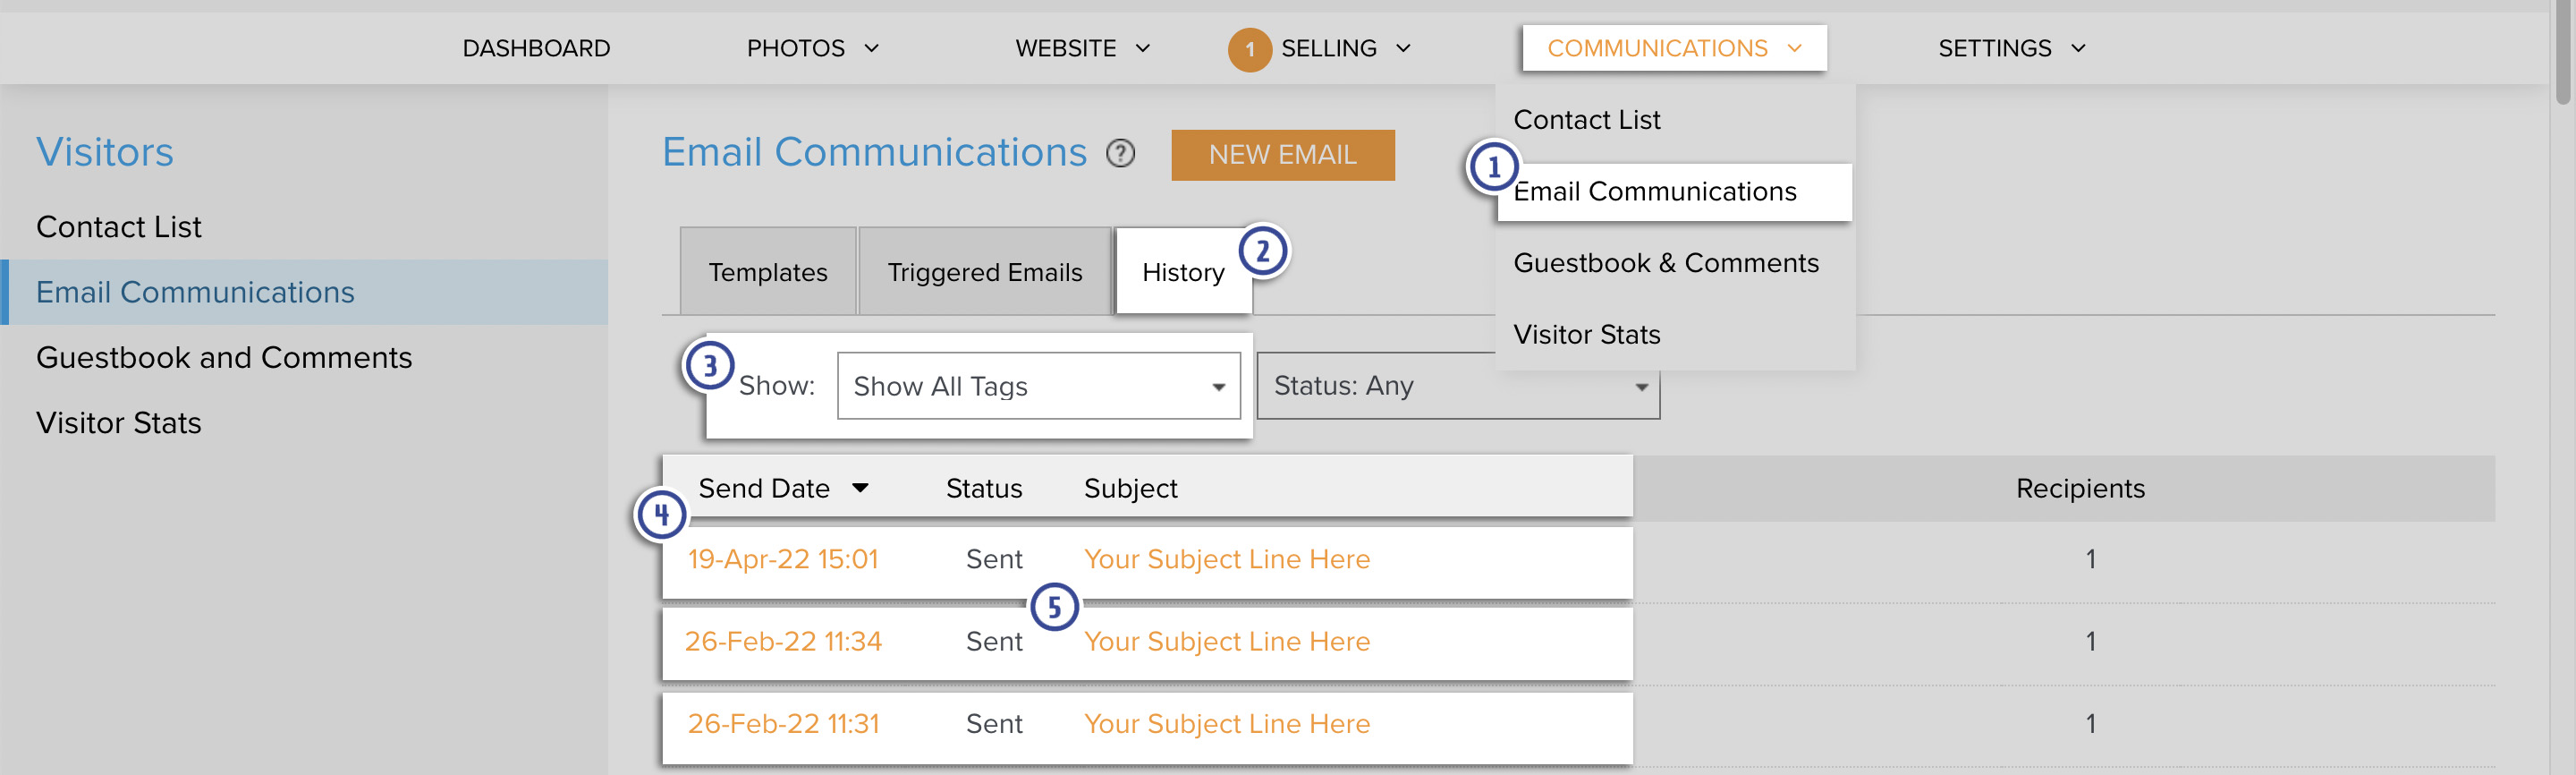
View Previously Sent Invite Emails
Previously sent invite emails are stored in the History tab of the Email Communications page.
- Hover the mouse pointer over Communications, a menu will appear. Click on Email Communications in that menu.
- Click on the History tab.
- Use the Tag and Status drop down menus to limit the emails displayed.
- Click on the column headings to sort the emails by the desired sorting method. Click the same heading again to change the order from Ascending to Descending and vice versa.
- Click the Send Date or the Subject of the email you would like to view.
New Photos Page: Inviting Clients to your Site via Email
To send an invitation email to view a specific gallery, collection, or group
Important Note: Before creating the email, please confirm that the group or gallery is open for visitors to view and is not access-protected. If it is password-protected, do not forget to include the password in the invitation.
- In you account, go to Photos.
- Click to select the gallery, group or collection in the Organizer or double-click on the thumbnail image of the item you want to open in the Main Area.
- Click Email Gallery, Email Group, Email Collection, etc. towards of the top of the page. A Compose Email window will load.
- Use the Select Email Template to choose from your custom email templates.
Please note that this feature is only displayed for Pro and Advanced plan subscribers.. - You can choose to send out the email as soon as it's completed or you can set it so it is sent at a later time.
- Check this box to include the link for displaying the photos in the Photo Moments app. Not available for Private groups and galleries.
- In the To window, add emails separated by commas or semicolons. You can also click Contacts to select from your Contacts List.
- Edit the Subject and the Body of your email as needed. Click here for more details on the Text Box Formatting Tools.
- You can preview what the invitation will look like to your recipients before sending by clicking on Continue to Preview. Doing this will load the Email Preview Screen.
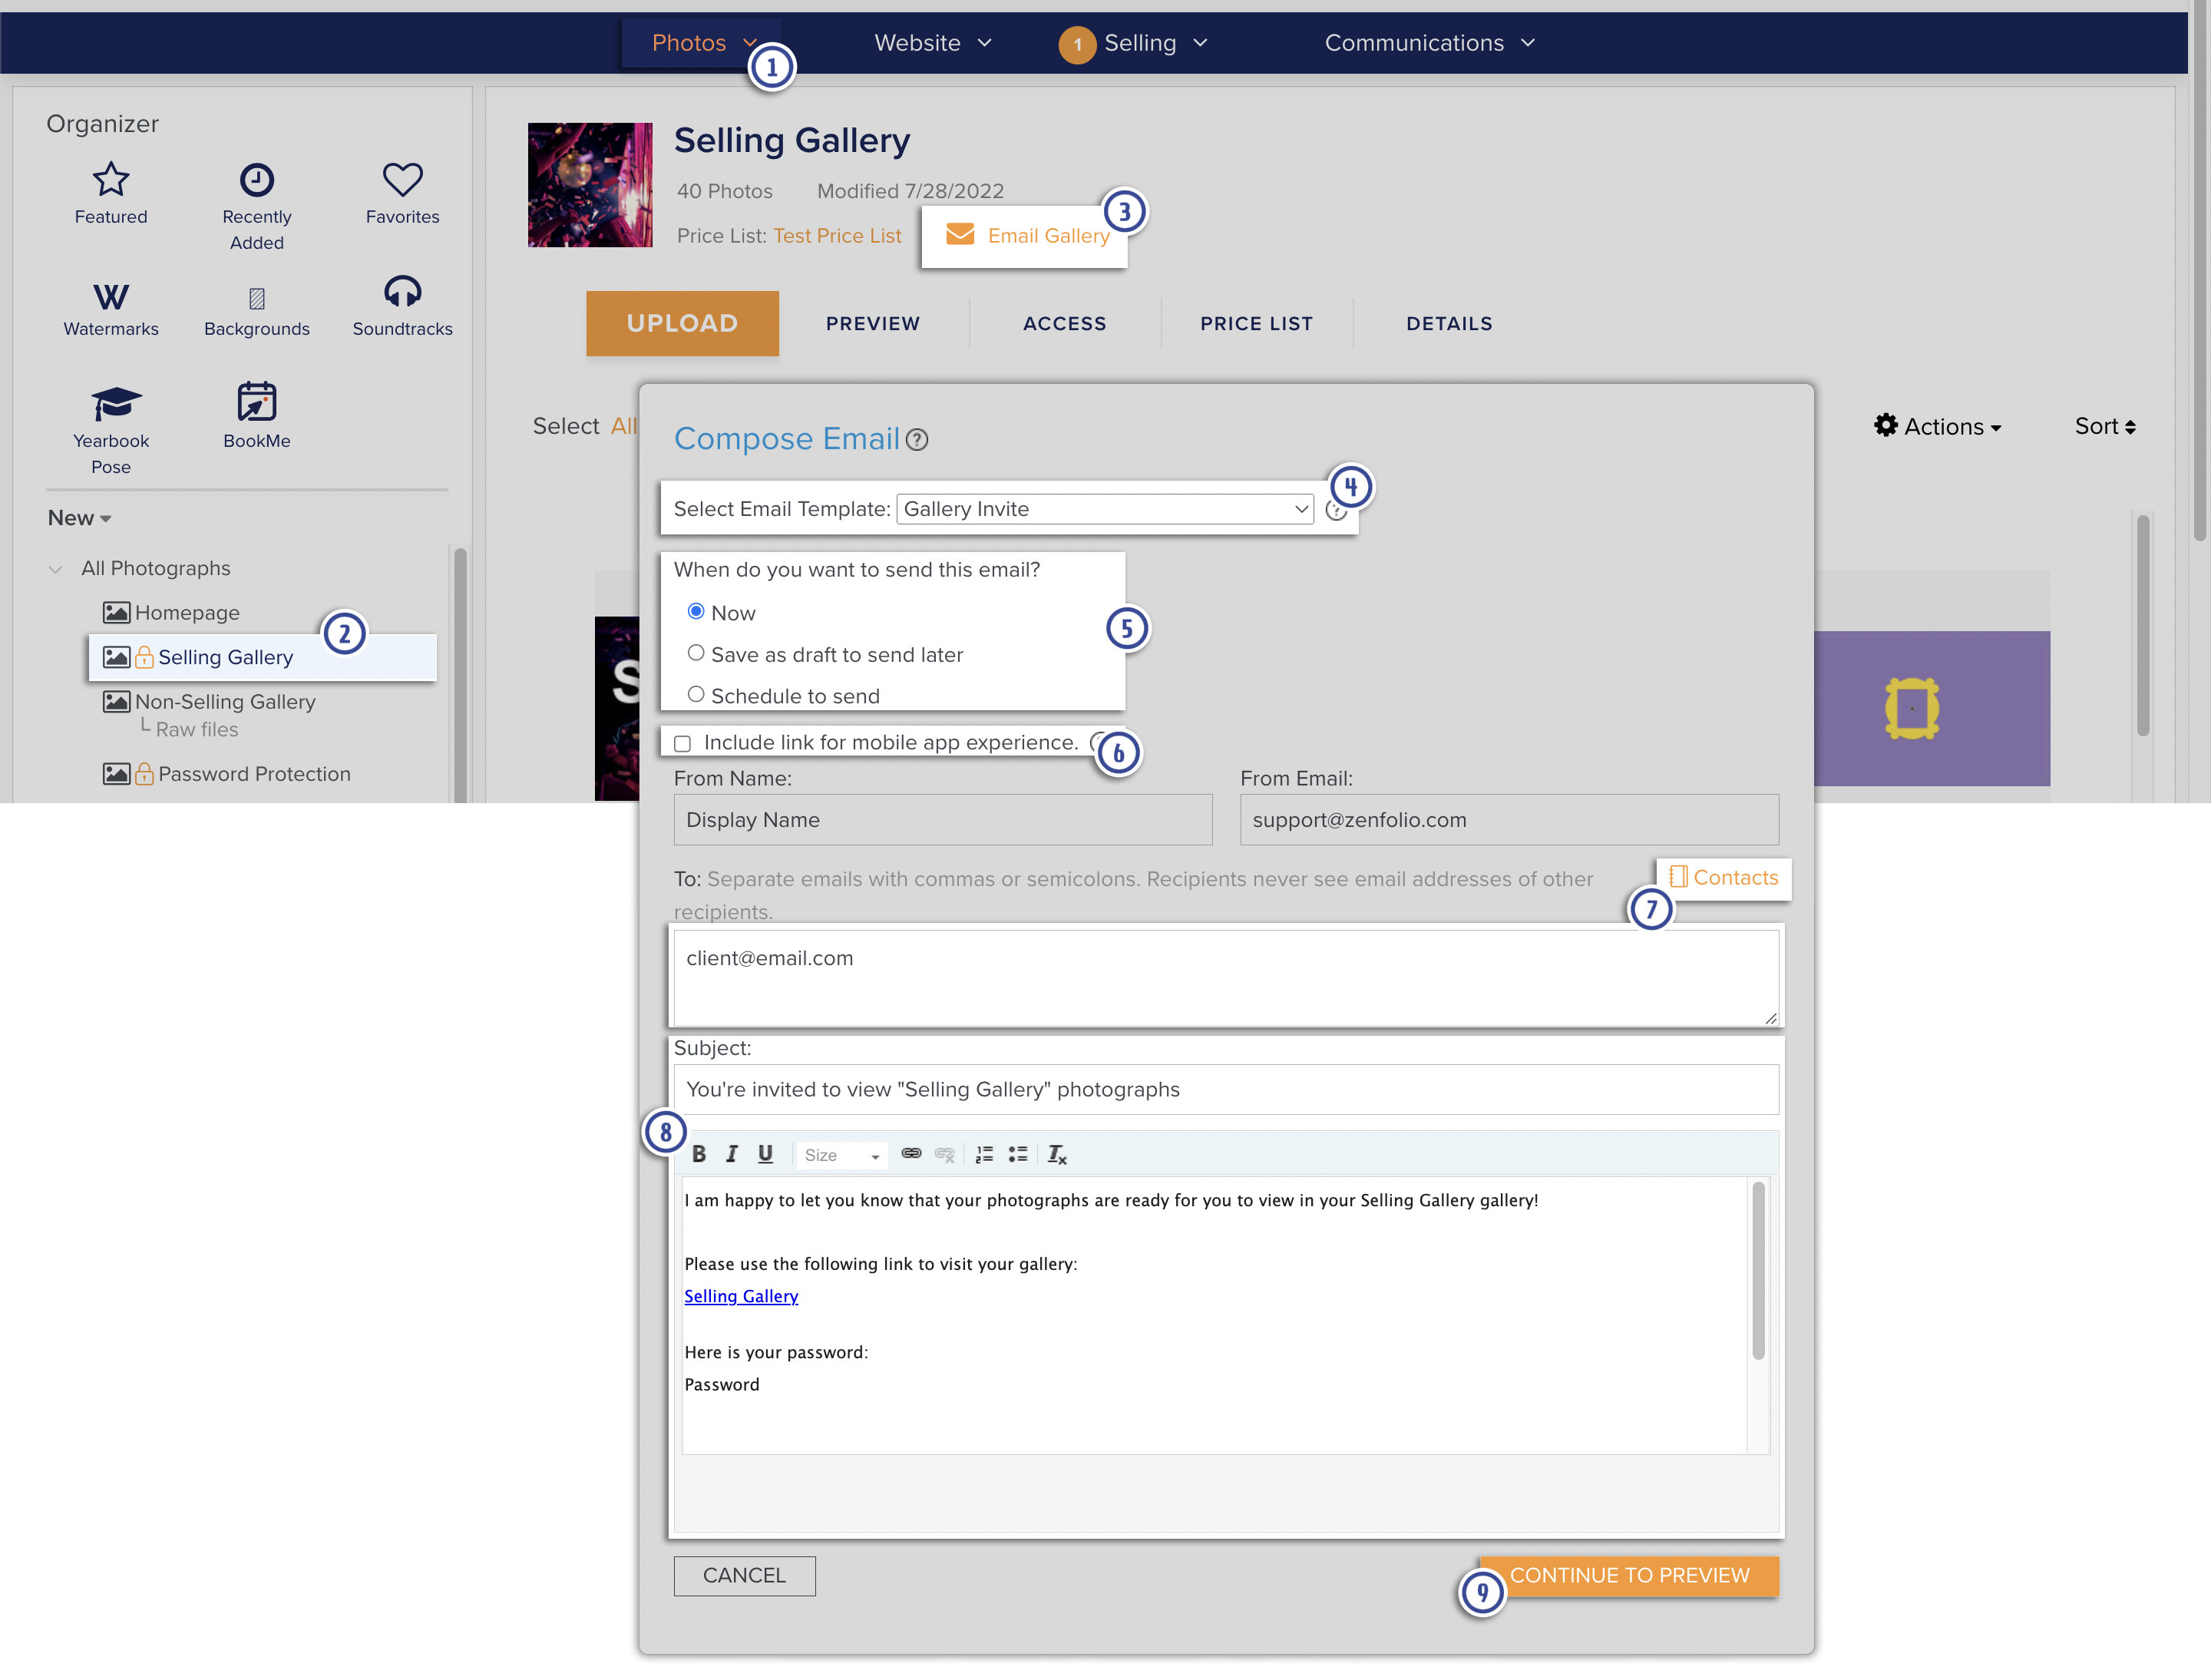
On the Email Preview Screen, you can:
- Choose to apply or not apply the same theme applied to the Group, Gallery or Collection.
- Include a link to the gallery and preview images from images in the gallery.
- Send yourself a copy of the email.
- Send the Email when you're ready.
The appearance of an invitation to view a group will only feature the assigned cover thumbnail image.
View Previously Sent Invite Emails
Previously sent invite emails are stored in the History tab of the Email Communications page.
- Hover the mouse pointer over Communications, a menu will appear. Click on Email Communications in that menu.
- Click on the History tab.
- Use the Tag and Status drop down menus to limit the emails displayed.
- Click on the column headings to sort the emails by the desired sorting method. Click the same heading again to change the order from Ascending to Descending and vice versa.
- Click the Send Date or the Subject of the email you would like to view.