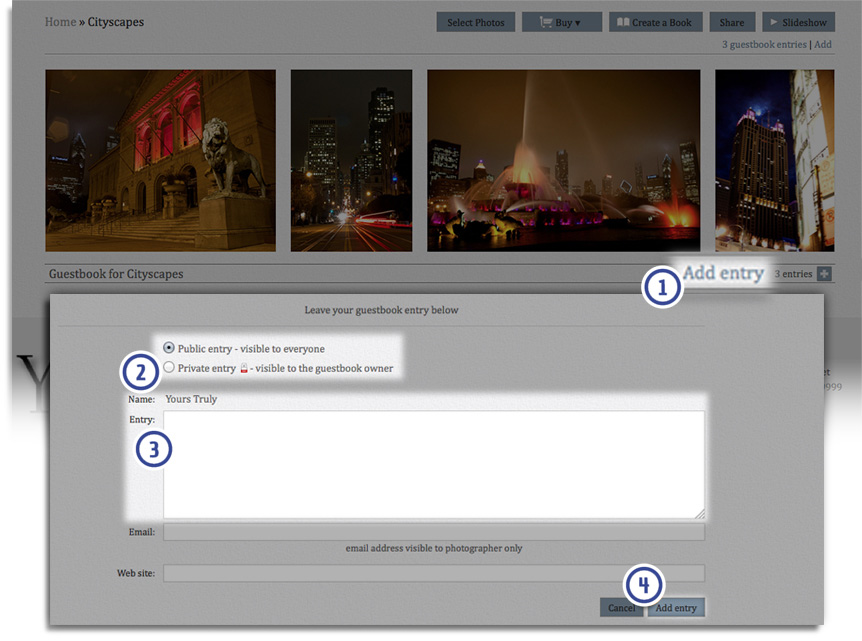
To Leave a Guestbook Entry
In Website View, navigate to the gallery, group or collection you would like to leave an entry for.
- Under the thumbnails at the bottom of the page, click Add Entry.
- If you want the entry to be public, click Public Entry. If you want the entry only to be viewed by the photographer, click Private Entry.
- Begin typing in the Entry field.
- When finished, click Add Entry.
To Leave a Comment
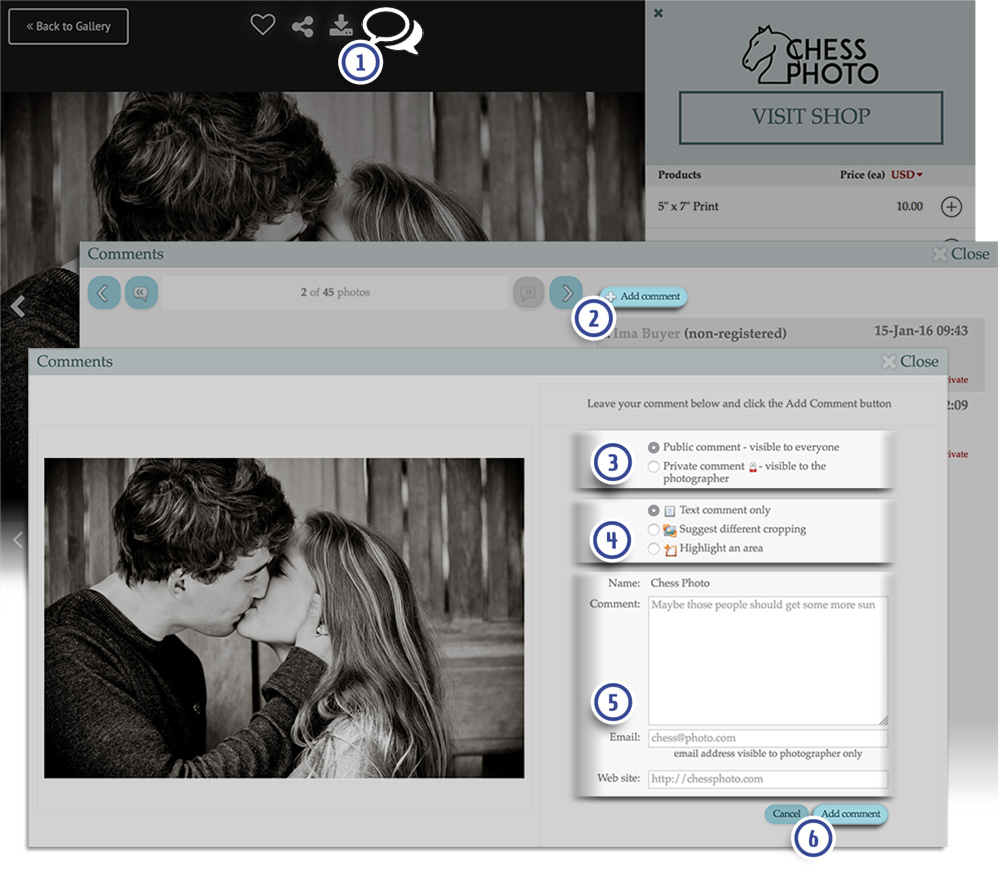
Here is how to leave a comment in a Quick Shop page:
- Click the Comments icon at the top of the page. The Comments window will appear.
- Click Add Comment.
- Choose Public Comment to leave a comment that can be seen by all visitors (subject to photographer approval).
Or choose Private Comment to leave a comment for just the photographer. - Choose whether or not you would like to leave a text only comment, suggest a cropping or highlight an area in the image.
- Enter your comment and your email address in the fields provided.
- Click Add Comment when the comment is complete.
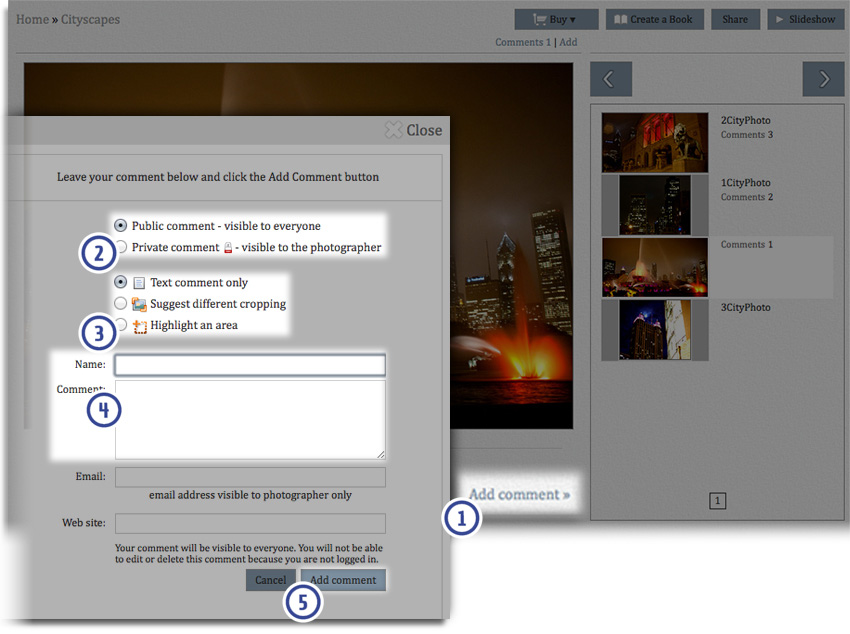
Here is how to leave a comment in a Photo Page:
- Beneath the photo, click Add Comment. A pop-up window will open.
- If you want the entry to be public, click Public Comment. If you want the entry only to be viewed by the photographer, click Private Comment.
- Choose Text Comment Only to leave a simple text comment.
- If you would like to suggest alternative cropping, select Suggest different cropping. A cropping tool will appear in the photo thumbnail. Click to drag the corners of the cropping tool until you are satisfied.
- If you would like to highlight a specific area in the photograph, select Highlight an area. Click and drag the tool over the photo until you have highlighted the desired area. You can do this multiple times until you are satisfied.
- In the Comment field, enter your comment.
- When finished, click Add Comment.