Your website's blog is comprised of the Summary Page and the Blog Post Page. The Summary Page is the main page of the blog and displays the the various blog posts. The Blog Post Page is used to display each individual blog post.
The look and feel of the blog can be customized through Customize Website View.
Access Blog Customize Website View
- In your account, hover the mouse pointer over Website
- Then click on Blog.
- Click Preview and Configure Blog.

Customize Website View Customization Options
Once in Customize Website View, various options will be displayed for customizing the looks and presentation of your blog.
- The Blog consists of the Blog Summary Page and the Blog Post Page. Both page types can be customize by switching between both page using the menu on the top left corner.
- Layout controls the placement of elements on the page. Apply different layouts to make the biggest impact on the way your blog is displayed.
- Themes control the colors and fonts used in the blog. You also have the option of creating a custom theme and applying it to the blog summary page or the blog post pages.
- Banner Content is used to select the content you would like displayed in the blog banner. The option to show or hide the banner can be found in Options while viewing the Blog Post Page view in Customize Website View.
- Options will display various options for the Layout selected. Here you can choose to Show or Hide various elements that are displayed on the page.
- Click Publish once you're satisfied with your changes and would like to apply the changes to your live site.

Modifying the Blog Welcome
An optional welcome message may appear at the top of your blog. This is used to tell visitors what your blog is about.
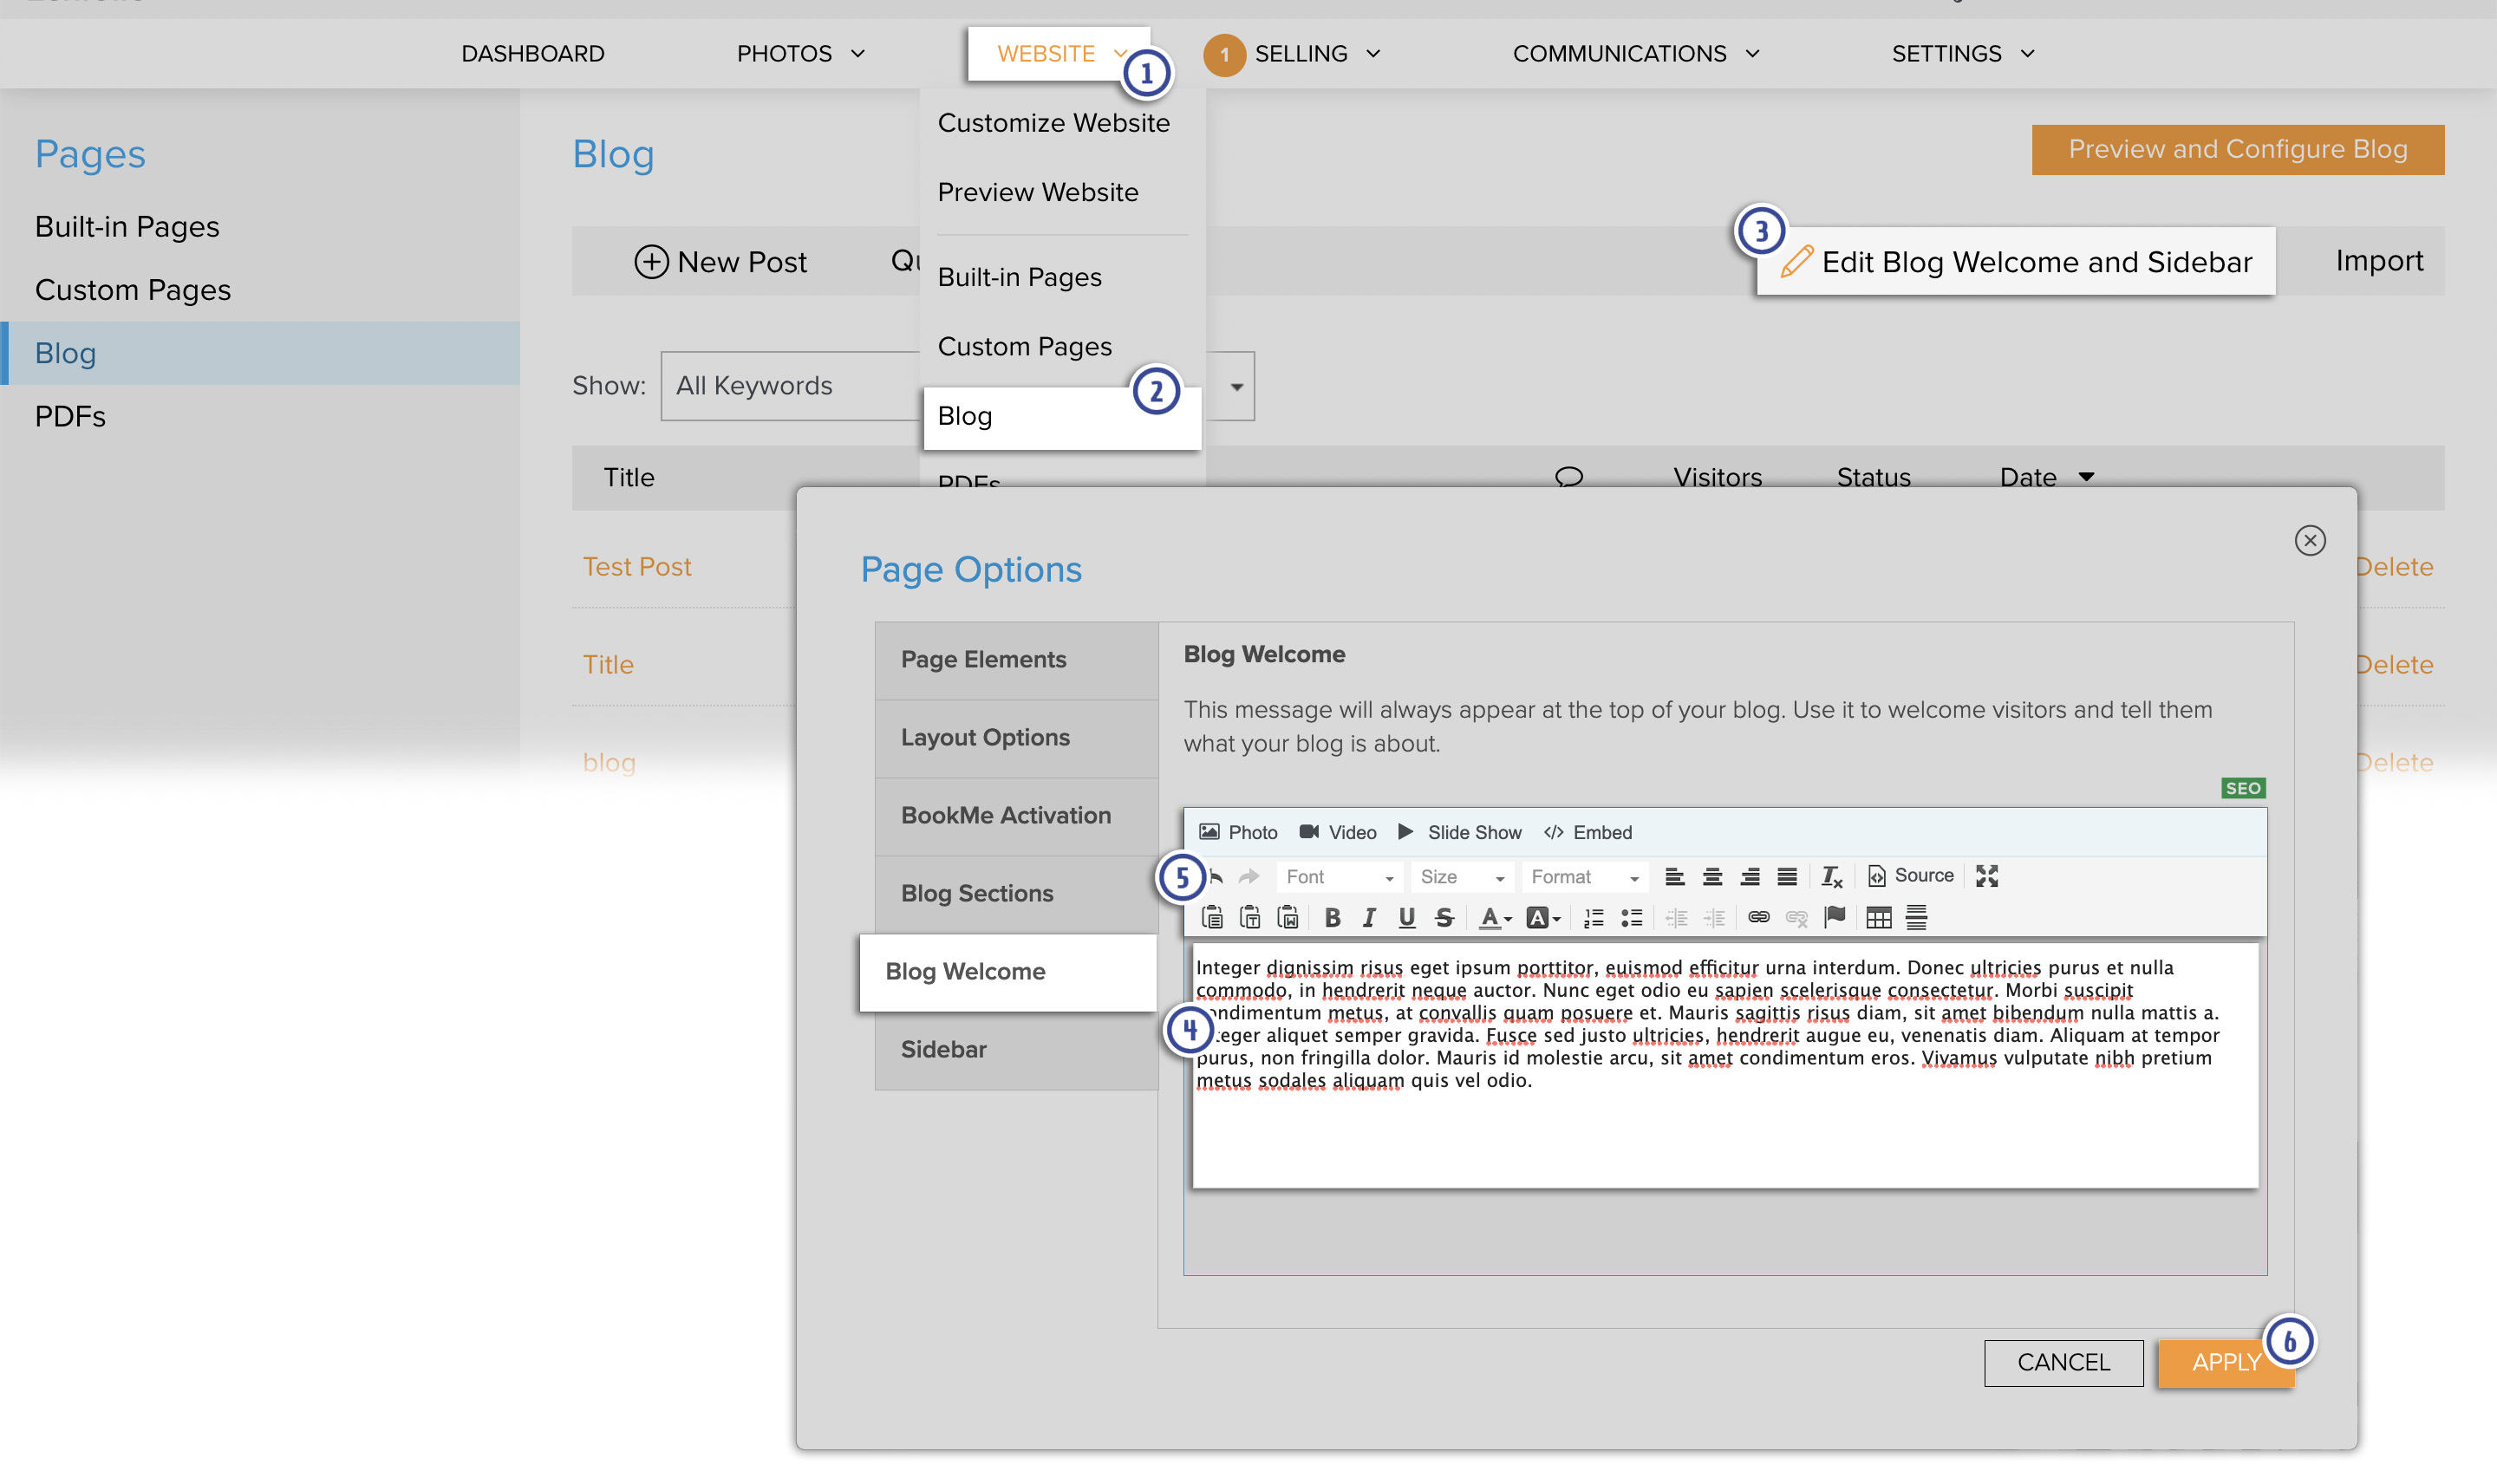
- In your account, hover the mouse pointer over Website.
- Then click on Blog.
- Click on Blog Welcome and Sidebar. The blog's Customize Website View will load and preload the Blog Welcome Message field.
- Enter your Blog Welcome message in the field provided.
- Use the tools in the formatting toolbar to format the text. This can also be used to add images, a video, a slideshow or embed HTML code.
- Click Apply to save the welcome message.
Click Publish before exiting Customize Website View to apply the new settings to your live site.
Modifying the Blog Sidebar
An optional section may appear on the sidebar of footer, depending on your layout. This is used to add an additional section of information.
- In your account, hover the mouse pointer over Website.
- Then click on Blog.
- Click on Blog Welcome and Sidebar. The blog's Customize Website View will load and preload the Blog Welcome Message field.
- Go to the Sidebar tab.
- Enter your Blog Sidebar message in the field provided.
- Use the tools in the formatting toolbar to format the text. This can also be used to add images, a video, a slideshow or embed HTML code.
- Click Apply to save the sidebar message.

Click Publish before exiting Customize Website View to apply the new settings to your live site.