
Through Zenfolio, photographers can offer a variety of photo book designs, sizes, papers and layout options to order custom press-printed photo books directly from their website.
With custom photos books, photographers' clients are able to choose from photos that they would like to have printed in the photo book. Using our custom designs and drag-and-drop tools makes it easy to create a beautiful custom photo book.
This guide covers how to design and order one of those Photo Books.
Please note that due to the variety of ways that photographers are able to customize their sites, some steps may differ a bit from the steps displayed here. Please contact Zenfolio Support if you have any questions about ordering photo books from a specific photographer's site.
Before you Start
Since Photo Books can take time to design and may take multiple visits to complete, it is recommended that a client account be created under the photographer's site. A client account allows you to add the incomplete photo book to the shopping cart, and then save the cart to the client account. Saved carts are stored permanently until the order is completed. Carts that are not saved to a client account are temporarily stored in the web browser for a short time. This means that any incomplete photo books that have not been ordered will be deleted when the cart expires.
Create a client account by visiting your photographer's site, and then click on the login link usually found at the bottom of their site. You can also create a client account by starting a new Favorites list, or by adding items to a cart and then clicking Register.
In regards to Favorites Lists, if the images are contained in multiple galleries, it is best to create a Favorites List and add all of the images from all of the galleries to the Favorites list. This will allow all of the images to be selectable and available to add to the photo book.
This guide shows all of the steps in creating a Favorites List.
Start the Photo Book Order
To start a Photo Book order, go to the gallery where the images are displayed.
- Click on the Buy button. A menu will appear.
- Click on Buy all photos in the menu.
Later, you will be able to select the specific photos in the gallery that you would like actually print on the Photo Book.
If product categories are displayed, click on the Photo Books category to display the Photo Book options.
The available Photo Book designs will be displayed. Use the menu on the left to filter the photo book options.
Click on the desired design to select it.

Photo Book Design Page Navigation
- You can use the drop down menu on the right to switch to a different product in the same product category.
- Use the options on the right to change the paper type used in the photo book and the number of pages in the book.
- Click Edit (or you can click Preview) to start customizing the photo book.

| Note: Once you get into the edit view of the Photo Book, it is highly recommended that you use the Add to Cart button to save the product to your shopping cart. This will allow you to save changes along the way. |
Changing Photos
Click on a page at the bottom of the book to change the photos that are to be printed on that page.
- After clicking on a Photo Book page, click on Change Photos above the book preview. The available photos will be displayed on the right side.
- Find the desired photo and drag and drop it into the photo book.

Note: Templated products, like Photo Books, will require the use of a computer to create the products with the selected photos. Those using mobile devices will be directed to use a computer for these type of products.
Selecting Photos from Favorites Lists
- Click on Change Photos.
- Click on the Favorites tab.
- Find the desired image and drag and drop the photo onto the book.

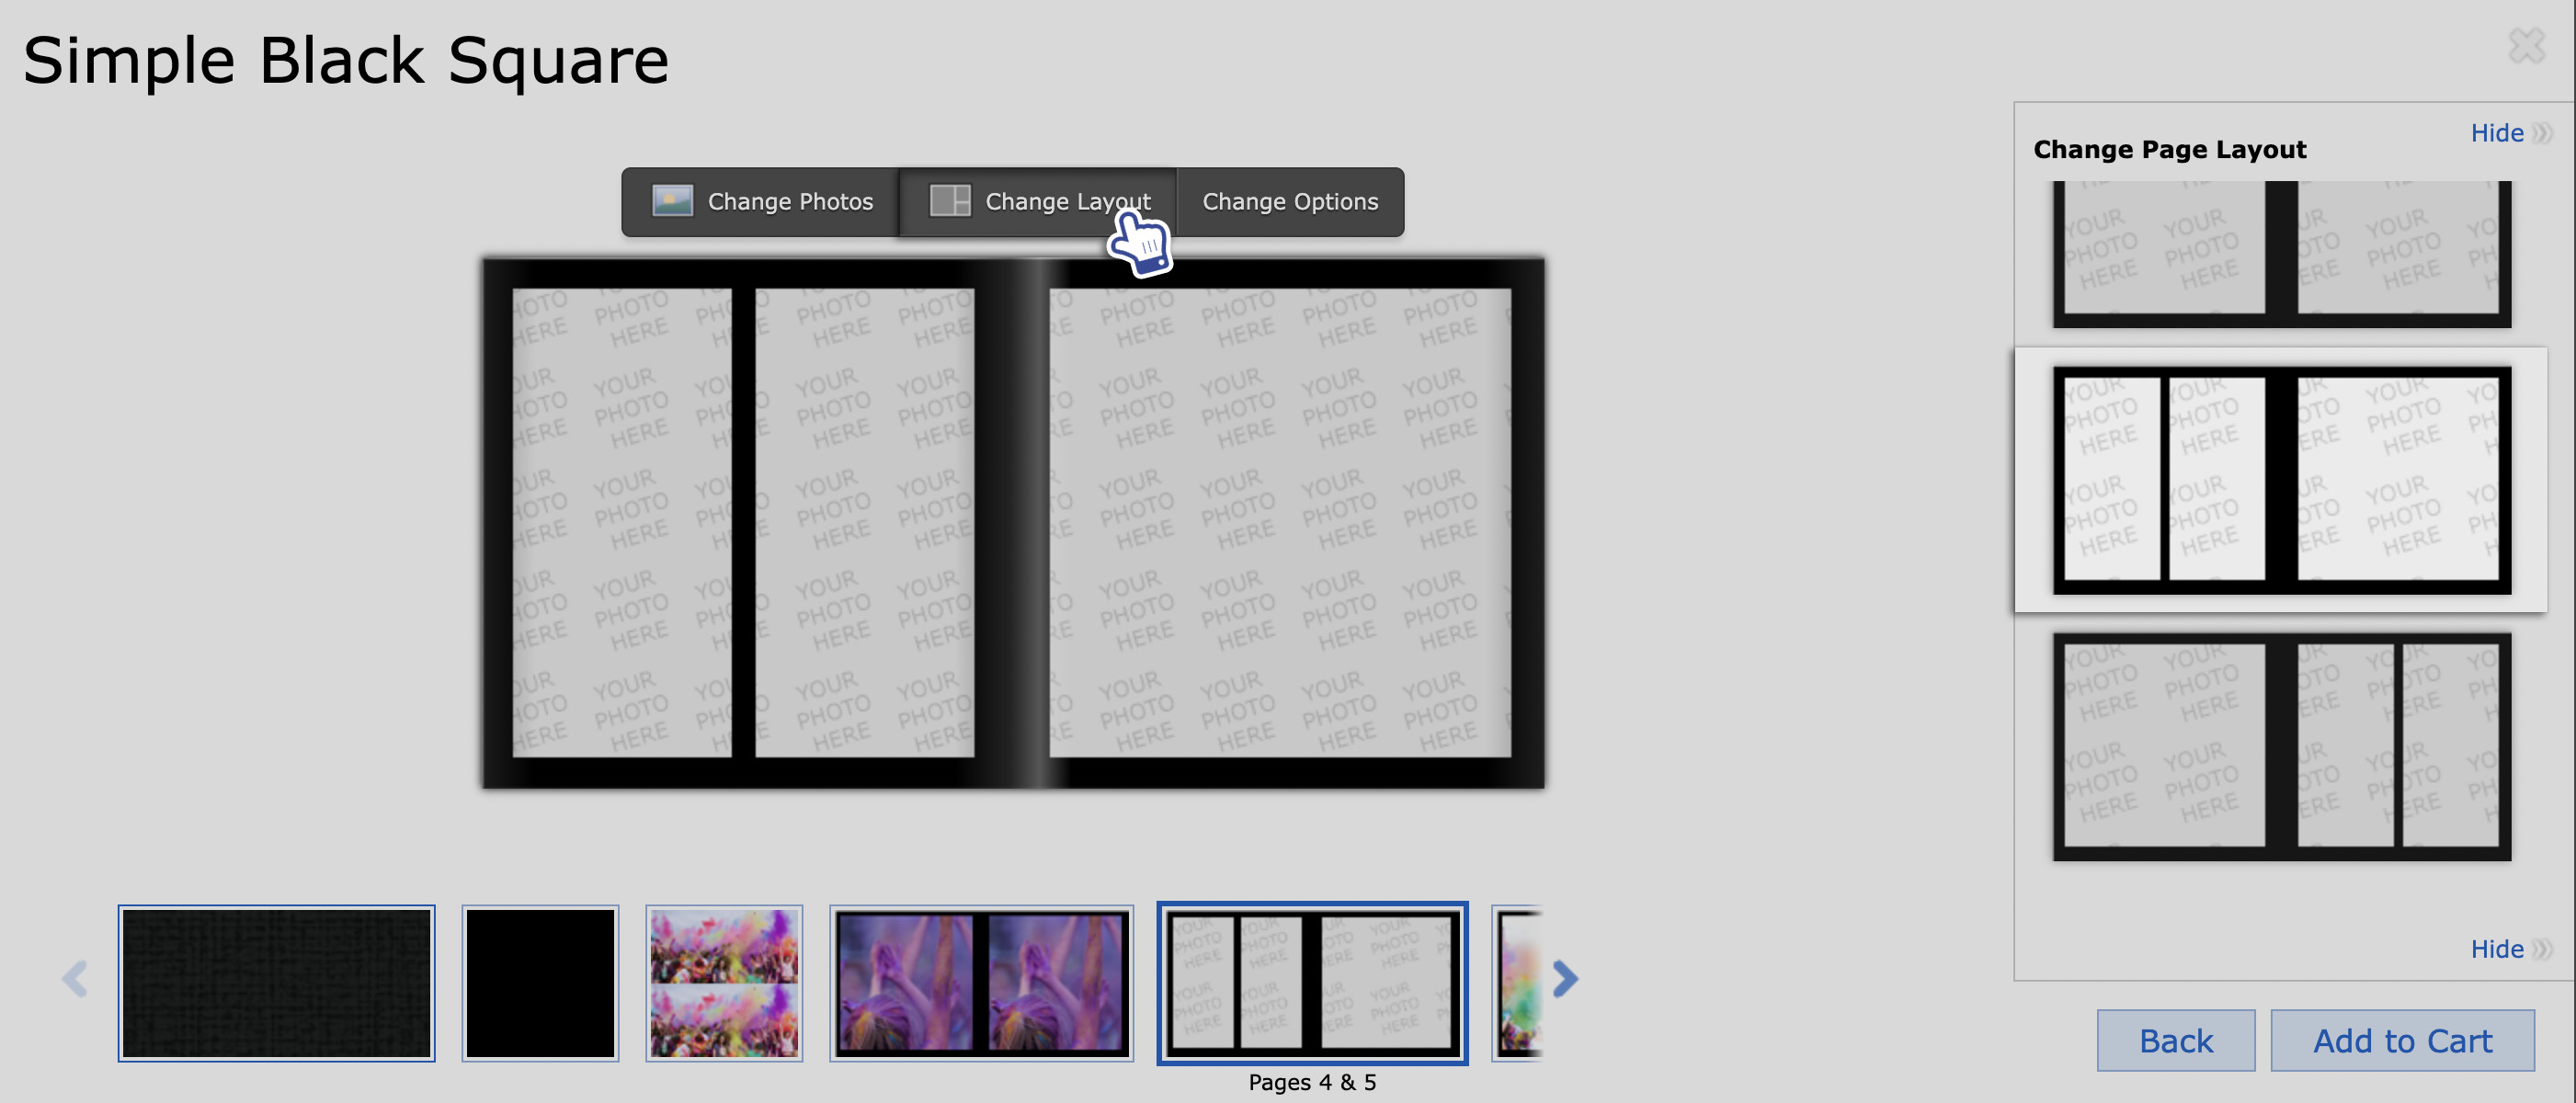
Changing Page Layouts
- Click on Change Layout. The layout options will appear on the right.
- Click on the desired layout and the photo book's layout will automatically update to the selected layout. The change will apply to the pages that are displayed in the center of the Photo Book editing window only, other pages are not affected.
Editing the Text to be Printed on the Book
- Click Change Options to display the Page Options.
- Click on the Text section under the Page Options.
- Click on the desired field to enter text into the field.
- Enter the desired text into the field then click Save.

Editing Photo Placement and Cropping
- Use the slider bar to zoom the image placement in out. The image will be printed exactly as it appears.
- Click Center to center the image. Some parts may be cropped so make sure to review the image.
- Click the Cropping tool to enlarge the image for finer cropping.
- Click the Delete icon to remove the image.
- Click Change Photo to choose a different photo to print in this layout. Drag and drop the photo from the selection on the right.

Add to Cart

I need more time to edit the Photo Book
Once the Photo Book is in the cart, click on Save Cart to save the cart to your account. If you're already logged in, the cart is automatically saved to your account.
