The Contact List is a way to store information regarding both your customers and potential customers. You can access the Contact List in the Dashboard by hovering the mouse pointer over Communications then clicking on Contact List in the menu that appears.
You can send marketing emails to your clients in your Contacts List.

Customers who have placed orders from your site will have their name and email address stored in the Contact List. This will include how many orders they have placed and when their last order was placed. What group or gallery they ordered from will also be added to a tagged list.
Customers who have registered with your site will have their name and email address added.
Visitors who accessed a group, gallery, or collection that had visitor sign in turned on will have their information stored in the Contact List, as long as this option was checked in the Visitor Sign in settings.
Contacts may also be added manually or imported from a CSV file.
Manually Adding a Contact to the Contact List
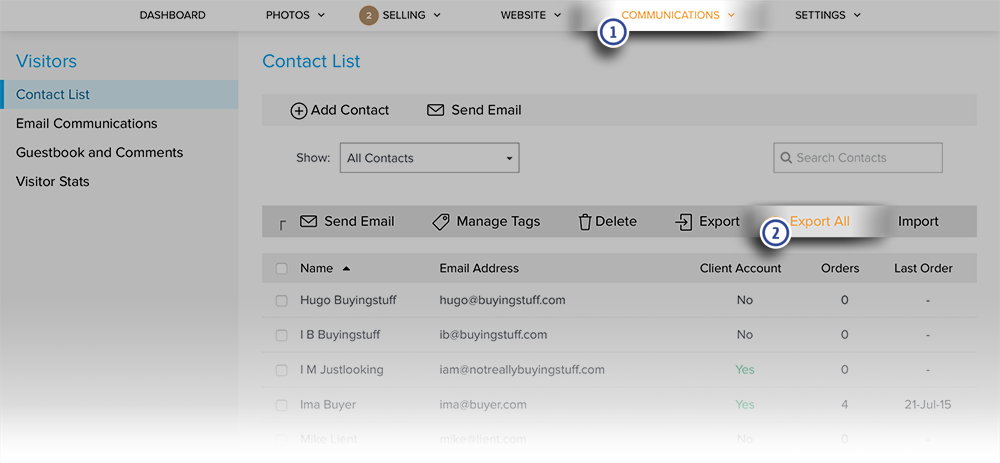
- In your account, click on Communications in the top menu.
- Click Add Contact. New form fields will appear.
- Enter the contact email address in the form field.
- Enter the contact name in the form field
- Select the Tags dropdown menu. A popup window will appear.
- Check the groups, galleries, or collections you will to apply to this contact.
- Click Apply to apply the tags.
- Click Add to finish entering the contact.

To enter more details such as a phone number and notes click on a specific name in the contact list. That will open the Contact for editing. There you can also edit that contact's tags.

Import Contacts to Contact List
- in your account, click on Communications.
- Click Import. The Import Contacts window will appear.
- Select to import a CSV file, or you may add contacts manually by pasting a list of addresses separated by commas.
- For duplicates, choose to overwrite entries or discard the imported entry.
- Click the dropdown menu, check the groups, galleries, and collections that you wish to have tagged with these contacts, and click Apply.
- Click Import to finish entering the contacts.

When importing the contacts' list, the CSV file must be formatted to include headers for Name and Email Address.
Here is an example of the formatting in a contacts' list CSV file with the optional headers for Primary Phone and Notes.
|
Name |
Email Address |
Primary Phone |
Notes |
|
Dave D |
ddupont@fakemail.com |
|
|
|
Adam F |
afaber@fakemail.com |
444-444-4444 |
Current Employee |
|
Steve H |
shall@fakemail.com |
|
|
|
Robert E |
redwards@fakemail.com |
111-111-1111 |
Loves photos of flowers |
Click here for a video tutorial on importing contacts:
Export Contacts from Contact List
Contacts lists can be exported from Zenfolio in a comma-separated values (CSV) file format. This is a plain text file widely supported by programs such as Microsoft Excel and Address Book.The exported CSV file can easily be modified in a text editor for copy and pasting entries, or through a program such as Microsoft Excel, which will allow the editing of entire columns and rows.
To export the contact list:
- in your account, click on Communications.
- Click Export All. You will be asked to save a contacts.csv file to your hard drive.