Included with your Zenfolio account is the ability to store a Contacts list of your friends and clients. You can then send emails to your contacts for use in marketing and promoting your site.
Uses for sending emails to your contacts can include:
- Informing your clients of newly uploaded photos
- Informing your clients of sales and coupons
- Informing your clients of site changes and new blog posts
- General marketing emails for a photography website
Please note that this is not the same as a general use email inbox such as gmail, Yahoo mail or Hotmail. This does not provide an email inbox for receiving emails.
Also this does not provide a custom email address based on your custom domain. For such an email address and service, you will need to contact a domain registrar or host.
For Pro and Advanced users, the ability to create your own email templates is provided.
Send a New Email
- In your account, hover the mouse pointer over Communications, then click on Email Communications.
- Click New Email. The Compose Email window will appear.
- Mark the circle for when you would like to send the email. If you choose to schedule to send it later, also select a date and time.
- Check this box if you would like to include a link to the Zenfolio Client App.
- In the From Name and From Email fields, enter your name and email address.
- If you have the recipient's addresses in your contact list, click Contacts to select the addresses for the correct recipients.
- In the To field, enter the email address of the recipient or multiple recipients with commas or semicolons between each address. In the case of multiple recipients, multiple emails are sent out, one for each recipient. So every email sent will only have one recipient listed.
- Enter a subject in the subject field.
- Enter your email message content in the message field.
- Select Continue to Preview. The Preview Email window will open so you may verify the look of your email before sending.
Please note: when sending an email to multiple recipients, separate emails will be sent to each recipient. The recipients will not be able to view the recipients list.

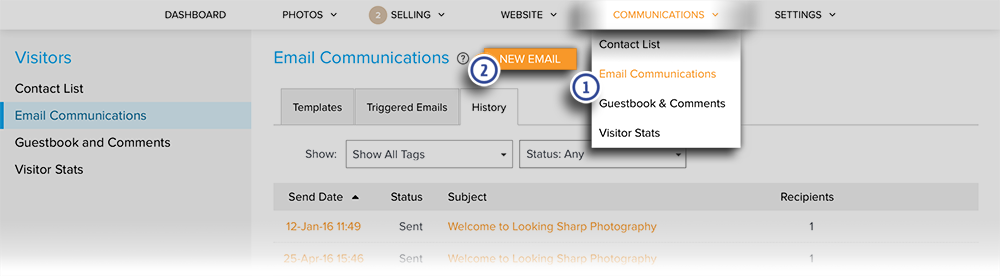
View Previously Sent Emails
- In your account, hover the mouse pointer over Communications, then click on Email Communications.
- Click on the History tab.
- Use the Tag and Status drop down menus to filter the emails displayed.
- Click on the column headings to sort the emails by the desired sorting method. Click the same heading again to change the order from Ascending to Descending and vice versa.
- Click the Send Date or the Subject of the email you would like to view.
