When images are uploaded to Zenfolio, smaller lower resolution versions of the images are automatically generated.
The smaller display images are used for online presentation and to help prevent the theft of your original full resolution image. This also ensures that your images will load with minimal delay.
The display images are in the jpeg format and so they do not have the animation or transparent layers of your original GIF and PNG files.
Because of this, animated Gifs and transparent PNG files cannot be displayed in galleries.
To display those files, you'll need to create a Custom Page and display the original animated/transparent images in that page.
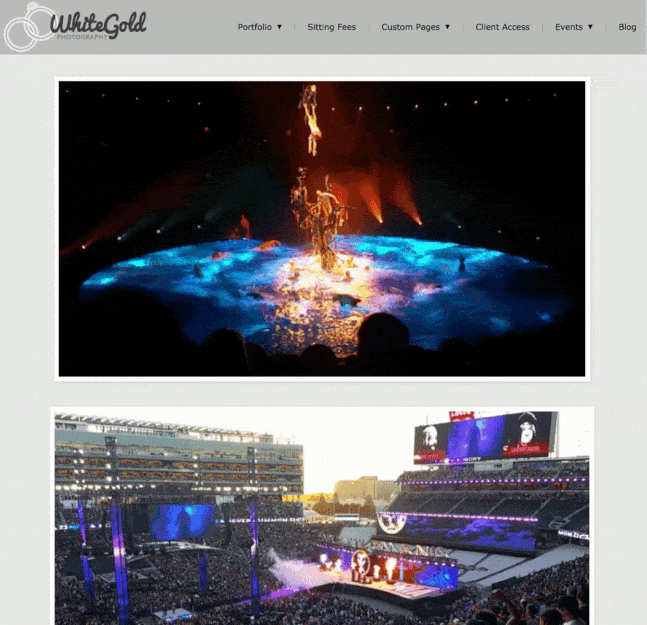
Click HERE for a demo of a Custom Page with animated gifs.
Please note that Custom Pages are 944 pixels wide. For best presentation, the animated gif and transparent PNG images should not be wider than 944 pixels.
Here are all of the steps needed for creating a custom page with animated gifs and/or transparent PNG files.
- Create a New Gallery and Upload the Animated Gifs And/or Transparent PNGs to the Gallery
- Allow the Free Downloading of Original Images in Access Control
- Copy the Direct Link to the Original Image in the Gallery (New Photos Page)
- Create a Custom Page
- Insert the Gif/PNG into the Custom Page Using the Link to the Original Image
1. Create a New Gallery and Upload the Animated Gifs And/or Transparent PNGs to the Gallery
Create a new gallery to store the Animated Gifs And/or Transparent PNG files then upload the images to that gallery. Click HERE for how to create a new gallery and upload photos to that gallery.
2. Making the Animated GIF or Transparent PNG available to use
So that the original animated or transparent image can be displayed in the custom page, the original image must be accessible. That is done by allowing the original image to be downloadable. That is done by allowing the downloading of original images in Access Control. See this link for how to allow original images to be downloadable.
Also make sure that the largest available Display Image is set to show for the images and that the gallery is set to 'Public' and not set to 'Private' or locked with a password. See this link for how to review and edit those settings.
You may also want to hide the gallery so that it cannot be viewed in your site. See this link for how to hide a gallery.
3. Copy the Direct Link to the Original Image in the Gallery
To display the original animated or transparent image in the custom page, you'll next need to grab the direct link (URL) to the original image.
That can be found in the Sharing panel when viewing the image in the Photos page of the Account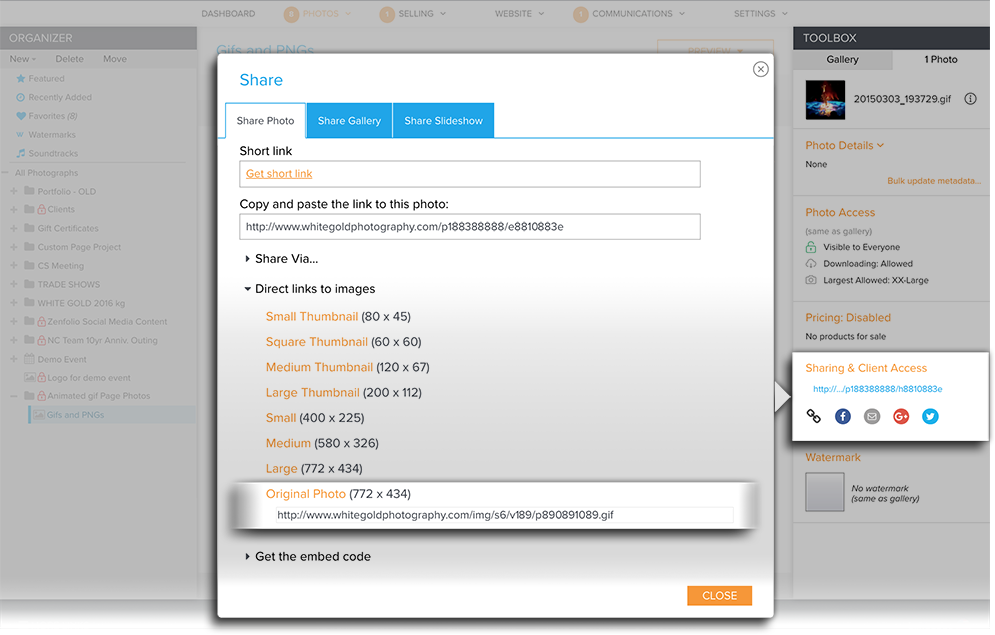
Copy the direct link (URL) to the original photo to your clipboard so that it can be pasted later on into the custom page.
See this link HERE for more details on finding the Sharing panel using the old Photos Page.
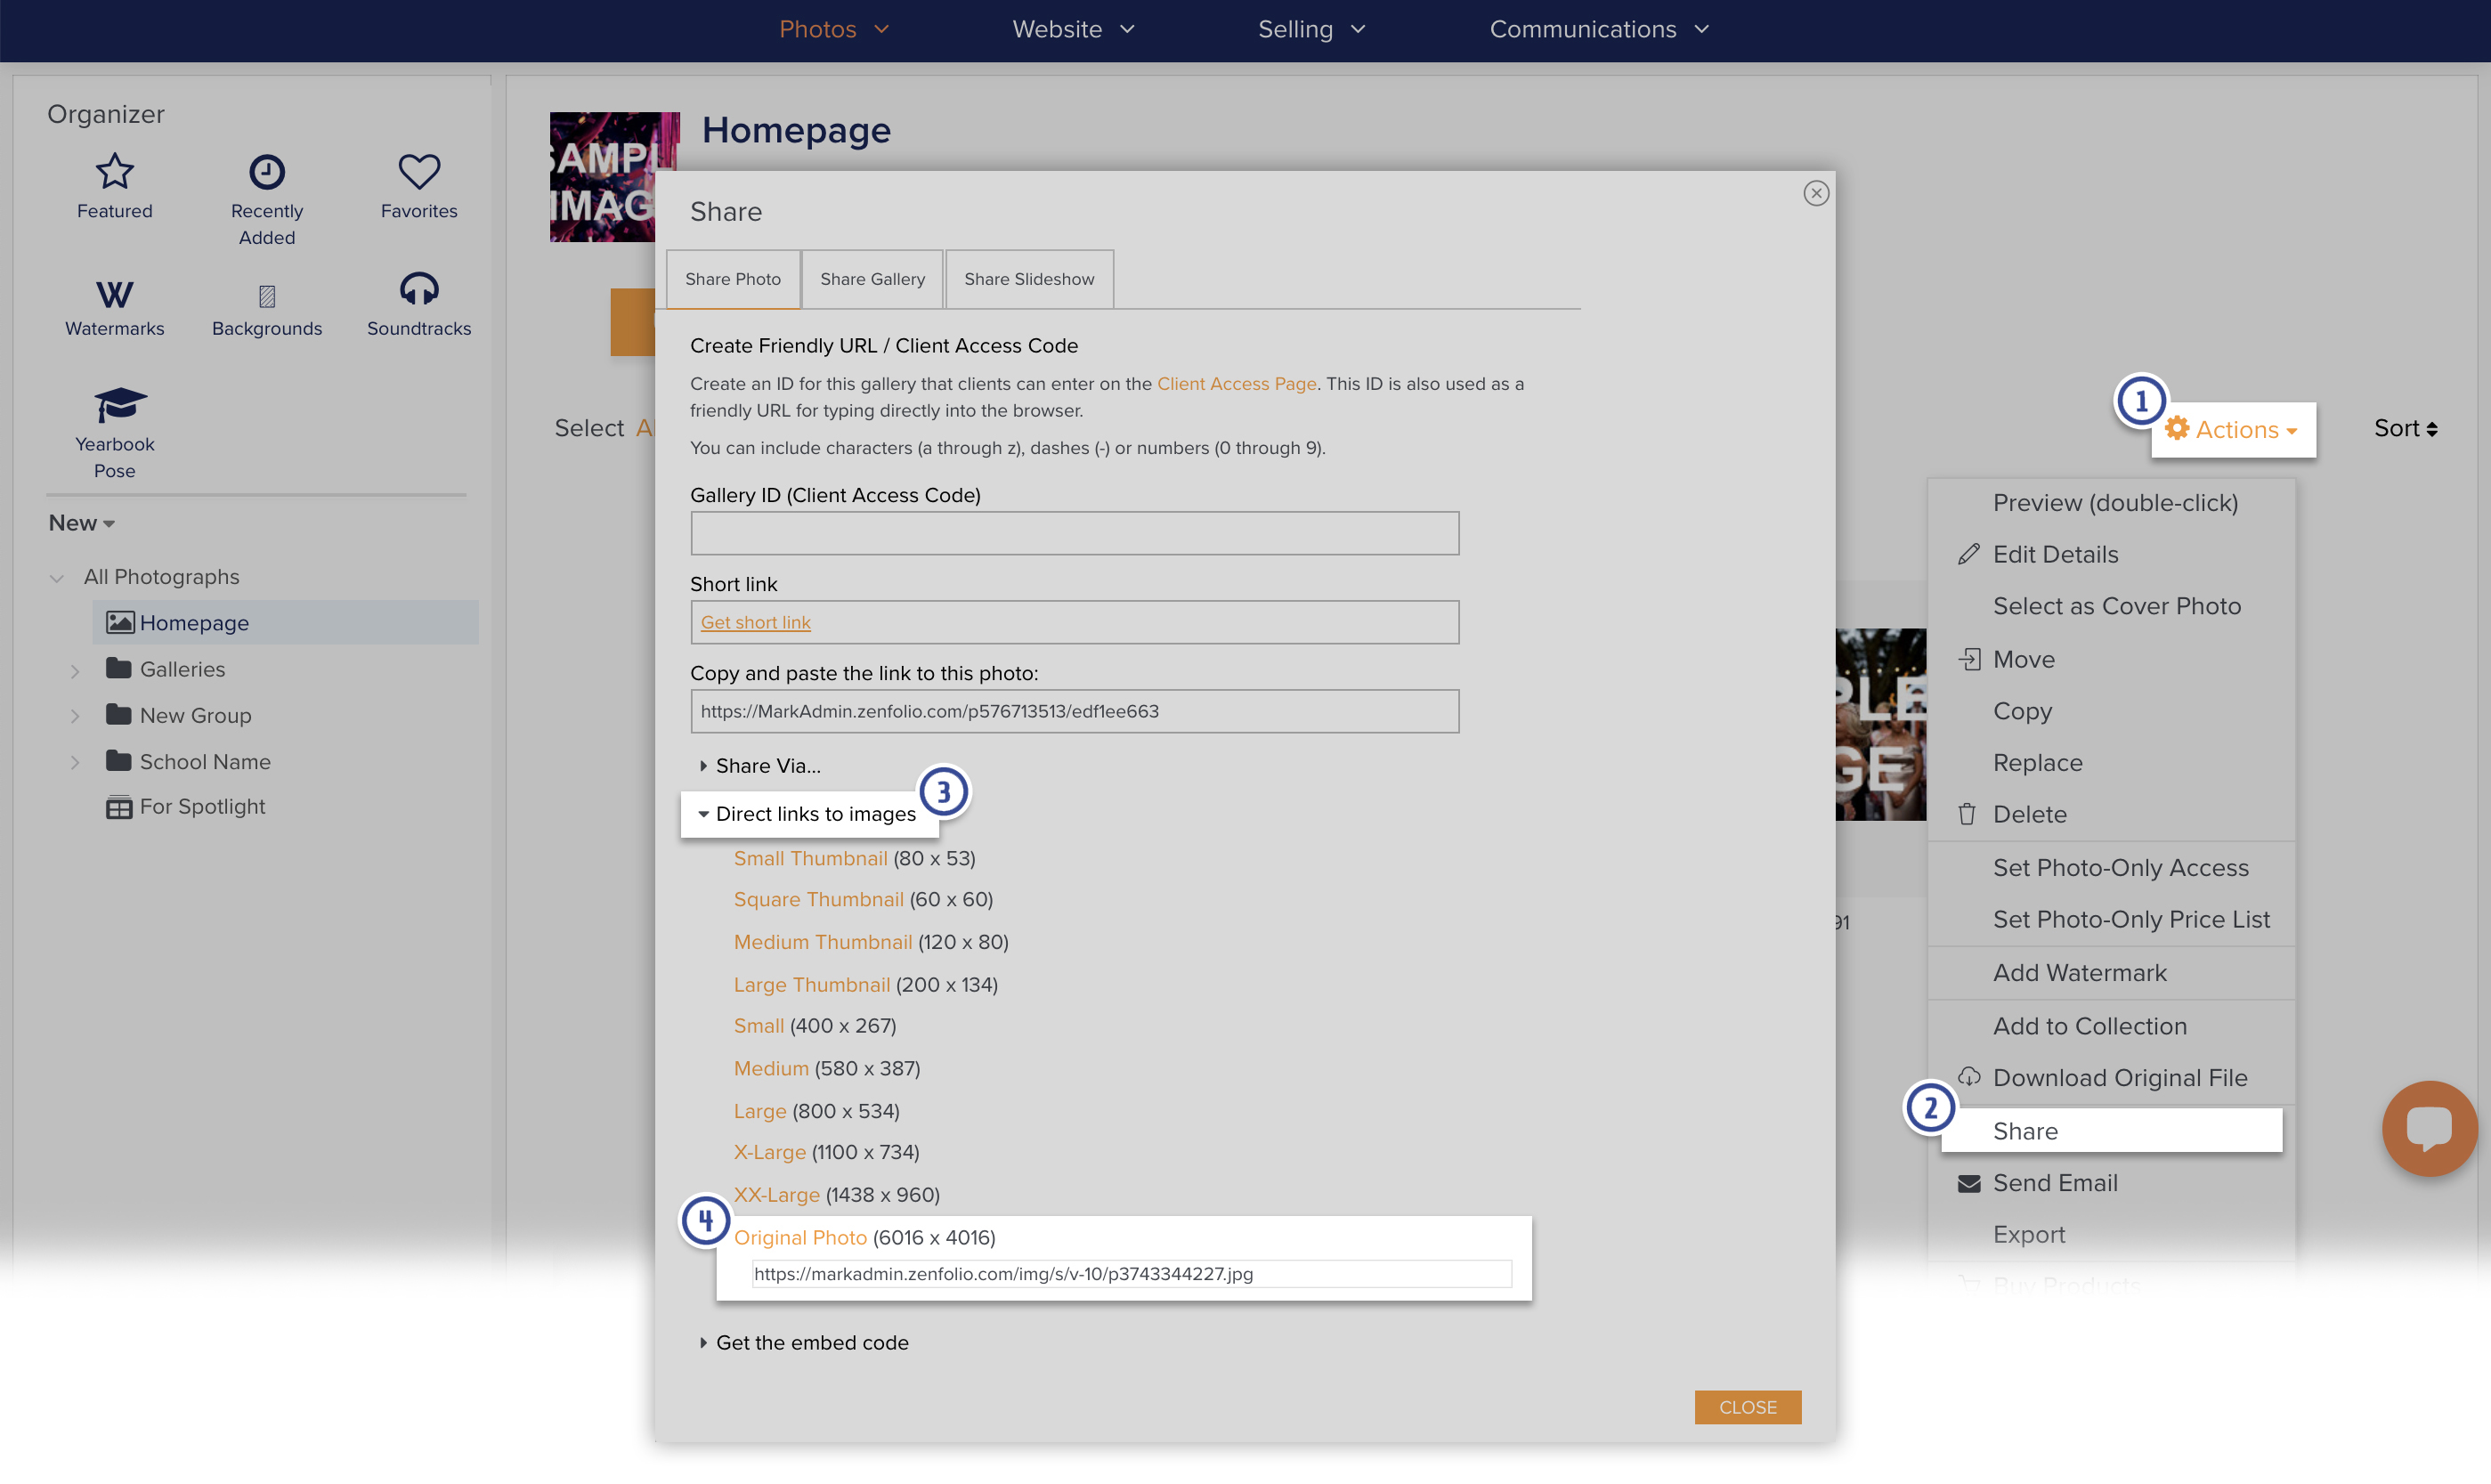
For Zenfolio users that signed up after May 10 2018, please see the updated instructions below
4. Create a Custom Page
The next step is to create the custom page wherein the animated or transparent images will be displayed. See this link HERE for how to create a custom page.
Please note that Custom Pages are 944 pixels wide. For best presentation, the animated gif and transparent PNG images should not be wider than 944 pixels.
5. Insert the Gif/PNG into the Custom Page Using the Link to the Original Image
Next you'll need to insert the link to the original animated or transparent image into the custom page.
While editing the custom page, click on Photo in the toolbar.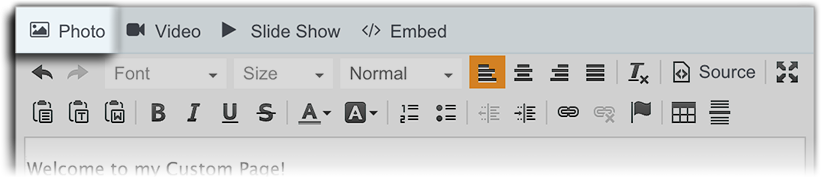
Then paste the link (URL) of the original image into the field labelled To use an image located elsewhere on the web, enter the link (URL) here:
Click Add Image after pasting the URL to the image.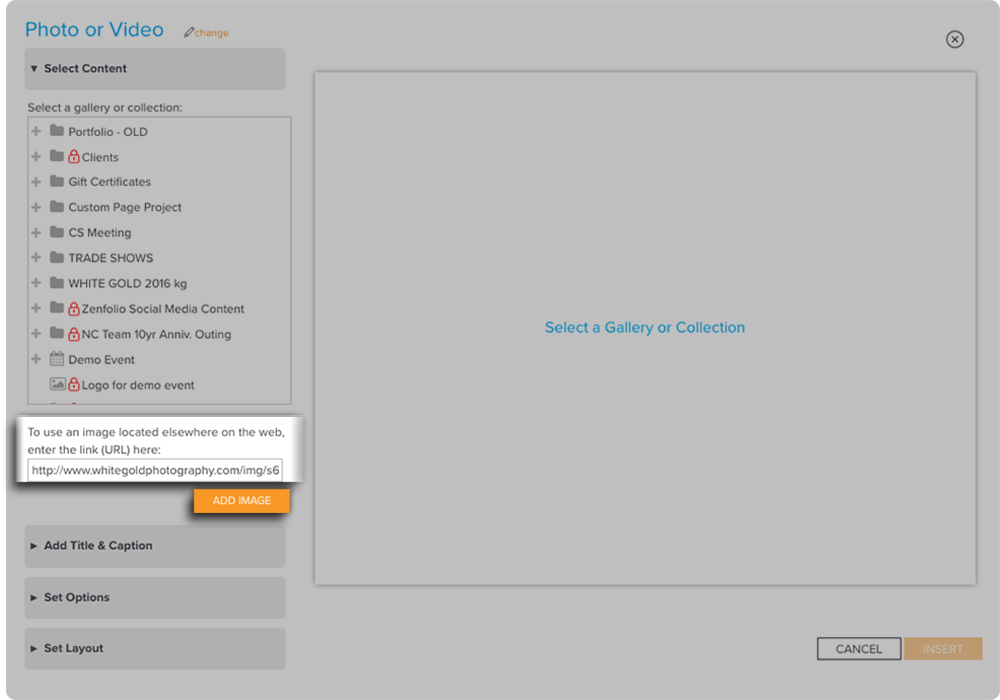
Click Insert to close the Photo panel.
Then repeat the process for every animated gif/transparent PNG that you would like to include in the custom page.
Save and Preview the Custom Page to review the page.