Exclusive to Pro and Advanced plan subscribers.

Groups, Galleries, and Collections may be given an expiration date after which the gallery's Access Control setting is changed to Private. Once private, the item will only be visible to the photographer. This is useful if you want the gallery, group or collection to only remain visible on your site for a specific amount of time.
Important thing to note about the expiration time for expiring galleries- the expiration time for the gallery is based on the hour that the changes to the expiration date is saved. That time is then rounded down to the closest previous hour.
So for example, if the gallery was set to expire on October 1 and the photographer saved the changes on at 1:15 PM UTC on September 1, then the gallery would expire at 1:00 PM UTC on October 1st.
What does your Account look like?
Click on the image that matches your view for instructions specific to your interface.
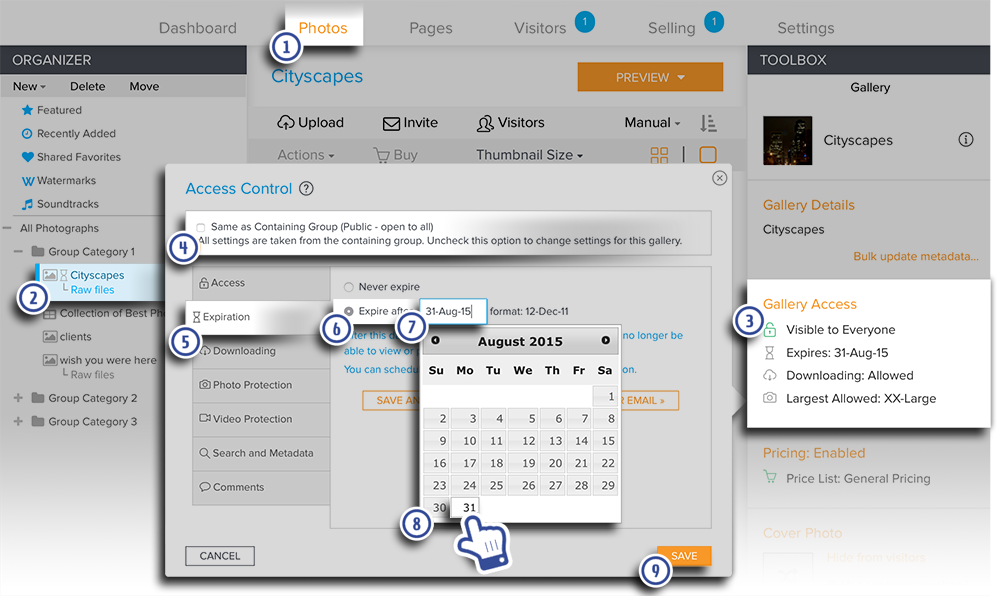
Original Photos Page: To set a Gallery or Group to expire
- In your account, go to Photos.
- Select the group, gallery, or collection you would like to set to expire in the Organizer. Information about the gallery will load under the Details.
- Under the Details, go to Gallery Access (Group Access or Collection Access for groups and collections). An Access Control window will appear.
- Uncheck the box for Same as Containing Group.
- Go to the Expiration tab.
- Mark the circle for Expire After.
- Click on the the expiration date field. A calendar will appear.
- Choose the date you wish the item to expire.
- Click Save to apply your changes.
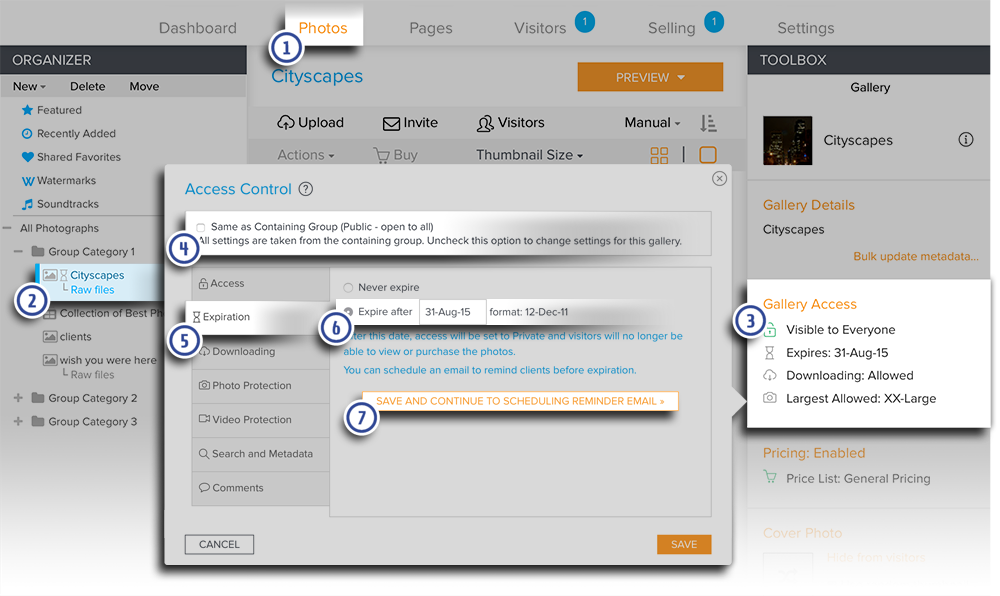
To schedule an expiration reminder email
- In your account, go to Photos.
- Select the group, gallery, or collection you would like to set to expire in the Organizer.
- Under the Details, go to Gallery Access (Group Access or Collection Access for groups and collections). An Access Control window will appear.
- Uncheck the box for Same as Containing Group.
- Go to the Expiration tab.
- Set the item's expiration date as per the instructions above.
- Click on Save and continue to schedule reminder email.
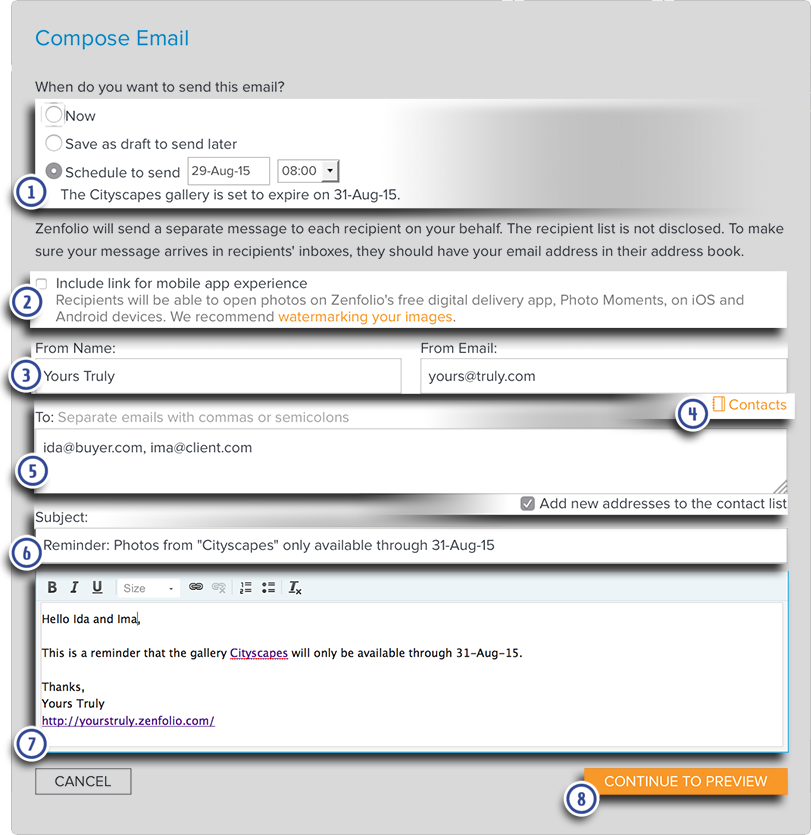
- Select the radial button for when to send the email. If you choose to schedule, also select a date and time.
- Check the box for Include link for mobile app experience if you would like your client to be able to view this gallery in the Photo Moments client app.
- Under From Name and From Email, enter your name and email address in the form fields.
- If you have the recipient's addresses in your Contacts List, click Contacts to select the recipients from your Contacts List.
- Otherwise, enter the recipient's email addresses in the To field.
Separate recipient's email addresses with commas or semicolons.
Check the box for Add new addresses to the contact list to save the email addresses. - Edit the subject in the subject field if needed.
- Enter your email message in the message field.
- Select Continue to Preview. The Preview Email window will open.
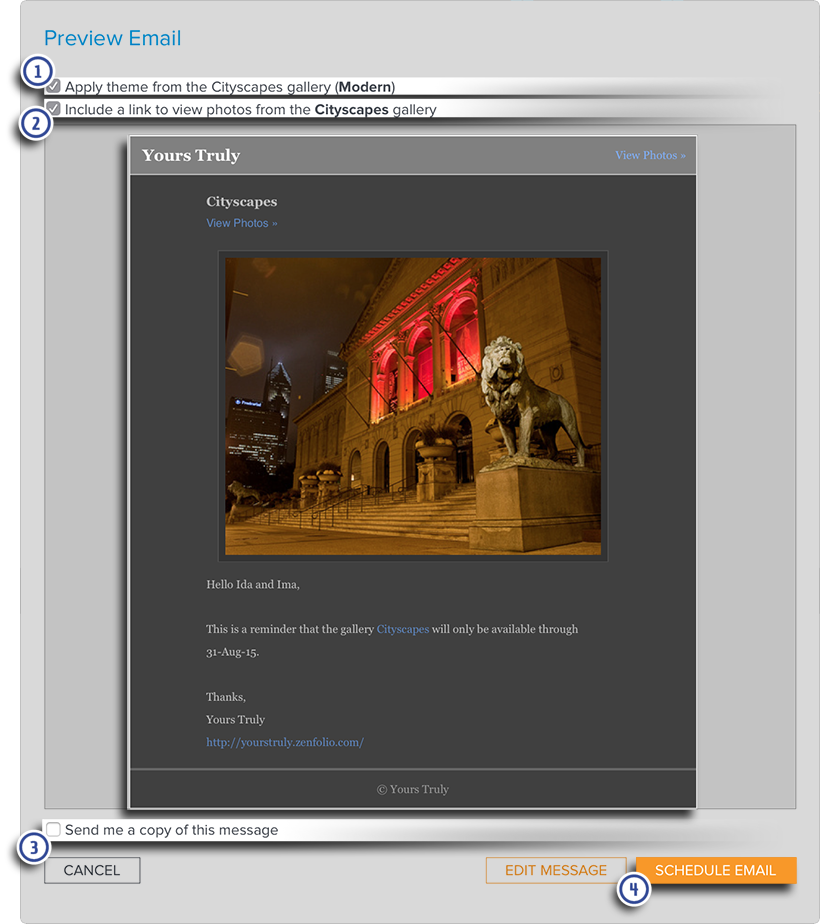
- Check the box for Apply theme from the gallery if you wish the email to use the current theme applied to the gallery, group or collection.
- Check the box for Include a link to view photos from the gallery if you with the email to include links to the photos contained.
- Check the box for Send me a copy of this message if you wish to have a copy of the email sent to you.
- Click the box for Schedule Email when the email message is complete.
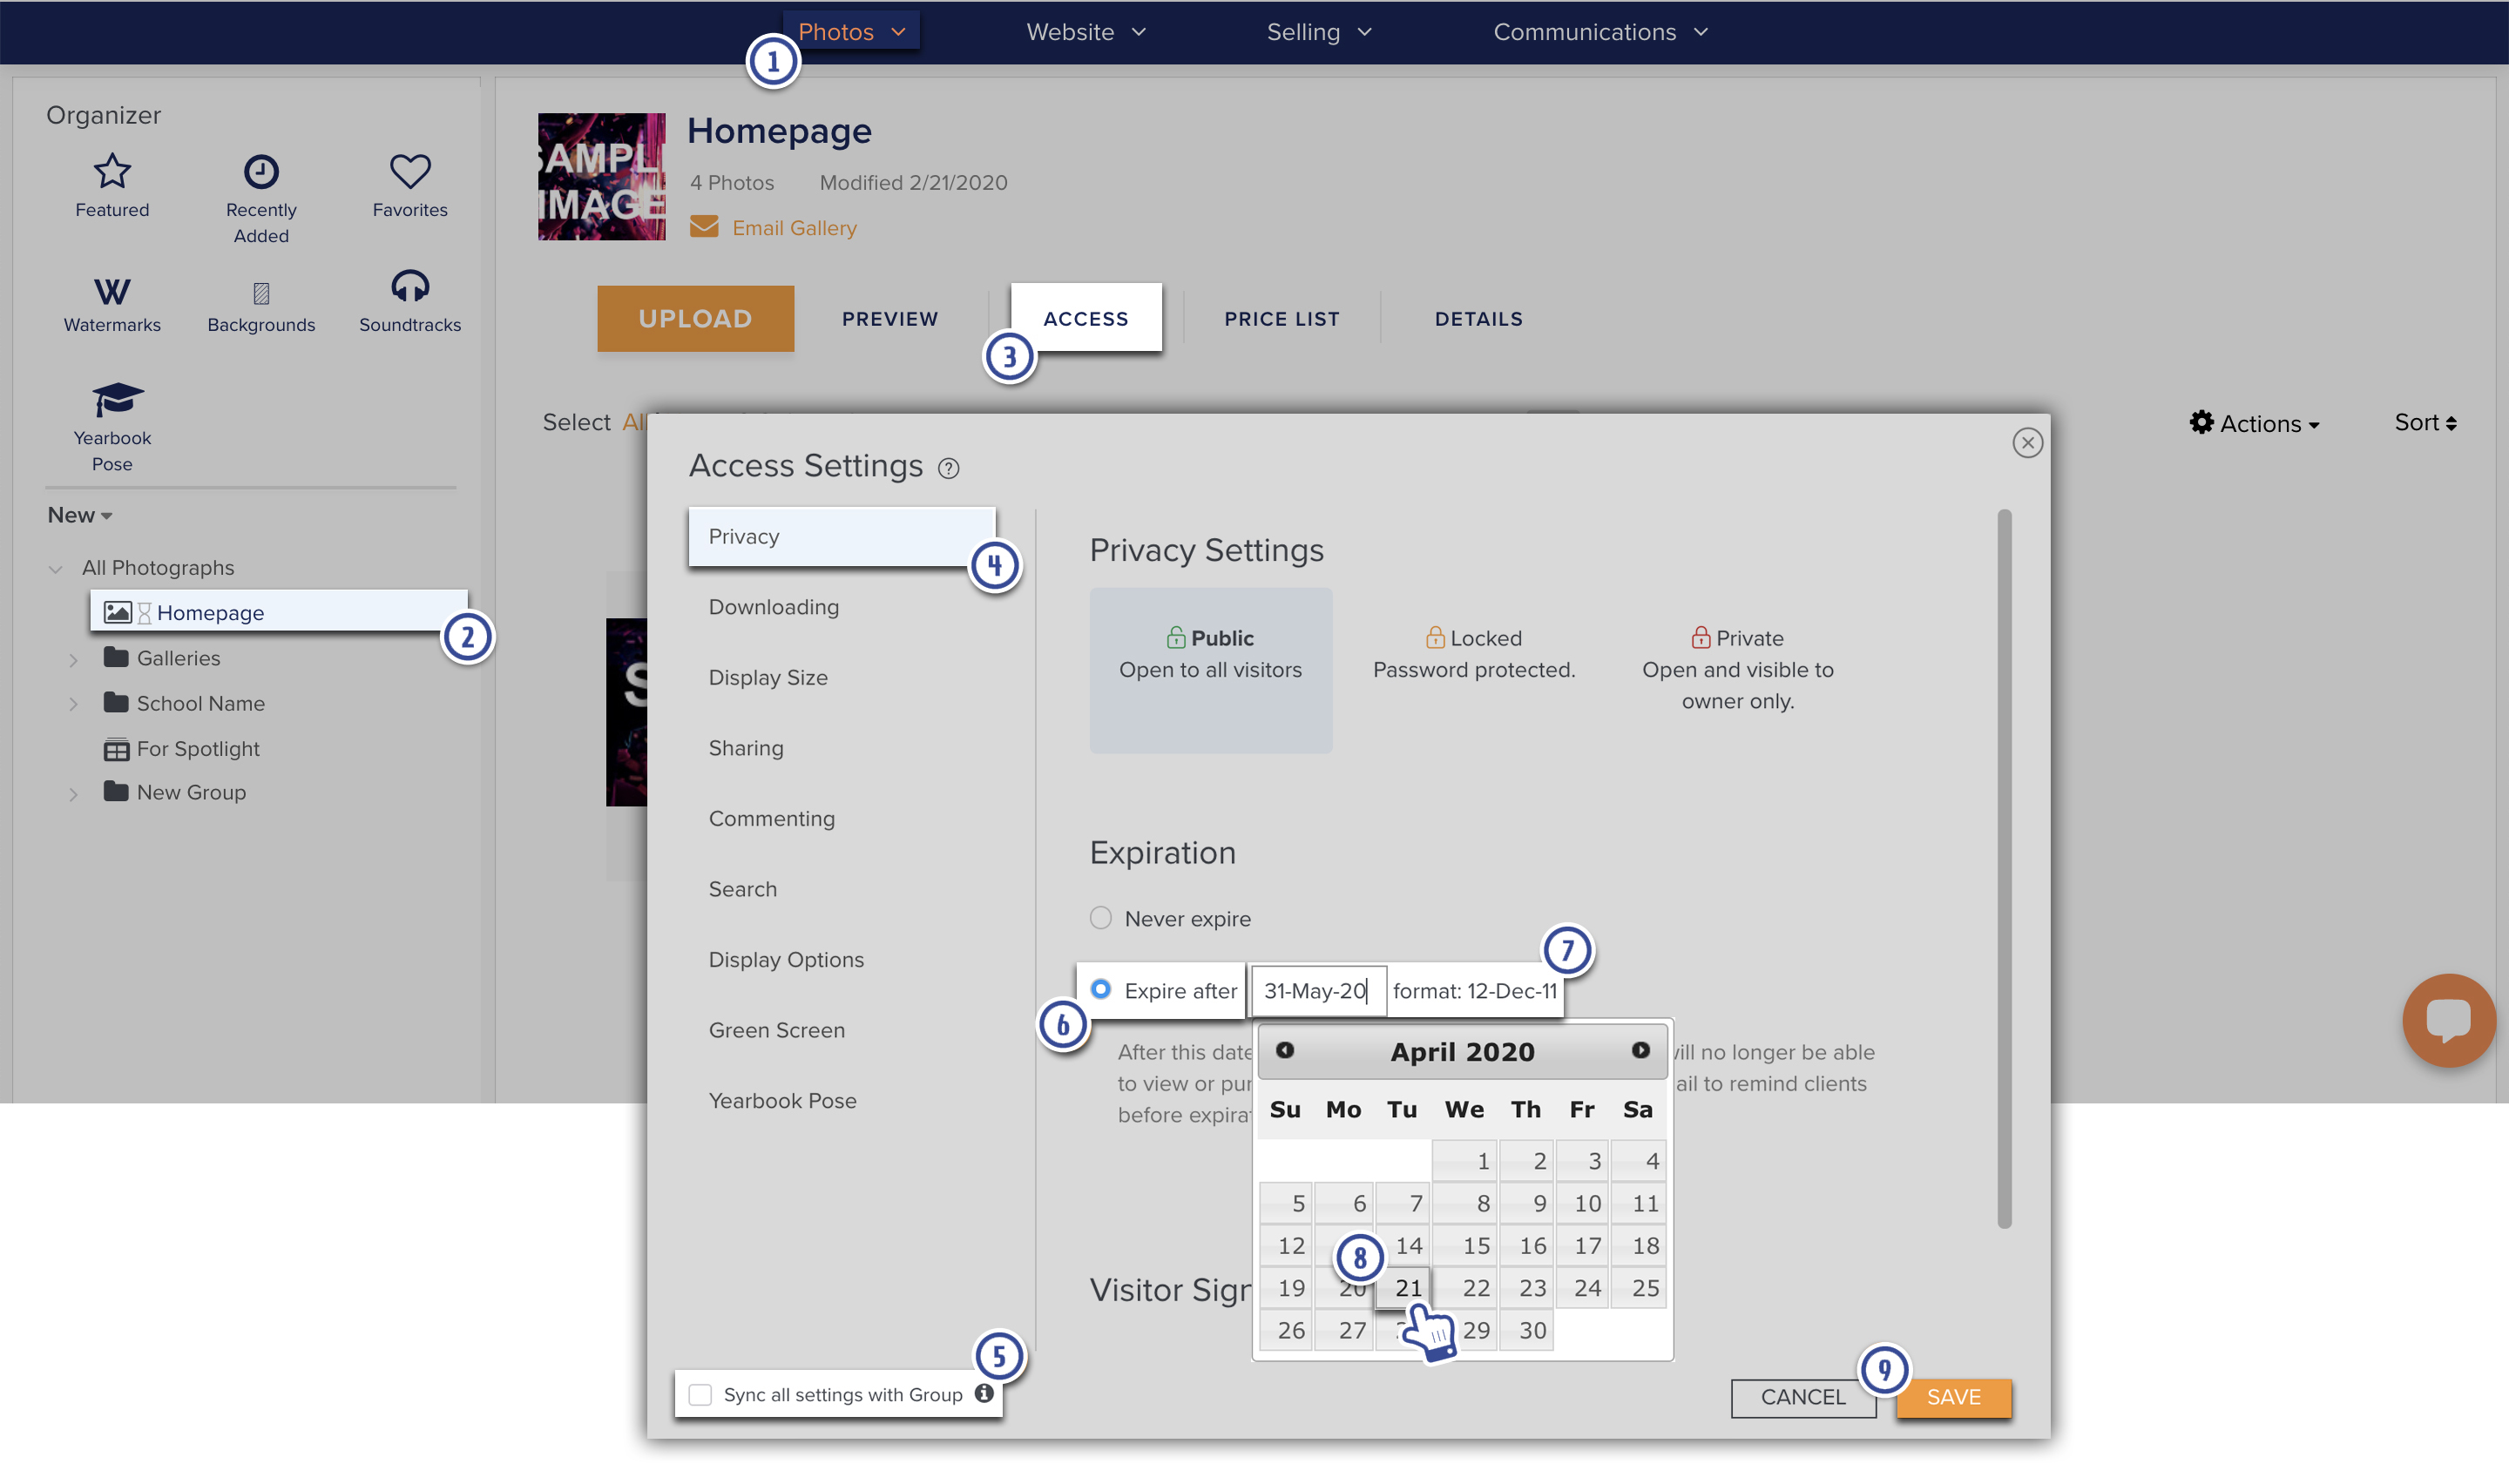
New Photos Page: To set a Gallery or Group to expire
- In your account, go to Photos.
- Select the group, gallery, or collection you would like to set to expire in the Organizer.
- Click on Access. An Access Settings window will appear.
- Uncheck the box for Sync all settings with Group
- Go to the Privacy tab.
- Mark the circle for Expire After.
- Click on the the expiration date field. A calendar will appear.
- Choose the date you wish the item to expire.
- Click Save to apply your changes.
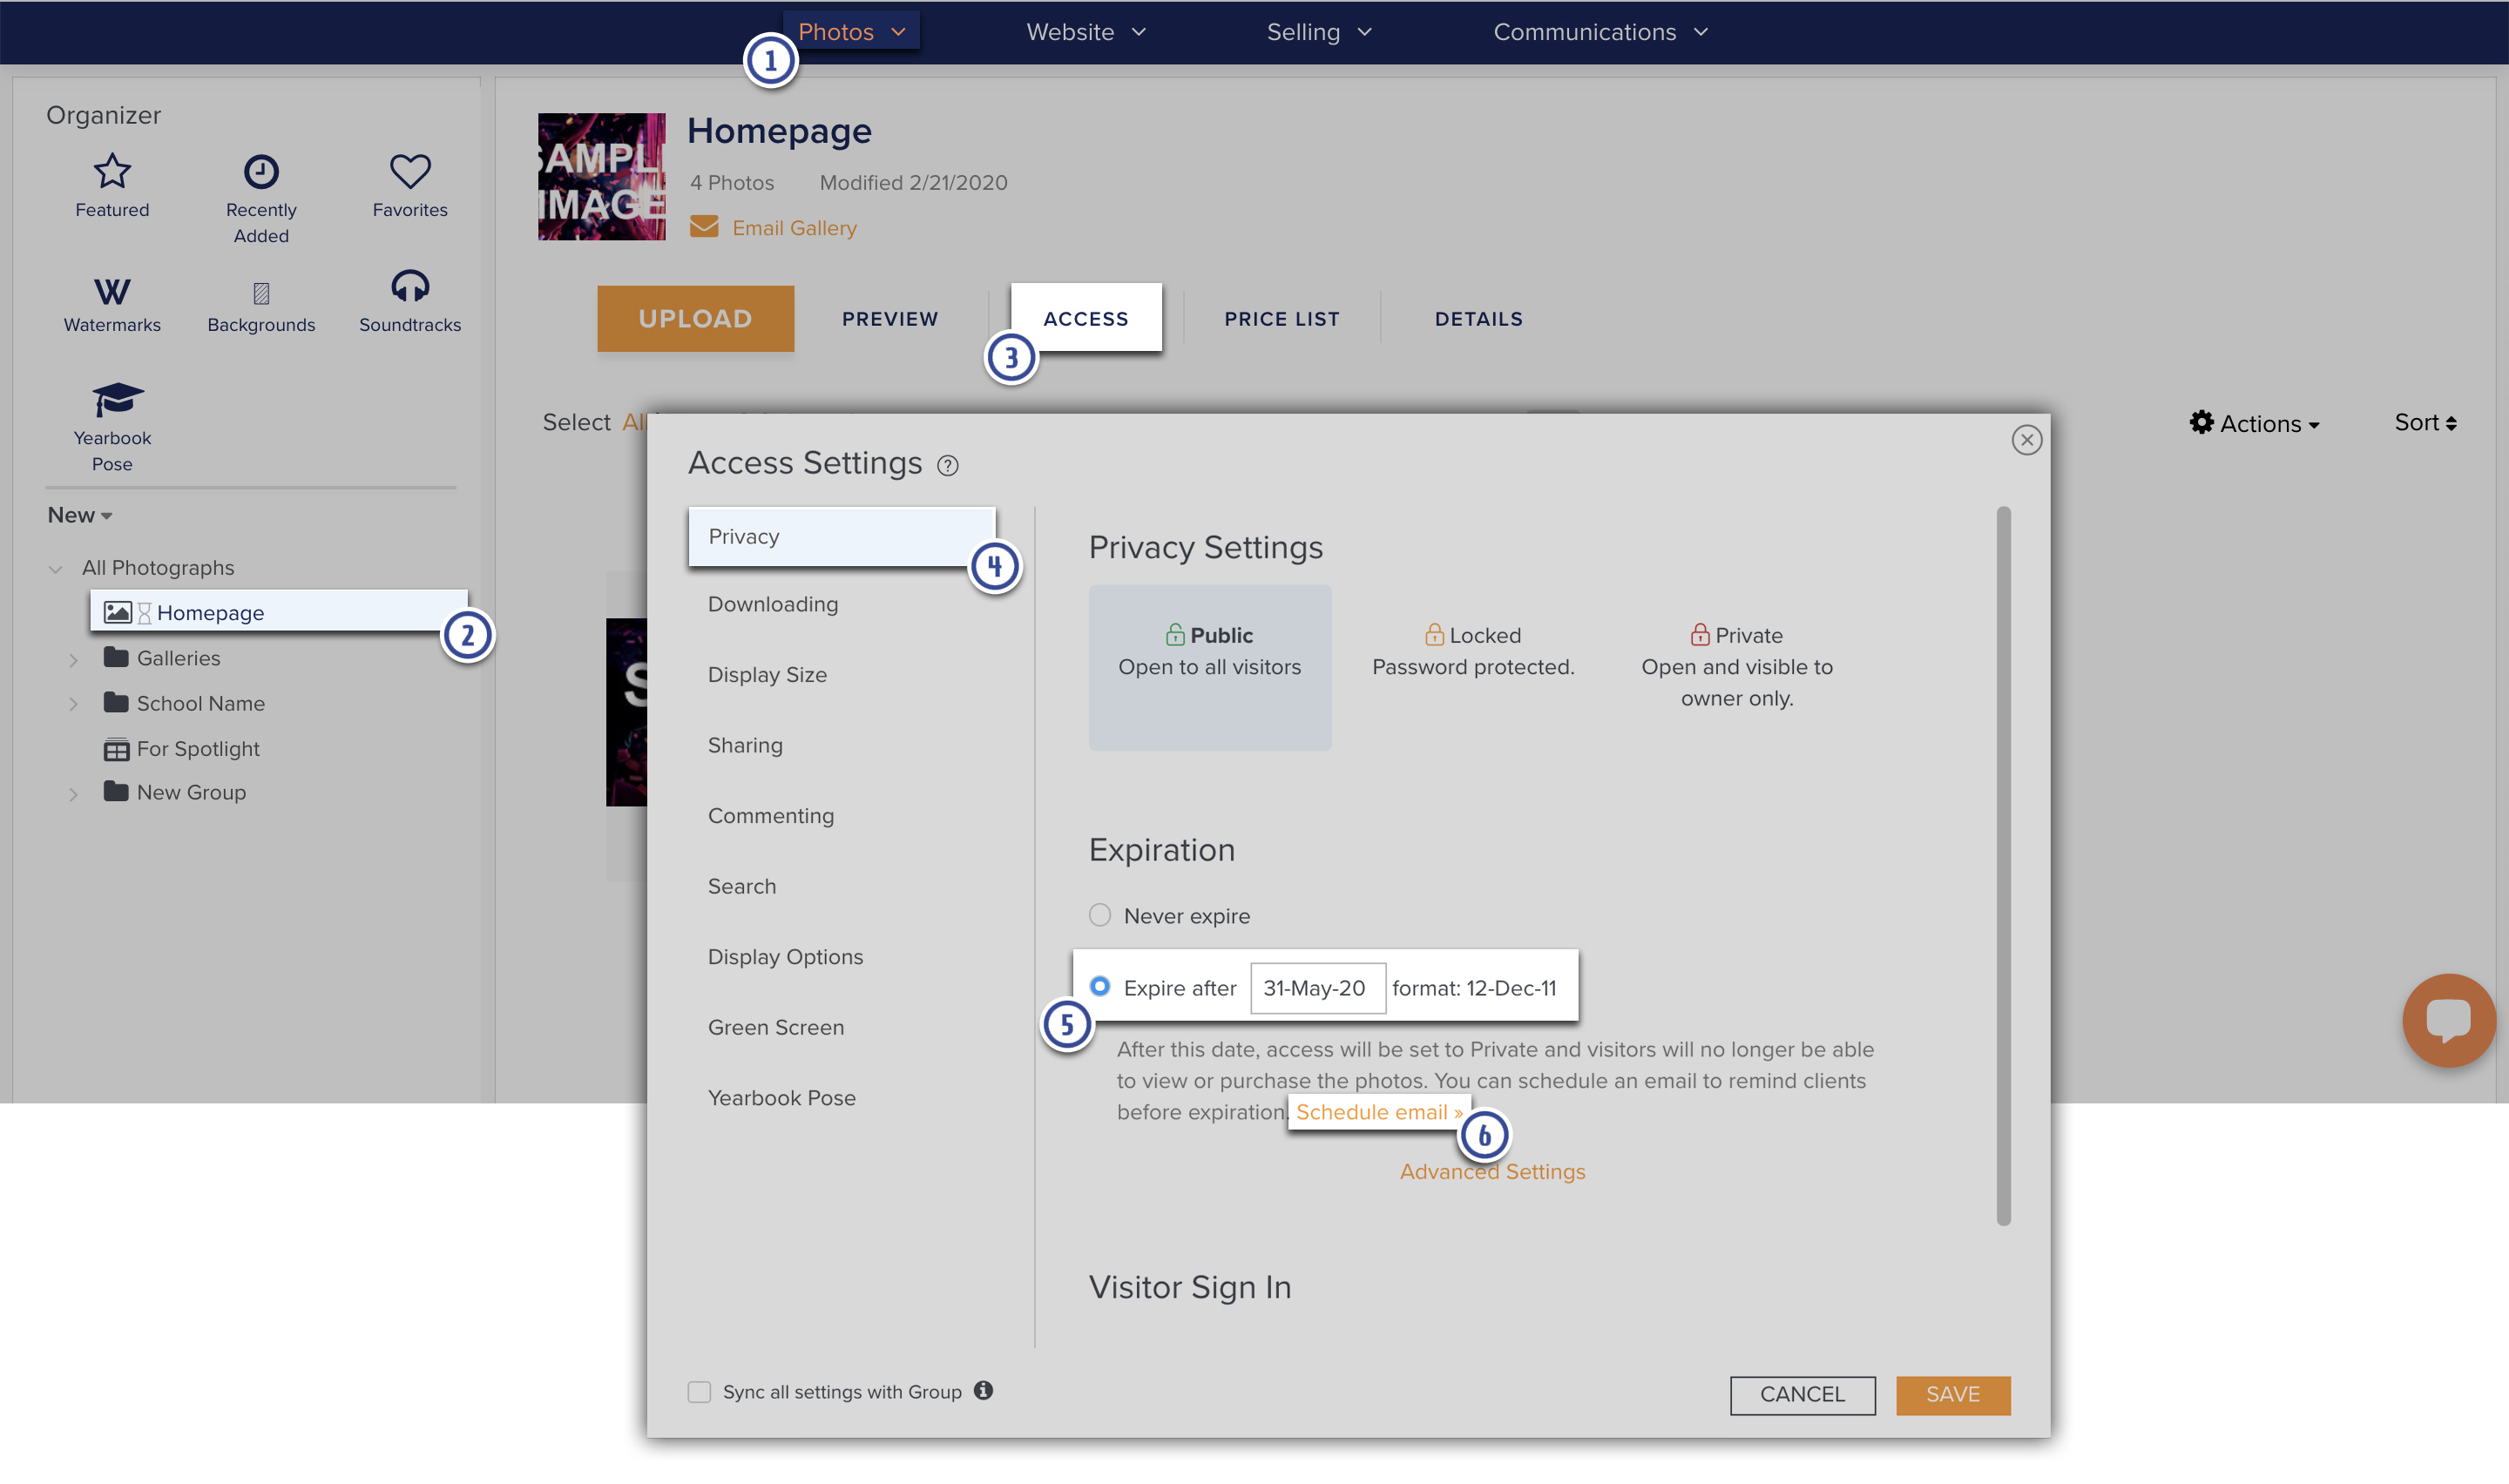
To schedule an expiration reminder email
- In your account, go to Photos.
- Select the group, gallery, or collection you would like to set to expire in the Organizer.
- Go to Access. An Access Settings window will appear.
- Go to the Privacy tab.
- Set the item's expiration date as per the instructions above.
- Click on Schedule email.
- Select the radial button for when to send the email. If you choose to schedule, also select a date and time.
- Check the box for Include link for mobile app experience if you would like your client to be able to view this gallery in the Photo Moments client app.
- Under From Name and From Email, enter your name and email address in the form fields.
- If you have the recipient's addresses in your Contacts List, click Contacts to select the recipients from your Contacts List.
- Otherwise, enter the recipient's email addresses in the To field.
Separate recipient's email addresses with commas or semicolons.
Check the box for Add new addresses to the contact list to save the email addresses. - Edit the subject in the subject field if needed.
- Enter your email message in the message field.
- Select Continue to Preview. The Preview Email window will open.
- Check the box for Apply theme from the gallery if you wish the email to use the current theme applied to the gallery, group or collection.
- Check the box for Include a link to view photos from the gallery if you with the email to include links to the photos contained.
- Check the box for Send me a copy of this message if you wish to have a copy of the email sent to you.
- Click the box for Schedule Email when the email message is complete.